background image


© Termo-tehnika, d.o.o. 


17-16-27-3033-00 

24 

07/2016 


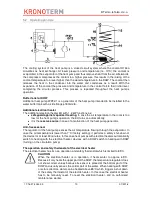
99  days).  After  setting  the  desired  value,  wait  for  5s;  after  the  blinking  stops,  the  setting  is 
saved. The National Institute of Public Health advises water overheating once every fourteen 
days.  Too  frequent  overheating  is  not  advised  because  the  energy  consumption  with 
overheating is 1/3 higher than normal operation of the heat pump. 

Disassembly and disposal 

The device as a whole has a lifetime of at least 8 years if the instructions for safe use and 
maintenance are considered. Individual components have different lifetimes, this is why they 
have  to  be  promptly  replaced  with  new  parts  in  cases  of  possible  malfunctions,  wear  and 
mechanical damage. 
Replacement  can  be  performed  only  by  using  technically  adequate  or  original  replacement 
parts. 
After its lifespan has ended, the whole device must be disposed of in accordance with current 
regulations for waste management. 

Care and maintenance 

The following maintenance work is recommended for a reliable and efficient operation of the 
device. 


CAUTION 

The  device  must  be  connected  in  accordance  with  this  manual  and  national 
regulations. 

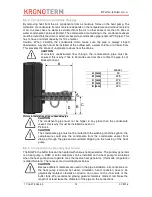
9.1  MAINTENANCE 

Recommended regular controls: 

  Control of the safety valve on the water supply installation. 
  Visual control of the HP evaporator. If the evaporator is very dusty, the device must be 

disconnected from  the  power  supply.  Remove  the  plastic  housing  of the device  and 
clean the evaporator. The use of a vacuum cleaner or compressed air is recommended. 
Be careful not to damage the lamellas of the evaporator or any other component. 

  Clean the evaporator as needed. 


WARNING 

The lamellas of the evaporator are very sharp. Injuries can occur if cleaning is 
not done carefully. 


WARNING 

The evaporator must not be cleaned with a water jet or rinsed with water. Danger 
of damaging the device. 

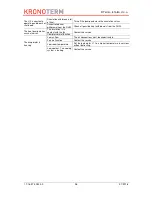
Before contacting the service, check the following: 

  Whether the installation leading to the heat pump is laid directly from the main electrical 

cabinet. 

  Whether  only  this  device  is  connected  to  the  power  cable  from  the  main  electrical 

cabinet. 

  Whether the connecting cable is damaged. 
  Check whether the air flow is unobstructed (dirt, grates, etc.). 
  Check whether the intake air temperature is above the lowest temperature at which the 

HP still operates (see page 11). 

The  service  must  check  the  Mg.  anode  in  the  DHW  buffer  tank  every  two  years.  It  is 
recommended to also clean the heat pump at this time. 

Summary of Contents for WP-F2-1

Page 1: ...ENG Instructions for Use and Installation Heat Pump for DHW WP F2 1 E PV P The manual has to be handed over to the end user Id 17 16 27 3033 00 07 2016 ...

Page 2: ...akage 8 4 3 7 Handling 8 4 3 8 Personal protection 8 4 3 9 Recycling 8 5 Technical description 9 5 1 General 9 5 2 Operating principle 10 5 3 Technical data 11 6 Installation 11 6 1 Delivery package 11 6 2 Storage 11 6 3 Transport 12 6 4 Installation location 12 6 5 Installation of the device 13 6 5 1 Hydraulic connection 13 6 5 2 Connection for condensate drainage 14 6 5 3 Connecting the secondar...

Page 3: ...al for use and installation Version 00 Released on 7 2016 Printed in Slovenia Copyright by Termo tehnika d o o This document is copyright protected Every use beyond the law on copyright protection without previous consent of Termo tehnika d o o is illegal and may be penalized according to the law This version invalidates all previous versions We reserve the right to change this document and for pr...

Page 4: ...vided at all time If during the operation of the heat pump the water temperature exceeds 75 C the service department has to be notified CAUTION The buffer tank for DHW is intended for storing drinking water this is why the water has to be in accordance with the national regulations on drinking water in force otherwise damage and a termination of the warranty can arise CAUTION The device must be co...

Page 5: ...ts own power supply directly from the main electrical cabinet Other devices must not be connected to the same line CAUTION It is prohibited to move clean or service the device while in operation During installation and every additional adjustments of the device it is necessary to familiarise with the content of the manual for use and maintenance CAUTION To avoid hazards the damaged power cable can...

Page 6: ...serious physical injuries WARNING Risk of situations which can lead to minor physical injuries CAUTION Risk of injury or damage to the device NOTE This symbol marks sections which symbolise important information for the user 3 2 General 3 2 1 Obligations of the manufacturer Our products are in accordance with current European directives and standards Products are marked with the mark CE and they h...

Page 7: ...s entire lifespan To give the user all the documentation accompanying the device 3 2 4 Obligations of the user To ensure unobstructed and effective operation of the device the user must consider the following instructions To thoroughly study the instructions for use and installation accompanying the device before installation Installation and commissioning of the device have to be performed by a q...

Page 8: ... real hazard for health A lower concentration of oxygen can only occur in rooms smaller than 10 m3 which are not ventilated and are underground where the coolant which is heavier than air can remain for a longer period of time Despite this we recommend reading the safety list of the coolant manufacturer and follow its instructions 4 3 2 Danger mark DANGER Risk of situations which can lead to serio...

Page 9: ...r Do not inhale the fumes danger of suffocation because of inadequate concentration of oxygen in the air Evacuate the dangerous area Stop the leakage Remove all possible sources of ignition and heat Thoroughly vent the room where the coolant leakage occurred danger of suffocation Avoid contact with skin and eyes 2 Cleaning decontamination Let the coolant evaporate 4 3 7 Handling 1 Technical measur...

Page 10: ...point out that the heat pump will cool the room only if there is a need for heating DHW If there is no need the heat pump will not cool the room NOTE For maximal efficiency and economical use we advise to use air from rooms where waste heat is generated DHW rooms laundries kitchens basements pantries and that the air temperature is as high as possible Dimensions Picture 1 Heat pump dimensions Mark...

Page 11: ...rature in the room is too low for the heat pump s operation the EH turns on automatically it is the reserve source in case of a malfunction of the heat pump generator Anti freeze sensor The regulator of the heat pump senses the air temperature flowing through the evaporator In case the air temperature is lower than 7 C factory setting it performs a safety shut down of the device for at least 30 mi...

Page 12: ...d 50 At lower air temperatures the relative moisture can be higher With devices installed at high altitudes lower air pressure can cause degraded performance of the device CAUTION The heat pump cannot be installed on a location where air is polluted with toxic agents which could damage the device stables warehouses with dangerous substances outdoors etc 5 3 Technical data Model WP F2 1 Max heating...

Page 13: ...ice it has to be disconnected from the power supply WARNING The mass of the device is too great for manual transfer This could lead to injuries and damage of the device All responsibility for eventual injuries or damage to property or the device is taken by the user Devices for transporting goods must be used CAUTION The heat pump must under no circumstance be laid in horizontal position 6 4 Insta...

Page 14: ... the buffer tank We recommend placing galvanic isolators made of red brass the length of at least twice the diameter of the pipe on the connections CAUTION The buffer tank for DHW is intended for storing drinking water this is why the water has to be in accordance with the national regulations on drinking water in force otherwise damage and a termination of the warranty can arise Dimensions of the...

Page 15: ...f the condensate pipe CAUTION The condensate pipe must not be higher in any place than the condensate vessel this is why it must be installed as seen on Picture 4 CAUTION The condensate pipe must not be routed into the washing machine syphon the overpressure could stop the condensate from the condensate vessel from draining through the pipe and would start dripping on the housing of the heat pump ...

Page 16: ...anti corrosion and anti bacterial agents must also be used to prevent corrosion Before filling the system it has to be cleaned of all impurities The heating system must be thoroughly vented Air including diffusion air must be prevented entering the device Picture 5 HP in combination with solar collectors Picture 6 HP in combination with the DHW ...

Page 17: ...heat pump to the water supply and it is thoroughly vented it can be connected to the power supply 1 Compressor 9 Connecting the circulation pump 2 Fan 10 Compressor condenser 3 Screen 12 El heater 4 Pressure switch 13 Safety thermostat 5 NTC probe water 16 PV signal connection 6 NTC probe air 17 Relay board 7 Supply cable 18 Keyboard 8 Grounding 19 Filter ...

Page 18: ...ecting cable has a standard plug suitable for a standard socket 16 A 230 V ac This socket has to have its own power supply directly from the main electrical cabinet Other devices must not be connected to the same line CAUTION Connecting the heat pump must be performed by an electrician ...

Page 19: ...ive wire is checked with the resistance gauge The resistance between the grounding connection and the inside of the casing must be between 600 and 700Ω This ensures the installation was performed correctly If the given value is not achieved check whether the grounding cable is installed correctly 7 Commissioning of the device 7 1 Filling the device with water After an expert has connected the HP t...

Page 20: ...ed to the electrical network according to these instructions the display shows the regulator version and the factory set programme of operation i e P 1 and all operating parameters and their values after 2 seconds 30 seconds after connecting the device to the mains the entire system starts up and starts heating the water in the DHW The heat pump starts operating and operates until the set breaking...

Page 21: ... is too low or lower than the set minimal operating temperature L1 the device automatically switches to heating water with DHW Is illuminated Is blinking P 5 The device in the automatic mode heats the water with the compressor to the set temperature It operates inside the limited temp zone of the intake air In case the temp of intake air is too low or lower than the set minimal operating temperatu...

Page 22: ... of active outputs only display 0 7 0 no output is active 1 KO 2 CP 3 HP CP 4 EH 5 HP EH 6 CP EH 7 HP CP EH L4 Shut down temperature hysteresis 1 20 C 10 L5 switching on the auxiliary heat source quick heating 1 55 C L6 Raising the temperature at PV 1 20 5 L7 Standby at PV signal 1 10 3 Operation programmes 1 Heating water with heat pump programme P 1 must be chosen The water is heated with the he...

Page 23: ...ation from the reserve source back to heating the water with the heat pump occurs after 30 minutes when the intake air warms up for 3 C above the switching temperature L 1 NOTE Water overheating in programme P 4 or P 5 is performed with the currently active heat generator 5 Heating water with the heat pump in combination with photovoltaic panels programme P 6 in this operating mode the device oper...

Page 24: ...ettings of parameters You can enter the menu displaying the parameters by shortly pressing keys and at the same time we can move between the displays themselves with the key or When the desired parameter has been chosen we have to wait for 8s then the value of the chosen parameter is displayed for 8s After 8s the display returns into its basic menu which displays the current water temp in the DHW ...

Page 25: ...anual and national regulations 9 1 MAINTENANCE Recommended regular controls Control of the safety valve on the water supply installation Visual control of the HP evaporator If the evaporator is very dusty the device must be disconnected from the power supply Remove the plastic housing of the device and clean the evaporator The use of a vacuum cleaner or compressed air is recommended Be careful not...

Page 26: ... limit If the temperature of the intake air is constantly above the upper limit another room must be found for setting up the HP or the air ducts have to be routed into the room with a temperature lower than the upper level 40 C 10 2 Disruptions ERRORS CAUSE SOLUTION E7 High pressure in the cooling system Check whether the buffer tank has enough water You can erase the error by pressing the key If...

Page 27: ... all possible heat withdrawals from the DHW The heat pump makes unusual noises The insulation is in contact with the fan Contact the service Compressor malfunction The evaporator is freezing Low air flow The air connections must be unobstructed Fan malfunction Contact the service Low room temperature Set the parameter L1 to a higher temperature in versions without defrosting Low coolant The coolin...

Page 28: ...anufacturing Termo tehnika d o o Orla vas 27a Tel 00386 3 703 16 20 Fax 00386 3 703 16 33 Internet www termotehnika com E mail info kronoterm com Customer support and service 00386 3 703 16 26 E Mail servis kronoterm com ...

Reviews: