RUNNING GEAR OPERATION
48
Operating instructions • Load Carrier • 505410638-02 • 07/2019
Spare wheel removal
► Fold up the side collision protection, if
necessary
(see "5.14 Side collision protec-
.
► Remove the securing device.
► Unscrew the rim holder.
► Remove the spare wheel from the stor-
age basket.
ü
The spare wheel has been removed.
Spare wheel insertion
► Insert the spare wheel in the storage
basket.
► Firmly screw the rim holder.
► Install the securing device.
► Fold down the side collision protection,
(see "5.14 Side collision pro-
.
► The spare wheel is inserted.
5.15.2
Spare wheel with winch
CAUTION
Risk of injury due to a falling spare
wheel!
The weight of a falling spare wheel can
cause injuries.
► Work carefully when changing a spare
wheel.
► Before removing the securing
devices, check the support cable and
winch for function and damage.
1
2
4
3
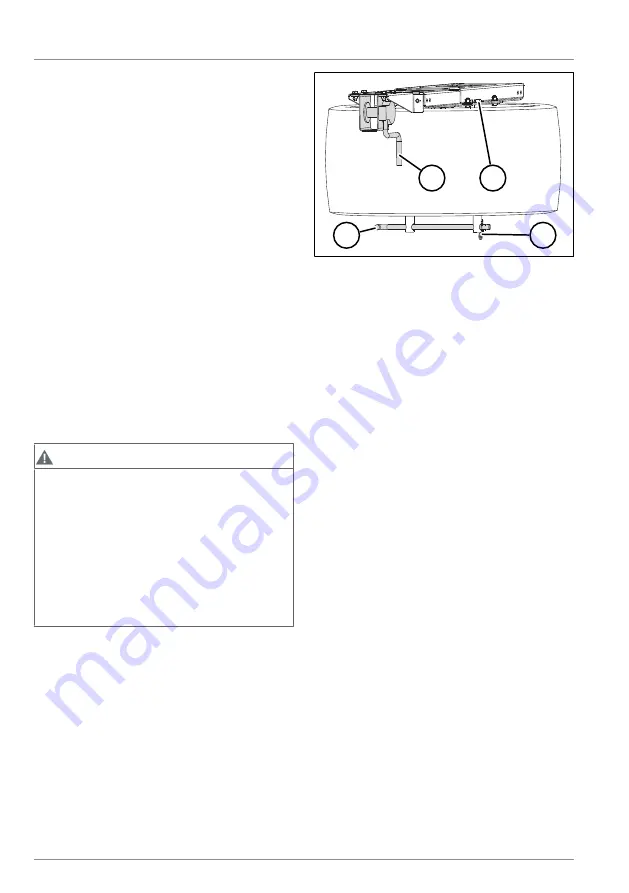
Fig. 5-37:
Spare wheel with winch
1
Retainer rod
2
Hand crank
3
Tubular nut
4
Spring cotter pin
Spare wheel removal
► Fold up the side collision protection, if
(see "5.14 Side collision protec-
► Remove the spring cotter pin.
► Remove the retainer rod from the tubu-
lar nuts.
► Unscrew the tubular nuts counter-
clockwise using the retainer rod.
► Turn the hand crank counter-clockwise
and slowly lower the spare wheel to
the ground using the winch.
► Let out the support cable until the
spare wheel can be removed from the
spare wheel bracket.
ü
The spare wheel has been removed.
Spare wheel insertion
► Place the spare wheel under the sup-
port cable.
► Let out the support cable until the
spare wheel bracket can be fastened
to the rim.
► Turn the crank counter-clockwise and
slowly lift the spare wheel using the
winch until the support cable is slightly
tensioned.


