background image

2

ActiveMow R 360

Original Operating Instructions 150000864_01_en

Contact

Maschinenfabrik Bernard Krone GmbH & Co. KG

Heinrich-Krone-Straße 10

48480 Spelle

Germany

Telephone switchboard

+ 49 (0) 59 77/935-0

Telefax switchboard

+ 49 (0) 59 77/935-339

Telefax spare parts warehouse do-
mestic

+ 49 (0) 59 77/935-239

Telefax spare parts warehouse 49 (0) 59 77/935-359

Internet

www.landmaschinen.krone.de

www.mediathek.krone.de/

Information for enquiries and orders

Year

Machine no.

Type

Contact data of your dealer

Summary of Contents for ActiveMow R 360

Page 1: ...Original Operating Instructions Document no 150000864_01_en Rear Mounted Mower ActiveMow R 360 From machine no 976393 ...

Page 2: ...elle Germany Telephone switchboard 49 0 59 77 935 0 Telefax switchboard 49 0 59 77 935 339 Telefax spare parts warehouse do mestic 49 0 59 77 935 239 Telefax spare parts warehouse export 49 0 59 77 935 359 Internet www landmaschinen krone de www mediathek krone de Information for enquiries and orders Year Machine no Type Contact data of your dealer ...

Page 3: ... Danger zones 15 2 3 11 Ensuring functionality of safety devices 17 2 3 12 Personal protective equipment 17 2 3 13 Safety markings on the machine 18 2 3 14 Road safety 18 2 3 15 Parking the machine safely 19 2 3 16 Consumables 19 2 3 17 Dangers arising from environment 20 2 3 18 Sources of danger on the machine 21 2 3 19 Dangers in connection with certain activities Working on the machine 22 2 3 2...

Page 4: ...ing reducing ground pressure 55 10 4 1 Setting the relief springs for the mower 55 10 4 2 Setting the relief spring for the carrying bar 56 11 Maintenance General Information 57 11 1 Maintenance table 57 11 1 1 Maintenance Once after 50 hours 57 11 1 2 Maintenance Before the beginning of the season 57 11 1 3 Maintenance Every 10 hours but at least once a day 58 11 1 4 Maintenance Every 50 hours 58...

Page 5: ...864_01_en 5 14 7 Checking replacing linings on cutterbar 75 14 8 Checking oil level 76 15 Maintenance Lubrication 78 15 1 Lubricating universal shaft 78 15 2 Lubrication chart Machine 79 16 Storage 81 17 Waste disposal 83 18 Index 84 19 Declaration of conformity 89 ...

Page 6: ...able documents To ensure that the machine is used safely and as intended observe the following further applicable documents Operating instructions for universal shaft With front mounted mower Operating instructions front mounted mower Assembly instructions KRONE 1 4 Target group of this document This document aims at the operator of the machine who fulfills the minimum requirements of personnel qu...

Page 7: ...e type The information that refers to the figure always corresponds to the machine type of this document 1 5 5 Scope of the document In addition to standard equipment accessories kits and versions of the machine are described in this document Your machine may deviate from this document 1 5 6 Means of representation Icons in the text The following means of representation icons are used to present t...

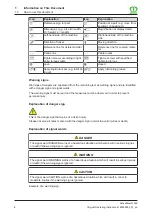
Page 8: ... grease Warning signs Warnings of dangers are separated from the remaining text as warning signs and are identified with a danger sign and signal words The warning signs must be read and the measures must be observed in order to prevent personal injury Explanation of danger sign This is the danger sign that warns of a risk of injury Please observe all notes marked with the danger sign in order to ...

Page 9: ... necessary Check gearbox oil level approx 3 to 4 hours after the machine has been switched off Check oil level only when machine is in horizontal position Notes with information and recommendations Additional information and recommendations for trouble free and productive operation of the machine are separated from the remaining text and marked with Information Example INFORMATION Each safety labe...

Page 10: ... bar non SI bar 14 5038 Torque Newtonmeter Nm 0 7376 pound foot or foot pound ft lbf 8 8507 pound inch or inch pound in lbf Temperature Degrees Celsius C Cx1 8 32 Degrees Fahrenheit F Velocity Metres per minute m min 3 2808 Feet per minute ft min Metres per second m s 3 2808 Feet per second ft s Kilometres per hour km h 0 6215 Miles per hour mph Volumes Litres L 0 2642 US gallon US gal Millilitre ...

Page 11: ...Information on This Document 1 How to use this document 1 5 ActiveMow R 360 Original Operating Instructions 150000864_01_en 11 This page has been left blank deliberately ...

Page 12: ...d other property Unauthorised modifications to the machine may affect the properties of the machine or disrupt the proper operation For this reason unauthorised modifications shall exclude any liability of the manufacturer for consequential damage The intended use shall also include the adherence to the operating maintenance and repair conditions set by the manufacturer 2 2 Service life of the mac...

Page 13: ...he information in the operating instructions accordingly He is familiar with driving vehicles safely For road travel he has adequate knowledge of the highway code and has the stipulated driving licence 2 3 3 Personnel qualification of the technicians If the work assembly conversion modification extension repairs retrofitting is performed improperly on the machine people may be seriously or fatally...

Page 14: ... accidents To ensure operational safety use original parts or standard parts which correspond to the requirements of the manufacturer 2 3 8 Jobs on the machine Passengers Passengers can be seriously injured by the machine or fall from the machine and be overrun Ejected objects may strike and injure passengers As a result make sure that no one except the operator is on the machine 2 3 9 Operational...

Page 15: ...amage repaired by a qualified service centre Technical limit values If the technical limit values of the machine are not observed the machine may be damaged As a result accidents may occur and people may be seriously injured or killed Observance of the following technical limit values is particularly important for safety Maximum permissible operating pressure of hydraulics Maximum permissible driv...

Page 16: ... the universal shaft locks to engage Attach chains to prevent the universal shaft guards from rotating with the shaft Make sure that there is no one in the danger zone of PTO shaft and universal shaft Ensure that the selected speed and direction of rotation of the PTO shaft of the tractor match the permitted speed and direction of rotation of the machine Switch off the PTO shaft when the angles be...

Page 17: ...ng machine parts If machine parts are trailing people may be seriously injured or killed After the drives have been switched off the following machine parts will trail Universal shafts Cutting discs Conditioner Conveying devices Shut down and safeguard the machine refer to page 24 Do not approach the machine until all machines parts have come to a complete stop 2 3 11 Ensuring functionality of saf...

Page 18: ...gnizable safety labels Provide spare parts with intended safety labels Descriptions explanations and order numbers of safety labels refer to page 25 2 3 14 Road safety Dangers for road travel If the machine exceeds the maximum dimensions and weights specified by national law and is not correctly lit when travelling on public roads other road users may be endangered Before driving on roads ensure t...

Page 19: ...machine will be changed by payload and by executing machine functions Avoid abrupt steering movements on slopes Do not move the machine from working position to transport position or from transport position to working position as long as the machine is used across a slope Do not park the machine on slopes Observe procedures for operating the machine on slopes 2 3 15 Parking the machine safely An i...

Page 20: ...ric shock from overhead lines When folding the mowers in and out the machine may reach the height of overhead lines This may cause voltage to flash over to the machine and cause a fatal electric shock or fire Keep a sufficient distance from electrical overhead lines when folding the mowers in and out Never fold the mowers in or out near pylons and overhead lines With mowers folded in keep a suffic...

Page 21: ...nditions of the machine specify and use suitable hearing protection Specify rules for the use of hearing protection and for the working time During operation keep windows and doors of cabin closed Remove hearing protection for road travel Liquids under high pressure The following liquids are under high pressure Hydraulic oil Liquids escaping under high pressure may penetrate through the skin and c...

Page 22: ...burn people Transfer gearbox Mower gearbox Belt gearbox Hydraulic system Cutter bar Maintain a sufficient distance from hot surfaces Leave machine parts to cool down and wear protective gloves 2 3 19 Dangers in connection with certain activities Working on the machine Only perform work when the machine is at standstill If the machine is not shut down and safeguarded parts may move unintentionally ...

Page 23: ...s Frame or supporting components Running gear Before carrying out welding work on the machine obtain consent by KRONE customer service and if required identify alternatives Before performing welding work on the machine park the machine safely and disconnect it from the tractor Have welding work performed by experienced technicians only Attach the earthing of the welding device near the welding poi...

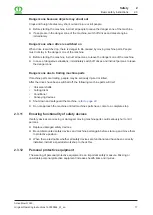
Page 24: ...ised machine and machine parts against lowering WARNING Crushing hazard due to movement of machine or machine parts If the machine or machine parts are not secured against lowering the machine or machine parts may roll fall or sag Thus people could be squeezed or killed Lower the raised machine parts Shut down and safeguard the machine refer to page 24 Before working on or under raised machine par...

Page 25: ...ge 24 Observe the intervals for oil level check oil and filter element changes refer to page 57 Use only the oil grades and quantities specified in the consumables table refer to page 33 Clean the area around the parts for example gearbox high pressure filter and make sure that no foreign objects get into the parts or the hydraulic system Check existing seal rings for damage and replace them if ne...

Page 26: ...2 Safety 2 5 Safety labels on the machine 26 ActiveMow R 360 Original Operating Instructions 150000864_01_en Position and meaning of safety labels KM000 413 ...

Page 27: ...d by voltage flashover if machine parts come too close to power transmission lines Maintain the stipulated safety distance from power transmission lines c Danger when exceeding the maximum per missible PTO speed or the maximum per missible operating pressure When exceeding the permitted PTO speed machine parts may be destroyed or be hurled up uncontrollably If the maximum permitted operating press...

Page 28: ...objects being flung out When the machine is running there is a risk of injury as objects may be flung out uncontrol lably When the machine is running keep your distance 4 Ord no 27 002 459 0 2x Danger due to machine parts which fold out or swivel out unintentionally Risk of injury for road users due to machine parts that could fold down or swivel out unin tentionally Whenever transporting the mach...

Page 29: ... 2 6 Safety equipment KMG000 088 Pos Designation Explanation 1 Stop cock When transporting the machine and when working under the machine always close the stop cock 2 Support jack The support jack is designed for the stability of the machine when it is not connected to the tractor refer to page 44 ...

Page 30: ... 11 Friction clutch 2 Three point hitch 12 Relief spring s carrying bar 3 Universal shaft bracket 13 Locking 4 Impact damage protection system 14 Relief spring s cutterbar 5 Cutterbar 15 Lifting eye 6 Locking for relief spring s 16 Mower gearbox 7 Stop cock 17 Intermediate universal shaft 8 Universally jointed drive shaft 18 Support jack 9 Spare blade drawer 19 Main gearbox 10 Blade key ...

Page 31: ...s on the front cover page of these operating instructions 3 3 Pole protection mechanism WARNING Risk of accident due to changed driving behaviour If the value for the spring on the impact damage protection system is changed the trigger moment of the impact damage protection system also changes As a result the impact damage protection system may trigger in the transport position in case of abrupt l...

Page 32: ...3 Machine Description 3 3 Pole protection mechanism 32 ActiveMow R 360 Original Operating Instructions 150000864_01_en KMG000 032 ...

Page 33: ...40 min Required hydraulic connections Single acting hydraulic connection 1x Machine equipment series Lower link hitch Cat I and cat II SafeCut Series Blade quick fastener or blade screw connec tion Series Number of cutting discs 5 units Number of mower drums 4 units Mechanical spring relief Series Ambient temperature Temperature range for machine operation 5 to 45 C Airborne noise emission Equival...

Page 34: ...ks Input gearbox 0 5 l SAE 90 Wiolin ML 4 SAE 90 Main gearbox 0 3 l SAE 90 Wiolin ML 4 SAE 90 Cutterbar 8 0 l SAE 90 Wiolin ML 4 SAE 90 The filling quantities of the gearboxes are guide values The correct values result from oil change oil level check refer to page 65 4 1 2 Lubricating greases Designation Filling quantity Specification Manual lubrication points As required 1 Lubricating grease to D...

Page 35: ...on Single acting control unit 1 and operating cable Pull the operating cable and keep it tensioned Float position Lowers the mower from the transport position to the working position 1 Raises the mower from the working position to the transport position Single acting control unit 1 Float position Lowers the mower from the headland position to the working position 1 Raises the mower from the workin...

Page 36: ...nstructions If the relevant safety routines are not observed persons may be seriously injured or killed The safety routines must be read and observed to avoid accidents refer to page 24 6 1 Checklist for initial operation ü The machine is mounted according to assembly instructions of the machine ü All screws and nuts have been checked to make certain they are tight and tightened to the specified t...

Page 37: ...de Pull out the longer lower link pin 1 outwards up to the next borehole Secure both lower link pins 1 3 with the cylinder screws 2 KM000 433 On wider tractors or when working in combination with front mounted mower working width of approx 2 8 3 2 m it is recommended to reconnect the lower link pins 1 3 for the ball sleeves of category II cat II into position III For the ball sleeves of category I...

Page 38: ...refer to page 39 Raise machine until the PTO shaft end of the tractor and the drive shaft of the machine are on the same height Lower machine into working position Shut down and safeguard the machine refer to page 24 Disassemble the universal shaft Install one half each 1 2 on tractor side and on machine side Shorten section tubes and guard tubes NOTICE Material damage caused by failure to achieve...

Page 39: ... incorrectly connected to the tractor or have been improperly installed they may pull off or be damaged This may result in serious accidents If connection lines are interchanged functions may inadvertently be actuated which may also result in serious accidents Correctly connect and secure the hoses and cables Lay the hoses cables and ropes so that they do not scrape come under tension or become ja...

Page 40: ...er to connect the hydraulic hose properly the hydraulic hose 1 is labelled with a number or a letter In order to connect the hydraulic hose properly the hydraulic hose 1 is labelled with a number or a letter Hydraulic hoses for connection to a single acting control unit are marked with a number and the plus sign e g 1 Use a control unit on the tractor which can be locked in the neutral position ag...

Page 41: ... not checked when changing the tractor In order to avoid damage to the machine check universal shaft length every time the tractor is changed and correct it if necessary refer to page 38 KMG000 048 ü The machine is shut down and safeguarded refer to page 24 Slide universal shaft 1 on PTO shaft end of tractor and secure it Secure universal shaft guard by means of supporting chain 2 against turning ...

Page 42: ...f the following notes are not observed persons could be seriously injured or killed Before you turn on the PTO shaft make sure that the machine is in working position and that the glide skids touch the ground Even with intended operation of the machine there is a danger caused by ejected foreign bodies Thus instruct all persons to leave the danger zone of the machine Special care should be taken w...

Page 43: ... the locking 2 off the bolt Fold up the front guard 1 place the locking 2 onto the bolt and secure it with the spring cotter pin 3 8 1 2 Fold down the front guard KMG000 077 ü The machine is in the working position refer to page 47 ü The machine is shut down and safeguarded refer to page 24 Pull the spring cotter pin 3 and pull the locking 2 off the bolt Fold down the front guard 1 place the locki...

Page 44: ...3 of the guard cloths Fold up the side guard 1 8 2 2 Folding down side guard working position KMG000 059 ü The machine is in the working position refer to page 47 ü The machine is shut down and safeguarded refer to page 24 Fold down the side guard 1 Make sure that the side guard 1 is secured by the locking refer to page 54 Secure the guard cloths using the turnlock fasteners 2 8 3 Operating suppor...

Page 45: ...into the upper position Insert the locking pin 2 into the upper borehole and secure it with the linch pin 3 8 3 2 Moving support jack into support position For the Series version KM000 436 Raise the machine via the rear hydraulics until the support jack can be pushed down Pull the linch pin 3 out of the locking pin 2 Remove the locking pin 2 and move the support jack 1 into the lower position Inse...

Page 46: ...dditional support jacks 1 2 can be mounted After mounting the support jacks 1 2 lower the machine via the rear hydraulics until the machine is resting on the support jacks 1 2 Shut down and safeguard the machine refer to page 24 8 3 4 Dismounting support jack For the additional support jacks version KM000 437 ü The mower is in the transport position refer to page 48 Raise the machine via the rear ...

Page 47: ...ransport position to working position KMG000 075 From transport position to headland position ü The stop cock is open The stop cocks are open To relieve the locking 1 actuate the control unit 1 To release the locking 1 tauten the operating cable 2 and keep it tensioned To lower the mower move the single acting control unit 1 to the float position Release the operating cable 2 Headland positions ü ...

Page 48: ...osition Release the operating cable 2 KM000 435 Close the stop cock 3 on the hydraulic cylinder 8 6 Mowing Preparing to mow ü All points listed in the chapter Start up have been fulfilled refer to page 39 ü The machine is in the working position refer to page 47 ü The machine is shut down and safeguarded refer to page 24 ü The front guard is folded down refer to page 42 ü The side guard is folded ...

Page 49: ...protection system engages automatically NOTICE Machine damage caused by impact damage protection system that does not engage automatically To ensure that the impact damage protection system engages automatically relieve the relief spring s refer to page 55 and reverse until the impact damage protection system engages Then tension the relief spring s again refer to page 55 INFORMATION Leave the con...

Page 50: ...e components could be activated unintentionally This may result in serious accidents To avoid that functions are triggered by mistake the regulating valves of the tractor must be in neutral position when performing transport journeys on the road and must be locked WARNING Risk of accident from open stop cocks Machine components could be moved unintentionally when stop cocks are open This may resul...

Page 51: ... guard is folded down closed and locked 1 refer to page 42 ü The side guard is folded up and is in the transport position refer to page 44 ü The machine is in the transport position refer to page 48 ü The locking 2 has been released refer to page 48 ü The control units on the tractor are in neutral position and locked ü The stop cock 3 on the hydraulic hose is closed refer to page 47 Lower the mac...

Page 52: ... jacks refer to page 46 Lower the machine to the ground via the rear linkage Shut down and safeguard the machine refer to page 24 Remove the universal shaft 3 from the tractor and place it on the storage surface 4 Close the stop cock s INFORMATION Problems when connecting the machine the next time To avoid problems when connecting the machine the next time depressurise the hydraulic system before ...

Page 53: ... non observance of safety instructions If the relevant safety routines are not observed persons may be seriously injured or killed The safety routines must be read and observed to avoid accidents refer to page 24 10 1 Setting the mower in working position KM000 431 If the bolt 1 is centred above the marking arrow 2 the optimal working height of the machine is set ü The machine is in the working po...

Page 54: ...rely refer to page 24 ü The machine is shut down and safeguarded refer to page 24 The high cut skids must always be mounted underneath the cutting discs that run next to the mower drums Insert the high cut skid 2 into the sliding skid 1 and screw it 10 3 Checking setting locking of side guards KMG000 042 The locking 2 prevents during use that the side guard 1 is folded up and foreign bodies are sl...

Page 55: ...ured or killed The relief spring s must only be dismounted or adjusted in the transport position The bottom fittings on the relief spring s are fully screwed in 10 4 1 Setting the relief springs for the mower KM000 426 The relief springs 1 are used to adapt the ground pressure of the cutterbar to the local conditions In order to protect the sward the load on the cutterbar must be relieved so that ...

Page 56: ...vel the locking 2 down Tensioning relief springs ü The machine is in the transport position refer to page 48 ü The machine is shut down and safeguarded refer to page 24 Swivel the locking 2 downwards Æ The relief spring or the relief springs are tensioned when the machine is lowered to the working position 10 4 2 Setting the relief spring for the carrying bar KM000 429 The inside of the cutterbar ...

Page 57: ... machine If a test run is performed after repair maintenance or cleaning work or after technical intervention the machine may behave unpredictably Thus there is a risk of serious injuries or death ü The machine is in working position Do not switch on the drives until the mower is resting on the ground and you are absolutely sure that there is no one in the danger zone The test run of the machine m...

Page 58: ...to page 65 Main gearbox refer to page 66 Cutterbar refer to page 76 Components Changing replacing blades refer to page 70 Check replace cutting discs mower drums refer to page 74 Check replace retaining bolt blade screw con nection refer to page 73 Check replace retaining bolt blade quick fastener refer to page 73 Check replace blade carrier blade quick fastener refer to page 74 Check guard cloths...

Page 59: ...to countersunk screws with hexagon socket in case the countersunk screw is tightened via hexagon socket DV000 001 X Thread size 1 Strength class on screw head X Strength class 5 6 8 8 10 9 12 9 Tightening torque Nm M4 3 0 4 4 5 1 M5 5 9 8 7 10 M6 10 15 18 M8 25 36 43 M10 29 49 72 84 M12 42 85 125 145 M14 135 200 235 M16 210 310 365 M20 425 610 710 M22 571 832 972 M24 730 1 050 1 220 M27 1 100 1 55...

Page 60: ...12 9 Tightening torque Nm M12 x 1 5 88 130 152 M14 x 1 5 145 213 249 M16 x 1 5 222 327 382 M18 x 1 5 368 525 614 M20 x 1 5 465 662 775 M24 x 2 787 1 121 1 312 M27 x 2 1 148 1 635 1 914 M30 x 1 5 800 2 100 2 650 Metric thread screws with countersunk head and hexagon socket INFORMATION The table applies only to countersunk screws with hexagon socket and metric thread tightened via hexagon socket DV0...

Page 61: ... aluminium or steel housings The term locking screw includes the drain plug the inspection screw as well as the ventilation and breather filters The table only applies to locking screws with external hexagon together with copper seal ring and for bleed valves made of brass with shaped seal ring Thread Locking screw and viewing glass with copper ring Ventilation breather filter made of steel Bleed ...

Page 62: ...he machine may be damaged considerably Never intervene in the overload protection Only use KRONE original spare parts The friction clutch protects the tractor and the machine from damage The friction clutch must be vented at the beginning of the storage period The friction clutch is designed with a permanently adjusted turning torque MR The torque is applied to the housing of the friction clutch 2...

Page 63: ...osen the cap nuts 1 uniformly but do not dismount them ð The friction discs are relieved Turn the friction clutch 2 Screw in the cap nuts 1 completely 11 5 Checking guard cloths KMG000 010 ü The machine is in the working position refer to page 47 ü The machine is shut down and safeguarded refer to page 24 Carry out a visual inspection of the guard cloth 1 to ensure that there are no cracks and dam...

Page 64: ...or killed The safety routines must be read and observed to avoid accidents refer to page 24 WARNING Hydraulic hoses are subject to ageing Hydraulic hoses may wear depending on pressure heat load and the effect of UV rays People can be seriously injured or killed by damaged hydraulic hoses The date of manufacture appears on the hydraulic hoses This way the age can be ascertained quickly Replacement...

Page 65: ...d accidents refer to page 24 13 1 Input gearbox KMG000 005 Observe the safety routine Safely performing oil level check oil change and filter element change refer to page 25 INFORMATION The oil level must be checked and the oil must be changed in working position and with machine in horizontal position Check oil level Unscrew the locking screw of the inspection hole 1 ð If the oil reaches up to th...

Page 66: ...1 13 2 Main gearbox KMG000 073 Observe the safety routine Safely performing oil level check oil change and filter element change refer to page 25 INFORMATION The oil level must be checked and the oil must be changed in working position and with machine in horizontal position Check oil level Unscrew the locking screw of the inspection hole 1 ð If the oil reaches up to the inspection hole 1 Screw on...

Page 67: ...w the locking screw of the inspection hole 1 and the locking screw of the filling hole 3 Unscrew the drain plug 2 and drain the oil Mount the drain plug 2 Anziehdrehmoment refer to page 61 Top up new oil via the filling hole 3 up to the inspection hole 1 Mount the locking screw of the inspection hole 1 and the locking screw of the filling hole 3 Anziehdrehmoment refer to page 61 ...

Page 68: ...ng onto obstacles e g stones the both shear pins in the rotary hub will shear off The rotary hub incl nut turns upward on the pinion shaft The cutting discs or drums which move the crop to the left LH in the direction of travel have left handed thread The cutting discs or drums which transport the crop to the right RH in the direction of travel have right handed thread To distinguish between right...

Page 69: ...and nut no groove mark on pinion shaft and nut Anti clockwise rotating LH cutting discs mower drums always have left handed pinion shaft and nut with groove mark on pinion shaft and nut KM000 049_1 ü The machine is in the working position refer to page 47 ü The machine is shut down and safeguarded refer to page 24 Dismount the cutting disc or the mower drum at the rotary hub with the defective she...

Page 70: ...nd blade supports If blades are missing damaged or incorrectly mounted dangerous unbalanced rotation may be caused and parts may fly around People may be seriously injured or killed as a result Check the blades at least once a day and the retaining bolts every time after changing the blades or after contact with foreign objects Immediately replace missing damaged or incorrectly mounted blades and ...

Page 71: ...f the dimension is X 13 mm the wear limit is not reached ð If the dimension is X 13 mm or the borehole touches the marking 1 the blade must be replaced 14 3 2 Changing blades for the blade screw connection version KM000 044 ü The machine is in the working position refer to page 47 ü The machine is shut down and safeguarded refer to page 24 ü The front guard is folded up refer to page 42 ü The area...

Page 72: ...ick fastener version KM000 045 ü The machine is in the working position refer to page 47 ü The machine is shut down and safeguarded refer to page 24 ü The front guard is folded up refer to page 42 ü The area around the blade mowing discs and mower drums is cleaned To remove the blade 2 slide the blade key 1 between the mowing disc 4 and the blade carrier 3 as far as it will go press it down with o...

Page 73: ...ow material thickness on the retaining bolts If the material thickness on the retaining bolt is too low the blades may loosen due to the high rotating speed Thus there is a risk of serious injuries or death Whenever a blade is changed check the material thickness of the retaining bolt When the retaining bolts are damaged or worn replace them in kits per cutting disc mower drum The retaining bolts ...

Page 74: ...aterial thickness of the blade carriers The material thickness of the blade carriers must not be less than 3 mm at the weakest point The blade carriers must be replaced at the latest when the application seam 1 is worn at one point The blade carriers must only be replaced by KRONE original spare parts KM000 041 14 6 Checking replacing cutting discs mower drums WARNING Deformed cutting discs mower ...

Page 75: ...mower drums is reached when the material thickness is less than 3 mm The cutting discs mower drums must be replaced at the latest when the material thickness is below the minimum material thickness of 3 mm The cutting discs mower drums must only be replaced by KRONE original spare parts KM000 043 14 7 Checking replacing linings on cutterbar NOTICE Impact stops are checked irregularly The impact st...

Page 76: ...e upper side of the cutterbar in the sections 1 each should be approx 30 mm INFORMATION The edges 2 must not be welded On the bottom of the cutterbar weld the lining 3 to the cutterbar along the whole length in section 5 INFORMATION The edges 4 must not be welded 14 8 Checking oil level INFORMATION There is no need to change the oil on the cutterbar Before checking the oil level on the cutterbar t...

Page 77: ...if necessary via cutting height setting refer to page 53 Aligning the cutterbar in longitudinal direction Place the spirit level 1 on two cutting discs Align the cutterbar using the spirit level 1 align it horizontally using wedges if necessary Checking oil level KM000 036 Release the locking screw of the inspection hole 1 ð The oil level must reach up to the inspection hole 1 If the oil reaches t...

Page 78: ...CE Environmental damage caused by consumables If consumables are not stored and disposed of properly they may escape into the environment As a result the environment will be damaged even by small quantities Store the consumables in suitable containers according to the statutory provisions Dispose of used consumables according to statutory provisions NOTICE Bearing positions will be damaged If diff...

Page 79: ...ne In case of an increased load and under extreme working conditions the time periods must be reduced The types of lubrication are marked by means of icons in the lubrication chart refer to table Type of lubrication Lubricant Comment Grease Multi purpose grease Apply two strokes of lubricating grease from the grease gun per grease nipple Remove excess lubricating grease at the grease nipple KM000 ...

Page 80: ...15 Maintenance Lubrication 15 2 Lubrication chart Machine 80 ActiveMow R 360 Original Operating Instructions 150000864_01_en KM000 432 Every 100 operating hours 1 2 3 ...

Page 81: ...rom a high pressure cleaner is aimed directly at bearings and electrical electronic components these parts can be damaged Do not aim the water jet from high pressure cleaner at bearings and electrics electronic components Lubricate the machine according to lubrication chart Do not wipe off any grease that comes out of bearing points as the hardened grease will provide additional protection against...

Page 82: ...00864_01_en INFORMATION Write down all repair jobs which must be performed by the next harvest and arrange for them to be done with sufficient lead time Your KRONE dealer is better able to perform maintenance service and any required repairs outside of harvest season ...

Page 83: ...s and lubricants gearbox oil oil from hydraulic system before being scrapped The operating fluids and lubricants must be brought separately to an environmentally friendly disposal point or recycling centre Operating fluids and lubricants Operating fluids and lubricants diesel fuel coolant gearbox oil oil from hydraulic system must be brought to a disposal point for waste oil Synthetic materials Al...

Page 84: ... Changing blades for the blade screw connection version 71 Check change blades 70 Checking guard cloths 63 Checking oil level 76 Checking the blade for wear 70 Checking the wear limit on cutting discs mower drums 75 Checking replacing blade carrier 74 Checking replacing cutting discs mower drums 74 Checking replacing linings on cutterbar 75 Checking replacing retaining bolts 73 Checking setting lo...

Page 85: ...operating the machine on slopes 19 Declaration of conformity 89 Deviating tightening torques 62 Directories and references 6 Dismounting support jack 46 Driving and Transport 50 E Ensuring functionality of safety devices 17 Environmental protection and disposal 20 F Figures 7 Fold down the front guard 43 Folding down side guard working position 44 Folding up side guard transport position 44 Foldin...

Page 86: ...n 57 Maintenance Cutterbar 68 Maintenance Every 10 hours but at least once a day 58 Maintenance Every 200 hours 58 Maintenance Every 50 hours 58 Maintenance Every 6 years 58 Maintenance Gearbox 65 Maintenance General Information 57 Maintenance Hydraulic System 64 Maintenance Lubrication 78 Maintenance Once after 50 hours 57 Maintenance and repair work 22 Maintenance table 57 Means of representatio...

Page 87: ...ear bolt at the rotary hub 69 Road safety 18 Rotary hub 68 S Safety 12 Safety equipment 29 Safety labels on the machine 25 Safety markings on the machine 18 Safety routines 24 Scope of the document 7 Securing raised machine and machine parts against lowering 24 Service life of the machine 12 Setting the cutting height 53 Setting the mower in working position 53 Setting the relief spring for the ca...

Page 88: ...18 Index 88 ActiveMow R 360 Original Operating Instructions 150000864_01_en W Warning signs 8 Warnings of property damage environmental damage 9 Waste disposal 83 ...

Page 89: ...lare as manufacturer of the product named below under our sole responsibility that the Machine Rear Mounted Mower Type ActiveMow R 360 to which this declaration refers is in compliance with the following relevant provisions EC Directive 2006 42 EC Machinery The undersigned Managing Director is authorised to compile the technical documents Dr Ing Josef Horstmann Spelle 01 08 2017 Managing Director ...

Page 90: ...Maschinenfabrik Bernard Krone GmbH Co KG Heinrich Krone Straße 10 D 48480 Spelle Postfach 11 63 D 48478 Spelle 49 0 59 77 935 0 6 49 0 59 77 935 339 ü www landmaschinen krone de V 3 ...

Reviews: