background image

13

EN  Application sheet

EN  Application sheet

KITCHEN HOODS

INSTRUCTIONS ON THE USE  

OF THE KITCHEN HOOD

 The kitchen hood is to be used for extraction of 

smells from the kitchen. It may work in two modes 

depending on the method of its installation:

—  mode of air removal into the air shaft;

—  recirculation mode.

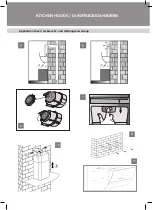
In the mode of air removal into the air shaft (see 

Fig. 5), the kitchen hood is connected to the air 

shaft with the help of a corrugated hose or a plas-

tic air conduit. Thus, all the evaporations from the 

kitchen, smells, char and soot pas through reus-

able aluminum grease trap filters and are removed 

outside the premises. With this working mode, it is 

not necessary to install charcoal acrylic scent-trap 

filters. Extraction mode is the most efficient as the 

kitchen hood removes all the evaporations from 

the kitchen to the air shaft.

In the recirculation mode (see Fig. 6), the kitch-

en hood is not connected to the air shaft, and thus 

the air is just passed through the kitchen hood in-

side the kitchen.

In this mode, charcoal acrylic disposable scent-

trap filters should be installed on the kitchen hood. 

These filters are not included in the set and are 

bought separately. The use of the kitchen hood in 

the recirculation mode reduces its productivity.

We recommend using the kitchen hood in the 

mode of air extraction to the air shaft.

MAINTENANCE AND SERVICE  

OF THE KITCHEN HOOD

Before starting any cleaning or repair opera-

tion for the hood, turn off the mains voltage. 

For external cleaning of painted hoods, use a damp 

cloth moistened with warm water with a neutral de-

tergent. For top cleaning of steel, copper and brass 

surfaces, use special tools, following the appropri-

ate instructions. Never use chlorine-containing 

and acid-containing products, abrasive agents or 

sponges to clean the extractor, which can scratch 

the surface. 

Aluminum grease filter, retaining particles of fat 

and passing through it the dust from the air, clogs. 

It should be cleaned not with acid-containing sub-

stances or washed after preliminary soaking in hot 

water with an effective detergent or, if possible, in a 

dishwasher (at 65 ° C). Strongly soiled, grease filters 

should not be washed in the dishwasher together 

with the dishes. Simultaneously with the cleaning 

of the grease collector, clean the fat deposits of all 

available elements of the hood. 

To remove aluminum filters, it is necessary to open 

the flip cover (item 3 on figure 1) in the service mode 

with the help of the remote control. Pressing on the 

lock of the aluminum filter, remove it (Fig. 7).  

Do not install the filter in the hood until it dries 

completely. 

The filter is installed in reverse order. It is necessary 

to press the spring lock on the filter and install it in 

place, after which the lock is released.

Installation of carbon filters

For your hood, two coal filters are installed. They are 

mounted on the protective grilles of the motor duct 

by lightly pressing and turning them clockwise. 

To remove the carbon filter, it should be slightly 

squeezed and turned counter-clockwise.

Replacing the backlight

For backlight, on the hood, LED strip is used. The 

purchase and replacement of the strip is done by 

means of an authorized service center.

Before starting any cleaning or repair operation for 

the hood, turn off the mains voltage.

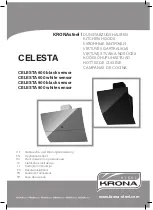
Summary of Contents for CELESTA 600 black sensor

Page 1: ...E CUISINE CAMPANAS DE COCINA DE Gebrauchs und Wartungsanweisung EN Application sheet RU Инструкция по применению LV Lietošanas instrukcija LT Vartojimo instrukcija ES Kasutamisjuhend FR Guide de l utilisateur SP Guía del usuario www krona steel com CELESTA CELESTA 600 black sensor CELESTA 600 white sensor CELESTA 900 black sensor CELESTA 900 white sensor ...

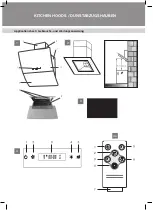
Page 2: ...Application sheet Gebrauchs und Wartungsanweisung KITCHEN HOODS DUNSTABZUGSHAUBEN 1 2 3 4 4a ...

Page 3: ...Application sheet Gebrauchs und Wartungsanweisung KITCHEN HOODS DUNSTABZUGSHAUBEN 9 7 10 11 8 Рис 7 5 6 ...

Page 4: ... Eine Ver wendung des Erzeugnisses für andere Zwecke ist unzulässig und führt zur Garantieverletzung Die Dunsthaube an Funktion in allen Betriebsarten prüfen bevor Sie mit der Installation anfangen und die Schutzfolie abmachen siehe Abschnitt Instal lation der Dienstabzugshaube Installation Anschluss und Reparatur der Dunstab zugshaube nur durch ein geschultes Personal für diese Erzeugnisse ausfüh...

Page 5: ...unstabzugshaube 7 Kasteninnenteil der Dunstabzugshaube 8 Dekorglas In der Dunstabzugshaube befindet sich nach dem Ausbau des Alu Fettfangfilters ein Kasten des Mo tors siehe Bild 2 mit einem Motor und Flügelrad komplett Im oberen Teil des Gehäuses ist ein Ein baukasten und ein Abspanntransformator ange bracht Als zusätzliches Zubehör für die Dunstabzugshau be ist ein Kohlefilter im Lieferumfang ni...

Page 6: ...ßen von aufklappbarem Paneel wird die Beleuchtung automatisch ausgeschaltet Uhr Einstellung Mit Hilfe vom Sensor Fernbedienungspult können Sie die Zeit einstellen Die Uhr Einstellung muss bei eingeschalteter Dunstabzugshaube mit geöff netem Paneel durchgeführt werden Die aktuelle Zeit wird auf dem Display nur im eingeschalteten Zustand angezeigt Im Standby Modus werden auf dem Display keine Inform...

Page 7: ...rücken wird das Gerät ausgeschal tet und ins Standby Modus versetzt das Paneel schließt sich dabei Mit Hilfe der Taste kann den Timer eingestellt werden Diese Funktion ist nur beim eingeschalte ten Motor verfügbar Durch zweites Drücken kann das Zeitintervall um 15 und maximall 60 Minuten vergrößert werden Durch drücken der Tas te kann dieser Wert um 1 Minute vergrößert und durch drücken der Taste ...

Page 8: ...d Staub aus der Luft festhält Er ist mit nicht säurehaltigen Mitteln zu reinigen bzw nach einer Vorwässerung im heißen Wasser mit einem wirksamen Waschmittel bzw falls möglich in einem Geschirrspüler bei Temperatur 65 C zu waschen Es ist nicht rätlich stark verunreinigte Fettfangfilter in einem Geschirrspüler zusammen mit Geschirr zu waschen Gleichzeitig mit einer Reinigung des Fettfangfilters rei...

Page 9: ...n der nächsten Reihenfolge 1 Vor der Anfertigung der Bohrungen für Dübel an der Wand soll man Markierungen machen Die Befestigungsleiste so an der Wand anord nen dass bei dem Anhängen der Dunstab zugshaube ein erforderlicher Abstand bis zum Tischplatte eingehalten wird Eine Markierung der Befestigungsbohrungen der Leiste vorneh men Bild 9 2 Bohrungen entsprechenden Durchmessers anfertigen Bohrungs...

Page 10: ...ach oben bis zur Deckung der Befestigungsbaugruppen des Kastens und der Leiste heben und diese ver binden ANSCHLUSS AN DAS STROMNETZ Die Dunstabzugshaube wird an ein Stromnetz mit der Spannung von 220 240 V 50 Hz angeschlos sen Um einen elektrischen Schlag zu vermeiden ist die Dunstabzugshaube an eine Schutzkontakt steckdose anzuschließen Es ist ausdrücklich verboten den Stecker bei der Installati...

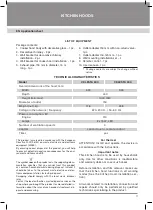
Page 11: ...sed by households only Use for other conditions is inadmissible and warranty does not cover such cases Before installation and film removal make sure that the kitchen hood functions in all working modes See the Kitchen Hood Installation sec tion All works related to installation connection and repairs should only be performed by qualified technicians specializing in the product 1 Cooker hood body ...

Page 12: ...minum grease filter there is a motor duct see figure 2 with the motor and impeller assembled In the up per part of the hood housing there is a mounting box and a step down transformer An additional accessory for extracting is a carbon filter not included in the kit Fig 4 The carbon scavenging filter is used for air filtration in the room when the hood is operating in the recir culation mode see Op...

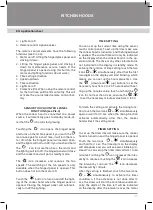
Page 13: ... SETTING You can set up the current time using the sensor touch control panel To set up the time make sure the cooker hood is turned on and the hinged panel is opened The current time will only be indicated on the display when the cooker hood is in the op eration mode The time or any other information is not indicated on the display in standby mode To activate the function of time setting touch th...

Page 14: ...ty service maintenance The out of order battery should be replaced with the battery of the same characteristics Touching the icon on the remote control turns the cooker hood on and opens the hinged panel in the same way as it happens when the same icon on the sensor touch panel is activated Unlike the sensor touch control panel pressing the but ton again turns the cooker hood off and closes the hi...

Page 15: ...warm water with a neutral de tergent For top cleaning of steel copper and brass surfaces use special tools following the appropri ate instructions Never use chlorine containing and acid containing products abrasive agents or sponges to clean the extractor which can scratch the surface Aluminum grease filter retaining particles of fat and passing through it the dust from the air clogs It should be ...

Page 16: ...llowing sequence 1 Before starting to drill the holes for the dowels in the wall markings must be made Place the hood bracket horizontally on the wall so that when the hood is stretched to it the necessary distance to the table top is obtained Make a marking of the holes for fixing the bar Figure 9 2 Drill a hole of the required diameter The depth of the hole must correspond to the length of the d...

Page 17: ...tchen hood is connected to the power net work with the voltage of 220 240V 50 Hz The kitchen hood should be connected to a wall outlet with earthing to avoid electrocution It is absolutely prohibited to cut off the plug during kitchen hood installation The damaged electrical cord should be re placed by a qualified service specialist For additional protection of the kitchen hood from voltage drops ...

Page 18: ...кухонная вытяжка предназначена исклю чительно для использования в домашнем хозяйстве Использование для других условий недопустимо и для этих случаев гарантия не распространяется Перед монтажом и снятием пленки убедиться в работоспособности вытяжки на всех режимах рабо ты см раздел Установка вытяжки Все работы по установке подключению и ремонту выполнять только квалифицированным мастерам по данному...

Page 19: ...авливающего фильтра находится короб мотора см рис 2 с мотором и крыльчаткой в сборе В верхней части корпуса вытяжки распо ложена монтажная коробка и понижающий транс форматор Дополнительным аксессуаром для вытяжки яв ляется угольный фильтр в комплект не входит Угольный запахоулавливающий фильтр при меняется для фильтрации воздуха в помещении при работе вытяжки в режиме рециркуляции см пункт Эксплу...

Page 20: ... на длительностью более 3 секунд приведёт к отключению скоростей мотора вытяжки выключе нию ламп подсветки закрытию откидной панели и переходу вытяжки в режим ожидания Пиктограмма служит для переключения ско ростей работы вытяжки Переключение возможно только при открытой откидной панели Выключить скорости мотора этой пиктограммой нельзя Воздействуя на пиктограмму можно вклю чить или выключить ламп...

Page 21: ...жностям он даже превосходит сенсорный пульт Некоторые опе рации возможно выполнить только с помощью дис танционного пульта управления Внимание Дистанционный пульт управления по ставляется с установленным элементом питания Для того чтобы элемент питания не разрядился раньше чем началось использование вытяжки между эле ментом питания и контактами пульта управления вставлена защитная плёнка Перед нач...

Page 22: ...о Использование вытяжки в режиме рецир куляции снижает ее производительность Рекомендуем использовать вытяжку в режиме отвода воздуха в вентиляционную шахту ОБСЛУЖИВАНИЕ И УХОД ЗА ВЫТЯЖКОЙ Перед тем как приступить к любой операции по очистке или ремонту вытяжки выключите напря жение электросети Для внешней очистки окрашенных вытяжек используйте влажную ткань смоченную в теплой воде с нейтральным м...

Page 23: ...олжна быть не менее 65 см а над газовой плитой не менее 75 см Внимание Монтаж этой вытяжки рекомендуется выполнять вдвоем Перед установкой вытяжки проверьте чтобы стена на которую будет подвешиваться вытяжка была достаточно прочной Для подвески вытяжки и планки крепления декоративного короба исполь зуйте шурупы и дюбели соответствующие типу стены в вашей кухне железобетон гипсокартон и т д Если шу...

Page 24: ...я декоратив ного кожуха 10 Перед установкой декоративных кожухов следу ет подключить вытяжку к электрической сети 11 Поместите внутреннюю часть кожуха в наруж ную Установите наружную часть кожуха на кор пус вытяжки 12 Внутреннюю часть кожуха поднимите вверх до совмещения узлов крепления кожуха и планки крепления кожуха и соедините их ПОДКЛЮЧЕНИЕ К ЭЛЕКТРОСЕТИ Вытяжка подключается к электросети нап...

Page 25: ...a nosūcēja augstums min max 1040 1520 Izvades atveres diametrs mm 150 Svars neto kg 17 8 23 8 Tīkla spriegums Frekvence 220 230 V 50 60 Hz Patērētā jauda W Motors 310 Lampas 2 x 1 5 W LED Ventilācijas ātrumu skaits 3 Vadība Skārienjutīgā tālvadība Taimeris Jā Šis izstrādājums ir marķēts saskaņā ar Eiropas direktīvu 2002 96 EK par elektriskā un elektroniskā aprīkojuma uti lizāciju EEAU Nodrošinot p...

Page 26: ...un neļaut tiem spēlēties ar iekārtu Iepakojuma materiāli piemēram polietilēna plēves var radīt smakša nas draudus Glabājiet tos bērniem nepieejamā vietā TVAIKA NOSŪCĒJA APRAKSTS Tvaika nosūcēja ārējā daļa sastāv no šādiem ele mentiem sk 1 attēlu 1 Tvaika nosūcēja vadības pults 2 Tvaika nosūcēja korpuss 3 Nolaižamais panelis kas ļauj tvaika nosūcējam uzsūkt apkārt esošo gaisu 4 Alumīnija tauku uztv...

Page 27: ...vadības pults sensors Tālvadības pults pogām sk 4a attēlu ir šādas funkcijas 1 Tvaika nosūcēja ieslēgšana izslēgšana Nolai žamā dekoratīvā stikla pacelšanas un nolaiša nas funkcija 2 Tvaika nosūcēja dekoratīvā nolaižamā stikla pacelšana nolaišana lai veiktu tvaika nosūcēja servisa apkopes paceļot dekoratīvo nolaižamo stiklu ar šo motora darbības pogu apgaismes lampas nedarbojas 3 Laika iestatīšana...

Page 28: ...ki Displejā tiek attēlots atlikušais laiks līdz taimera aktivizēšanai Notekot šim laikam atslēgsies mo tora ātrumi un apgaismes lampas bet nolaižamais panelis paliks atvērts Šī funkcija ir ļoti noderīga lai likvidētu virtuvē pa likušās smakas pēc ēdiena gatavošanas beigām Alumīnija tauku uztveres filtru attīrīšanas servisa funkcija Tvaika nosūcējam darbojoties periodiski uz dis pleja 3 4 attēls ie...

Page 29: ...r paredzēts virtuves smaku likvi dēšanai Atkarībā no tā uzstādīšanas veida tas var darboties divos režīmos gaisa novirzīšanas uz ventilācijas šahtu režīmā recirkulācijas režīmā Gaisa novirzīšanas ventilācijas šahtā režīmā sk 5 attēlu tvaika nosūcējs ar gofrētu cauruli vai plasti kāta gaisa pārvadu tiek pieslēgts ventilācijas šahtai Tādā veidā visi virtuves izgarojumi smakas dūmi un kvēpi izplūstot...

Page 30: ...ja montāžu un no ņemt aizsargplēves no nerūsējošā tērauda iekārtas kamēr neesat pārliecinājušies ka iekārta tehniskā ziņā normāli funkcionē to veic pieslēdzot tvaika nosūcēju pie elektrotīkla un pārbaudot visas tā funkcijas Lai to izdarītu jāatver iepakojums jāizņem tvaika nosūcējs un jānovieto tas uz līdzenas virsmas tā lai režīmu pārslēgšanas slēdzis būtu vērsts uz pār baudošās personas pusi Tāl...

Page 31: ... augstāka būs tvaika nosūcēja produktivitāte radīsies mazāk trokš ņu un vibrācijas Ja tvaika nosūcējs strādās recirkulācijas režīmā elastīgais gaisa pārvads netiks izmantots 7 Jāatzīmē iekšējā dekoratīvā apvalka plāksnes stiprinājuma caurumu vietas 11 attēls 8 Jāizurbj divi caurumi kuru diametrs atbilst kom plektā esošajiem dībeļiem 9 Izurbtajos caurumos jāievieto 2 dībeļi un jāpie skrūvē dekoratī...

Page 32: ...tinių atliekų išvežimo tarnybą arba parduotuvę kurioje pirkote šį gaminį Komplektacija gali būti keičiama be išankstinio pranešimo 1 Surinktas gartraukio korpusas su dekoratyviniu stiklu 1 vnt 2 Dekoratyvinė gartraukio ortakio dėžė 2 vnt 3 Dekoratyvinių dėžių tvirtinimo prie sienos lentjuostės 2 vnt 4 Gartraukio tvirtinimo prie sienos lentjuostė 1 vnt 5 Lankstusis ortakis skersmuo 153 mm ilgis 1 5...

Page 33: ...oje GARTRAUKIO APRAŠYMAS Išorinė gartraukio dalis sudaryta iš šių sudėtinių da lių žr 1 pav 1 Gartraukio valdymo pultas 2 Gartraukio korpusas 3 Atlenkiama plokštė užtikrinanti perimetrinį gar traukio oro išsiurbimą 4 Aliuminio riebalų sulaikymo filtras esantis po atlenkiama plokšte žr 3 pav 5 apšvietimo lempos apatinėje gartraukio dalyje 6 Išorinė gartraukė sekcijos dalis 7 Vidinė gartraukio sekci...

Page 34: ...ežimą Be to perio diškai įsižiebia ši piktograma Aktyvavę piktogramą atidarote atlenkiamą plokštę ir įjungiate pirmąjį gartraukio variklio greitį Pakartotinai trumpai aktyvavę piktogramą iš jungsite variklio greičius Atlenkiama plokštė lieka atverta apšvietimo lempos įjungtos Pakartotinai aktyvavę ilgiau nei 3 sek išjungsite gartraukio variklio greičius bus išjungtos apšvieti mo lempos uždaryta at...

Page 35: ...is jis yra pranašesnis nei jutiklinis pultas Kai kurias procedūras galima atlikti tik su nuotoliniu valdy mo pultu Dėmesio Nuotolinis valdymo pultas tiekiamas su sumon tuotu maitinimo elementu Norint kad maitinimo elementas neišsikrautų anksčiau nei prasidėjote naudotis gartraukiu tarp maitinimo elemento ir valdymo pulto kontaktų įstatyta apsauginė plė velė Prieš naudojantis plėvelę reikia pašalin...

Page 36: ...ą režimu GARTRAUKIO PRIEŽIŪRA Prieš valant ar remontuojant gartraukį atjunkite jį nuo elektros tinklo Dažytų garintuvo dalių valymui naudokite drėgną medžiagą sumirkytą šiltame vandenyje su neutralia skalbimo priemone Plieninių varinių ir žalvarinių paviršių valymui naudokite specialias priemones pagal atitinkamas instrukcijas Niekada nenaudoki te chloruotas ar rūgštines valymo priemones abra zyvu...

Page 37: ...urvinei sienoje reikia jas pažymėti Išdėstykite ant sienos gar traukio tvirtinimo plokštę horizontalioje plokš tumoje kad kabinant ant jos gartraukį būtų gautas reikiamas atstumas iki stalviršio Pažy mėkite plokštės tvirtinimo angas 9 pav 2 Išgręžkite reikiamo skersmens angas Angų gy lis turi atitikti murvinės ilgį 3 Prisukite montavimo plokštę išgręžtoje vietoje 9 pav 4 Sumontuokite plastmasinį p...

Page 38: ...NGIMAS PRIE ELEKTROS TINKO Gartraukis jungiamas prie 220 240 V AC 50 Hz įtampos maitinimo tinklo Norint išvengti pažeidimo elektros srove gartrau kis turi būti pajungiamas į įžemintą elektros lizdą Kategoriškai draudžiama montavimo metu nupjauti šakutę Pažeidus elektros laidą jį keisti gali tik kvalifi kuotas specialistas Norint papildomai apsaugoti gartraukį nuo įtam pos šuolių rekomenduojama jį ...

Page 39: ...tiliseerides antud seaded õigesti aitate Te ära hoida võimalikke negatiivseid tagajärgi keskkonnale ja inimese tervisele Sümbol esemel või sellega kaasneval dokumentat sioonil viitab sellele et antud eseme utiliseerimisel ei tohi seda käsitleda kui tavalist olmeprügi Selle asemel tuleb see üle anda punkti mis tegeleb elektrilist ja elektroonset inventari utiliseerimisega Käitlemine peab toimuma va...

Page 40: ...taja sees näha mootori karpi vt joon 2 mootori ja tiivikuga Õhupuhastaja ülemises korpu se osas on monteerimiskarp ja alandav transfor maator Õhupuhastaja lisaaksessuaariks on söefilter ei kuulu komplekti Söefiltrit kasutatakse ruumis õhu filtreerimiseks kui õhupuhastaja töötab retsirkulatsiooni režiimil vt Õhupuhastaja kasutamine Söefiltri ostmine on võimalik jaemüüjalt TÄHELEPANU Antud õhupuhast...

Page 41: ...ik vaid avatud liugpaneeliga Antud piktogrammiga ei saa mootorikiirused välja lülitada Piktogrammile vajutamisel saab käivitada ja välja lülitada taustavalgustus vaid avatud liupa neeliga Liugpaneeli sulgemine toob automaatse taustavalgustuse kustumise Kella seadistamine Puutetundliku juhtimispuldi abil saate määrata kellaaega Kellaaja seadistamist tuleb teostada töötava õhupuhastajaga liugpaneel ...

Page 42: ...itsekile Kaitsekile tuleb eemaldada enne juhti mispuldi kasutamist Komplekti kuuluval toiteele mendil on ainult demonstratiivsed funktsioonid ja see ei kuulu vahetamisele garantiihoolduse alusel Toiteelement mille tööaeg saab täis tuleb asenda da analoogsega Nagu ka puutetundlikul juhtimispuldil toob nupule vajutus kaasa õhupuhastaja käivitamise ja liugpaneeli avamise Erinevalt puutetundlikust juh...

Page 43: ...ooli kalt nende kasutusjuhendeid Ärge kasutage kloori ja happelisi puhastusaineid abrasiivseid vahen deid ja käsnasid mis võivad kriimustada õhupu hastaja pealispinda Alumiiniumist rasvafilter Rasvaosakesi ja tolmu püüdev alumiiniumist ras vafilter samuti ummistub Selle puhastamine toimub happeliste puhastusai netega või tõhusa puhastusainega leotades rasva filter eelnevalt soojas vees või kui see...

Page 44: ... le nõutud vahemaa Märkige ära lati kinnitus kohtade avad joon 9 2 Puurige vastava läbimõõduga avad Avade sü gavus peab vastama tüüblite pikkusele 3 Keerake kinnitusplaat puuritud avadesse joon 9 4 Paigaldage plastmassist üleminekuäärik kui see pole veel paigaldatud fikseerides see kindlalt oma kohale 5 Riputage korpus tugipunktidele A ja B vasta valt joonisele joon 10 Märkige ära õhupu hastaja ka...

Page 45: ...k kuhu õhupu hastaja ühendatakse olema maandatud Monteerimisel hargi lühemaks lõikamine on rangelt keelatud Elektrijuhtme kahjustamisel teostab selle va hetamist kvalifitseeritud spetsialist Õhupuhastaja lisakaitsmiseks faasipinge kõikumi se eest soovitame ühendada see läbi 6 A lisalüliti Õhupuhastaja on paigaldatud Lülitage see sisse ja kasutage pikki aastaid ...

Page 46: ...nstructions Remarques importantes La hotte est destinée seulement à un usage do mestique La garantie de produit est limitée et ne peut s étendre aux cas si vous n utilisez pas le pro duit selon sa destination directe Veuillez vous assurez de la fonctionnalité de pro duit à tous les modes avant de monter la hotte et de retirer le film protecteur regardez la partie Installation de hotte Tous les tra...

Page 47: ...ieur 7 Le carter extérieur 8 Le verre décoratif Lorsque le filtre à graisse est enlevé vous verrez à l intérieur de hotte un carter de moteur regar dez l im 2 à moulinet La boîte d encastrement et l abaisseur de tension se trouvent en haut dans la carrosserie Les filtres à charbon anti odeurs hors complet sont les accessoires supplémentaires pour la hotte Ils sont utilisés pour filtrer l air au mo...

Page 48: ...t lorsque le panneau basculant se ferme Réglage de l heure En utilisant la pupitre tactile vous pouvez régler l heure actuelle Il est nécessaire que pendant le réglage de l heure la hotte soit en marche le pan neau est ouvert L heure actuelle sera montrée sur l écran seulement lorsque la hotte est en marche L écran ne montre aucune information quand la hotte est en mode de veille Afin d activer la...

Page 49: ...i nutes Le délai maximal est 60 minutes Touchez pour réduire le délai de 1 minute ou pour l augmenter de 1 minute Vous pouvez quitter le mode de réglage en appuyant le bouton ou en attendant 10 secondes Appuyez le bouton position 3 image 5 lorsque le moteur de hotte est arrêté pour passer en mode de réglage de l heure Réglez l heure né cessaire en utilisant les boutons ou Ap puyez sur pour passer ...

Page 50: ...s l ordre inverse Tirez la poignée de décrochement à ressort mettez le filtre à place et lâchez la poignée Le filtre à charbon doit être remplacé une fois par 5 mois Appuyez et tournez le filtre dans le sens des aiguilles pour l installer sur les grillages protec teurs du carter de moteur Pour démonter le filtre appuyez et tournez le filtre dans le sens inverse L installation des filtres à charbon...

Page 51: ...n conduit d air flexible de lon gueur 1 5 m si vous avez besoin d un conduit plus long il sera nécessaire de l acheter à part et la bride d adaptation Étanchez la zone de jonction avec un produit d étanchéité et fixez le conduit sur la bride par un collier hors complet Faites attention ce qu il est interdit d utiliser le conduit avec le diamètre qui est moins de celui recommandé par l instruction ...

Page 52: ...er si Este producto está marcado de acuerdo con la Directiva Europea 2002 96 UE sobre residuos de aparatos eléctri cos y electrónicos WEEE Al asegurar una eliminación correcta de este producto Usted ayudará a evitar posi bles consecuencias negativas para el medio ambiente y la salud humana El símbolo en el producto o en la documentación de apoyo especifica que no se puede tratar este producto como...

Page 53: ...xterior de la chimenea decorativa de la campana 8 La parte interior de la chimenea decorativa de la campana 9 Vidrio decorativo En el interior de la campana después de quitar el filtro de grasa de aluminio se encuentra una caja de motor con un conjunto de motor y el impulsor En la parte superior de la campana se encuentra la caja de montaje y el transformador reductor Un accesorio opcional para la...

Page 54: ...s del motor apaga las bombillas de iluminación cierra del panel plegable y la campana entra en el modo de espera El icono sirve para cambiar la velocidad de funcionamiento de campana El cambio es posible sólo con el panel plegable abierto Con este icono no se puede apagar las velocidades del motor Pulsación en el icono active disactive las bombillas de iluminación pero con el panel plega ble abier...

Page 55: ...s bate rías no están descargadas antes de la utilización de la campana entre la batería y los contactos del panel de control esta insertada película protecto ra Antes de usar la película debe ser eliminada Las baterías incluidas en el suministro sólo tienen una función de visualización y no pueden ser re emplazados en el servicio de garantía Usada ba tería debe ser reemplazada por la misma Como en...

Page 56: ...s que puedan rayar la superficie El filtro de grasa de aluminio se contamina ya que atrapa las partículas de grasa que viene a través de él Debe limpiarse con productos que no con tengan ácidos o lavados después de un remojo preliminar en agua caliente con un detergente eficaz o si es posible en el lavavajillas a una tem peratura de 65 C Los filtros de grasa extremada mente contaminados no deben s...

Page 57: ... se suspenderá la campana Instale la campana en la siguiente secuencia 1 Antes de comenzar la perforación de los agu jeros para los tacos en la pared es necesario hacer la marcación Coloque en la pared la co rrea de fijación de campana horizontalmente en modo que cuando se instala la campana obtener la distancia necesaria para la mesa Marca los agujeros para la correa de fijación Fig 9 2 Perforar ...

Page 58: ...los puntos de fijación de la chimenea y la correa de fijación de la chime nea se alinean y conectan CONEXIÓN ELÉCTRICA Campana extractora está conectada a la tensión de red 220 240 VAC 50 Hz Para evitar la electrocución la campana extractora se debe conectar a una toma de la red eléctrica con una conexión de tierra Está absolutamente prohibido cortar el conec tor durante la instalación de la campa...

Page 59: ...ei der Diagnostik durch den Spezialisten des Servicezentrums das Erzeugnis intakt sein wird behält sich das Servicezentrum vor von dem Verbraucher die Ent geltung der unnötigen Anfahrt zu verlangen die nach Tarif bewertet wird Der Hersteller ist für keinerlei Schaden verantwortlich der seinem Verbraucher oder seinem Besitz angerichtet wird führt auch keine kostenlose Reparatur in den folgenden Fäl...

Page 60: ...trade or ganization and seller s signature including tear off cou pons model and serial number of the product Before calling a service center specialist read the in struction manual of the product carefully If a specialist of the service center correctly diagnoses the product the service center will have the right to demand payment of a false call from the consumer according to the price list The ...

Page 61: ... сервисного центра внимательно прочитайте инструкцию по эксплуата ции изделия Если при диагностике специалистом сервисного центра изделие окажется исправно то за сервисным центром остаётся право требовать от потребителя оплаты ложного вызова согласно прейскуранту Изготовитель не несёт какой либо ответственности за любой возможный ущерб нанесённый потребите лю или его имуществу и не производит бесп...

Page 62: ...noplēšamos ta lonus izstrādājuma modelis un sērijas numurs Pirms izsaucat Servisa centra speciālistu rūpīgi iepa zīstieties ar lietošanas instrukciju Ja servisa centra spe ciālists diagnostikas laikā konstatēs ka izstrādājums funkcionē normāli tad Servisa centrs var izmantot savas tiesības prasīt no apmaksāt nepamatoto izsaukumu pēc cenrāža Ražotājs neuzņemas atbildību par jebkādu iespējamo kaitēj...

Page 63: ...atidžiai perskaitykite gaminio eksploatavimo instrukciją Jei atlikęs diagnostiką techninės priežiūros centro spe cialistas nustato kad gaminys techniškai tvarkingas te chninės priežiūros centras turės teisę reikalauti iš varto tojo apmokėti už klaidinantį iškvietimą pagal kainoraštyje patvirtintus įkainius Gamintojas nebus atsakingas už bet kokią galimą vartotojui ar jo turtui sukeltą žalą ir nesu...

Page 64: ...sialisti tellimist lugege ho olikalt läbi toote kasutusjuhend Kui teeninduskeskuse spetsialisti diagnostika järel osutub toode töökorras ole vaks siis teeninduskeskusel jääb õigus nõuda tarbijalt visiidi eest tasumist vastavalt kehtivale hinnakirjale Tootja ei kanna vastutust tarbijale või tema varale teki tatud võimalike kahjude eest ning ei teosta tasuta remon ti järgmistel juhtudel puuduvad tas...

Page 65: ...alement marqués sur le bon de garantie Avant d appeler le technicien de SAV nous vous deman dons de lire attentivement l instruction d exploitation Si lors du diagnostic le technicien trouve que le ptoduit est operationnel le SAV se réserve le droit de demander au client de payer les frais de fausse alarme selon liste de prix Nous ne serons en aucun cas tenus responsable pour tout dommage spécial ...

Page 66: ...delo y el número de serie del producto Antes de llamar al especialista del centro de servicio léa con atención el manual de operación del producto Si durante el diagnóstico con el especialista del centro de servicio el producto resulta que funciona correctamente entonces el centro de servicio está en el derecho de exigir al usuario el pago de la flasa llamada de acuerdo con la lista de precios El ...

Page 67: ...www krona steel com ...

Reviews: