background image

8. Changing TV Channel

If some channels are stored, you have only
stored channels to explore by pressing
these buttons. If you have not saved any
channel  yet,  you  go  through  all  the
channels with these buttons. For your
convenience, it is recommended to store
some channels before use.

When you press <CH> buttons in TV Mode
(including PIP mode), the TV changes
channels in sequence.

You can view any channel directly by using
number buttons on the remote control.

You can change TV channel in menu mode, too.

9. Volume Control / MUTE

You can control volume when audio signal is
connected such as TV, PC and external
signal.

Press to increase or decrease the volume.

The system volume can be controlled by
OSD button. 

Press < MUTE > button to cut off the sound
temporarily and press it again to revive the
sound.

10. Auto Adjustment of PC Mode

Press <AUTO> button of remote control to
adjust the size of monitor screen and
resolution  to  the  best  conditions
automatically. 

In sub-menu, use <CH> button to select up
and down menu like main menu operation.

To control function of menu, use <VOL>
button.

If you finished all controls of menu, press
<MENU> button in sub-menu to enter main
menu and then press <MENU> button again
to exit menu control.

Or use <EXIT> button of the bottom of
remote control to finish current controlling
menu. 

7. Memorizing TV Channels

To search TV channel, press <SCAN>
button in TV mode. 

TO stop searching TV channel and to store
searched  TV  channel, press  <MENU>
button.

TV channel memory function works only
during the airtime. If TV signal is very
weak, it is hard to search signals.

When the power is cut off or the unit
system is reinitialized, all the recorded
channel information disappears. In this
case, you need to record the channels
again.

To erase searched TV channel, use channel
edit function of menu mode

Channels 2~69 are for “off-air”(antenna)
and channels 1 and 14~69 are for cable
channels. Channels 14~69 are for both
antenna and cable channels. To select one
of them, use source menu of TV menu. 

16

17

DCM-17WT 

Summary of Contents for DCM-17WT

Page 1: ...inutes to read this user s manual for the best performance of this TV Please keep this user s manual for future reference The present home appliance is certified and approved by EMC EMI and can be used in all places including residency area Information in this manual is subject to change without prior notice Ver1 00E ...

Page 2: ...Communications However there is no guarantee that interference will not occur in a particular installation If this equipment does cause unacceptable interference to radio and television reception which can be determined by turning the equipment off and on the user is encouraged to try to correct the interference by one or more of the following measures Reorient or relocate the receiving antenna In...

Page 3: ...k or fire 10 Do not place the TV set on an unstable cart stand tripod bracket or table Otherwise it can fall This can cause serious injury to a child or adult and serious damage to the appliance 11 Do not incline the TV set over 15o This may cause serious injure to a child or adult and serious damage to the appliance Safety Instructions To reduce the risk of fire electrical shock and other injurie...

Page 4: ... an electric shock or fire 2 After you removing the batteries from remote control keep them out of children s reach Children or infants may swallow them If it happens contact your doctor immediately 3 Never insert any metal object into monitor openings This may cause an electric shock fire or injury 4 Do not remove its cover or back No user serviceable parts inside This may cause an electric shock...

Page 5: ...uto Adjustment You can simply adjust the TV to the best conditions with one button Remarkable Functional Extension The unit carries out the functions of PC monitor as well as TV and can work in connection with various products such as DVD VCR Camcorder and Audio Perfect Image The most advanced TFT LCD panel is adapted to the unit It removes the screen flicker effect of Braun tube mode which reliev...

Page 6: ...does not be bent if you use Round Leads 75 ohm Round Leads Flat Twin Leads and antenna converter are separate purchasing items TV Parts 1 Power 10 S Video In jack 2 Remote Control Sensor 11 Composite Video In jack 3 Menu 12 Audio L In jack 4 Input Mode 13 Audio R In jack 5 CH Up Down 14 Stereo Audio In jack 6 Power indicator 15 Stereo Audio Out jack 7 Speaker 16 TV Antenna 8 Power Input Connector ...

Page 7: ...l connectors are connected with same color of input and output S Video outputs give you better images than Composite Video outputs 12 13 DCM 17WT ViDEO LINE IN RGB Display Card Output AUDIO Intput LINE IN LINE OUT Audio Output Audio Input Audio Video S Video L AUDIO R S VIDEO Rear Connection Parts of the TV Rear Connection Parts PC or External Equipment Earphone External Equipment s Rear Connector...

Page 8: ... DOWN Change TV channel MENU MENU control VOLUME UP DOWN Volume control PC TV Change PC TV signal 0 9 Select TV channels directly AUTO Auto adjustment of PC Mode Pause PIP PIP select MUTE Silent of sound ZOOM IN OUT Control screen size Change PIP position SCAN Auto TV channel selection EXIT Exit menu or function The remote control can be used up to about 7m 15o R L from remote control sensor 2 Ins...

Page 9: ...esolution to the best conditions automatically In sub menu use CH button to select up and down menu like main menu operation To control function of menu use VOL button If you finished all controls of menu press MENU button in sub menu to enter main menu and then press MENU button again to exit menu control Or use EXIT button of the bottom of remote control to finish current controlling menu 7 Memo...

Page 10: ... Picture Press II button to freeze the picture and press again to continue 12 PIP function and changing the screen size Press PIP button to create PIP screen Press PIP button to change the screen size The size changes as following order off small middle large PIP is only available in PC monitor mode PIP is available with TV mode and external signals Composite S Video You can adjust PIP input signa...

Page 11: ...of the LCD 2 Contrast This controls the contrast of the LCD 3 Color This adjusts the depth of TV image color 4 Tint This adjusts the tint of TV image color 5 Image This adjusts the clarity and the focus of screen image 6 Scaling Normal Image displayed in full screen zoom2 Image enlarged by 200 from the center of the screen Anamorphic Image displayed in panoramic view Zoom Image enlarged by 150 fro...

Page 12: ...t It adds new entries or deletes stored channels You can edit channels either by pressing VOL button on the remote control or turning POWER button to the right 1 osd It provides nine preset OSD positions 2 osd h v pos It controls OSD position 3 osd timeout User can select the time up to 60 seconds 4 osd background It controls the color of OSD background Opaque gray translucent transparent Utilitie...

Page 13: ...te control or turn the rotary button to the right To stop channel search press the MENU button on the remote control or on the function button 2Channels 2 69 are for off air antenna and channels 1 and 14 69 are for cable channels Channels 14 69 are for both antenna and cable channels To select one of them use source menu of TV menu 7 Channel swap It changes stored channel numbers at will You can d...

Page 14: ...e is ON you can adjust brightness contrast color tint and sharpness 4 Brightness of PIP screen 5 Contrast of PIP screen 6 Color of PIP scre 7 Tint of PIP screen 8 Sharpness PIP screen The conditions of PIP screen such as brightness contrast color and clarity may be somewhat inferior to those of normal screen Use PIP TV menu if you need to control TV menu when monitor mode is PIP TV Advanced 1 Shar...

Page 15: ...olume of audio 3 Freeze frame It pauses the image by selecting ON 4 Auto adjust It adjust the screen to the best condition automatically For this press the VOL button of remote control or turn the power button of OSD to the right Adv PIP You can control adv pip menu only when the PIP mode is ON 1 H Position It controls the horizontal PIP screen position 2 V Position It controls the vertical PIP sc...

Page 16: ... not support resolution 1280 768 please use it after upgrading the PC graphic card to the newest driver If your graphic card cannot support resolution 1280 768 60Hz please use your PC in the resolution 1024 768 or 1280 1024 5 Source You can select a source in the following order PC TV Composite S video 6 Factory reset This allows you to reset all the OSD control settings back to the factory settin...

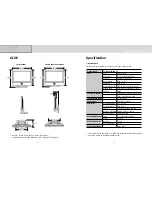
Page 17: ...io Output MAX 5W x 2 Stereo PC Monitor Horizontal Frequency 30 61 kHz Vertical Frequency 56 85 Hz Colors 16 2M colors 6bit FRC 2bit Maximum Resolution WXGA 1280 H x 768 V Other Resolution XGA SVGA VGA Power Supply Adapter Input AC 100V 240V 50 60Hz Output DC 12V Power Consumption Maximum 40W Power Saving OFF 5W Power Saving Mode VESA DPMS The present home appliance is certified and approved by EMC...

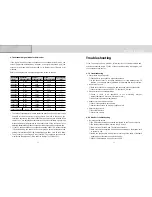
Page 18: ...ok off 2 The Standard Signal Mode for PC Monitor If the signal from the system corresponds to the standard signal mode the screen is adjusted automatically However if the signal discords with it the screen may go blank with the power LED on or display Out of Range error message Refer to the display card manual and adjust the screen as follows Resolution Horizontal Vertical Clock Sync Polarity H x ...

Page 19: ...al calamity thunderbolt fire storm flood gas sea wind earthquake etc caused trouble to the product 9 User did not respect the present instructions manual and caused trouble to the product 10 The product has trouble due to client s other faults 11 If the purchase date cannot be recognized we count the quality guarantee term from the first day of the third month after the date of manufacture Unable ...

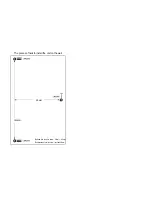
Page 20: ...162 mm 92 mm The places of nails to install the unit on the wall The head size of nail or screw 3 7mm 4 5mm The thickness of nail or screw less than 2 6mm Fixing hole Fixing hole Fixing hole ...

Reviews: