background image

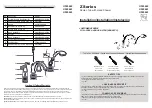
Step 3: Securing the faucet assembly

Install the weight clip (H) at the point of

the hose marking "weight here". Insert

the weight (G) onto the weight clip (H) 

by sliding it down onto the weight clip (H).

Step 4: Connect waterlines to main valve

Attach waterlines to angle stops

and tighten until snug. Turn on angles

stops and check for leaks (DO NOT TURN

FAUCET ON)

6

Weight 

here

Weight 

here

H

G

Connect the filter water inlet pipe (b) into the 

end of the filtration manifold (not including). 

Pull moderately to ensure the connection has 

been made.

b

NOTE: 3/8" typical connection attached. 1/4" 

connector / reducer included in the box for 

A-typical connections.

NOTE

are installed before connecting to 

the main valve

.


Summary of Contents for KFF-1610

Page 1: ...Single Handle Filtration Kitchen Faucet KFF 1610 INSTALLATION GUIDE www kraususa com I Toll Free 1 800 775 0703 I 2019 Kraus USA Inc I REV AUG 09 2021...

Page 2: ...ms with your product Please contact our Customer Service Team 1 800 775 0703 customerservice kraususa com Have the model number available and retain a copy of your receipt with purchase date for refer...

Page 3: ...ustomer Service at 800 775 0703 for a replacement Pre drilled countertop hole size requirement 1 3 8 min Max countertop thickness 3 3 8 Tools you will need 13 Wrench Phillips Screwdriver Safety Goggle...

Page 4: ...y Head C Rubber Washer D Metal Washer F Screws Diagram and Parts List G Weight B H Weight Clip C B Faucet Body E Mounting Nut D E F K G H J I Quick Connector I J 3 8 to 1 4 Filter Adapter K 2 5mm Hex...

Page 5: ...4 Faucet Dimension Installer Tip 3 8 compression 2 1 8 54 0mm 8 5 8 220 0mm 10 3 4 273 5mm 3 3 8 84 6mm 19 1 4 490 5mm 4 1 4 108 6mm 5 1 4 132 9mm 9 1 8 230 3mm 6 3 8 160 3mm 25 3 8 filter tube...

Page 6: ...p Secure the faucet B to the countertop using the rubber washer C metal washer D and mounting nut E provided Tighten screws F Step 2 Securing the faucet assembly Push the quick connector I firmly upwa...

Page 7: ...ines to angle stops and tighten until snug Turn on angles stops and check for leaks DO NOT TURN FAUCET ON 6 Weight here Weight here H G Connect the filter water inlet pipe b into the end of the filtra...

Page 8: ...s Re tighten any connections if necessary but do not overtighten Reinstall the spray head A by hand tightening it back onto the spray hose in a clockwise direction 7 Filtered Cold Water Function Make...

Page 9: ...ck hose w Matte Black connector BLMB Gray hose with Spot Free Stainless connector GRSFS Gray hose with Polished Chrome connector GRCH CH SFS MB BB SFACB 14 Filter Washer 15 Rubber Metal Washer KP27167...

Page 10: ...ten bonnet nut 7 with an adjustable wrench The aerator has an irregular or reduced water flow The aerator is dirty or mis fitted Remove the aerator and check for debris Ensure that the rubber washer i...

Page 11: ...ontinued or display products whether such items are purchased at discount outlets unauthorized dealers and or sold on clearance This warranty does not cover instances of negligence misuse abuse improp...

Page 12: ...charges will be covered foe the first 1 year of the warranted replacement part or product HI AK and Puerto Rico shipping charges may apply International shipping fees are not included All incidental...

Page 13: ...IMPORTANT Register Your Kraus Product REGISTER TODAY http www kraususa com registration Activate Your Warranty Access Premium Customer Support Get Product Information www kraususa com...

Reviews: