


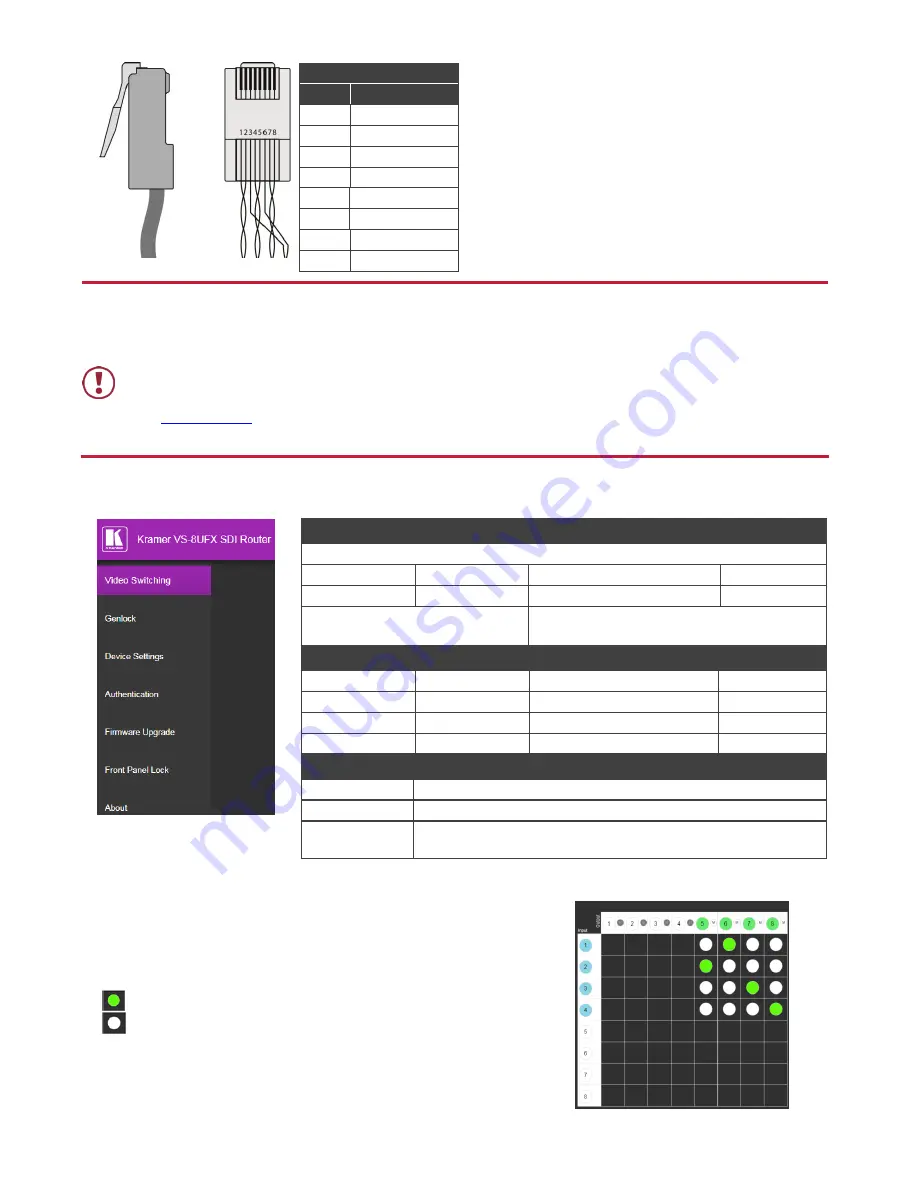
RJ-45 Pinout
:
PIN EIA /TIA 568B
PIN
Wire Color
1
Orange / White
2
Orange
3
Green / White
4
Blue
5
Blue / White
6
Green
7
Brown / White
8
Brown
Step 5: Connect the power
Connect AC power to the rear of the
VS-8UFX
, switch on its power and then switch on the power on each device.
Safety Instructions
Caution:
There are no operator serviceable parts inside the unit.
Warning:
Use only the power cord that is supplied with the unit.
Warning:
Do not open the unit. High voltages can cause electrical shock! Servicing by qualified personnel only.
Warning:
Disconnect the power and unplug the unit from the wall before installing.
See
www.KramerAV.com
for updated safety information.
Step 6: Control the VS-8UFX via the front panel buttons and via the:
Web Pages:
RS-232 and Ethernet:
RS-232
Protocol 3000
Baud Rate:
115,200
Stop Bits:
1
Data Bits:
8
Parity:
None
Command format example (define port
6 as an output port):
#PORT-DIRECTION 1,IN
~01@PORT-DIRECTION 1,IN
TCP/IP Parameters
IP Address:
192.168.1.39
UDP Port #:
50000
Subnet Mask:
255.255.0.0
Maximum UDP Connections:
20
Default Gateway:
192.168.0.1
Maximum TCP Connections:
Unlimited
TCP Port #:
5000
Full Factory Reset
Web Page:
Device Settings Web page.
Protocol 3000:
#FACTORY<CR>
Rear Panel
RESET Button:
Press RESET for 10 seconds while the machine is on. The device
automatically resets and powers up again, loading factory default values.
To configure the ports via the Video Switching Web page
:
Define a port as an input or output by clicking a port number.
Toggle Mute (M) on each output.
Click a white button in the matrix to switch an input to an output.
= current input to output routing state
= optional input to output routing
To route an input to an output using the front panel buttons
:
1. Press an output (green) PORT button.
2. Press an input (blue) PORT button.
The selected input is swtiched to the selected output.


