


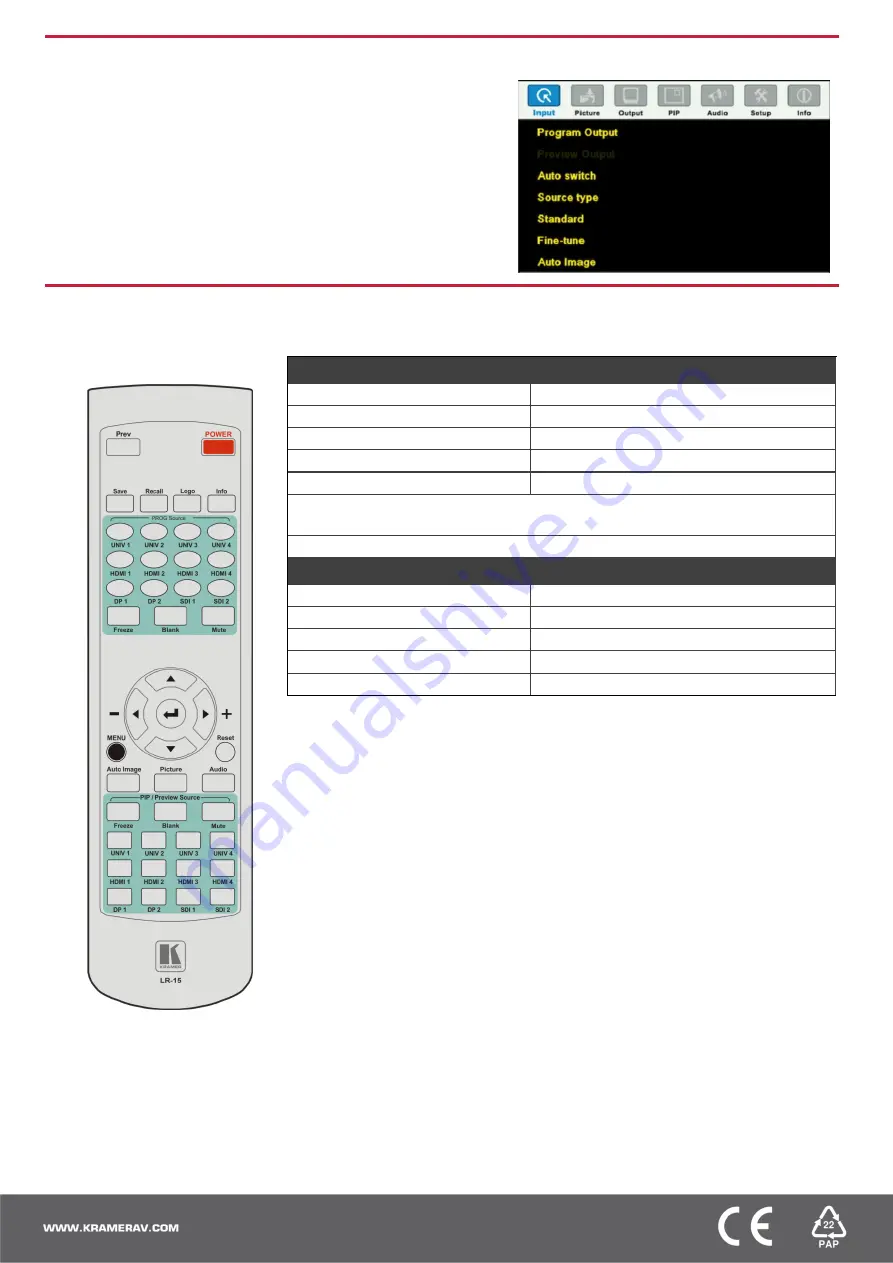
Step 6: Set operation parameters via the OSD menu
Enter the OSD menu via the
MENU
button on the front panel or the
IR remote control transmitter. Select a menu item and set parameters
as required. Sub-menus include: Input, Picture, Output, PIP, Audio,
Setup and Info.
Note:
if you do not see an image, verify that the display, TV, or
projector is in good working order, is connected to the
VP-732
, and
that the
VP-732
is selected as its source. If you still don't see an
image, press and hold the
RESET TO XGA/720P
button for 5
seconds to reset the output to XGA or 720p resolution.
Step 7: Operate VP-732 via the front panel buttons and via the:
IR Remote Control Transmitter
RS-232 / Protocol 3000 & Legacy protocol and Ethernet / web pages
RS-232 Default Parameters
Baud Rate:
115,200
Data Bits:
8
Stop Bits:
1
Parity:
None
Command Format:
ASCII
Protocol 3000 example (set the remote input switching of video to HDMI 1 from HDMI In 2):
#ROUTE 1,1,2<CR>
Legacy Protocol example (switch PIP input to UNIV3): Y 0 92 2<CR>
Ethernet / Default Parameters
IP Address:
192.168.1.39
Subnet Mask:
255.255.255.0
Default Gateway:
192.168.1.254
Default TCP Port #:
80
Maximum TCP Ports:
1
Embedded Web Pages:
•
Routing & Scaling
– select Program and Preview inputs, adjust size and
position of the video image, and adjust the audio volume
•
Device settings
– set the device name, change Ethernet parameters, perform
factory reset and view system information
•
Input Settings
– configure the Program and PIP/Preview input settings
•
Output settings
– configure the Program and PIP/Preview output settings
•
Audio Settings
– configure the audio output settings
•
Miscellaneous Video Settings
– configure video settings such as Frame Lock,
Auto Image, Switching Mode, Frame Latency
•
EDID management
– read the EDID from any of the outputs, from a list of
default resolutions or from a file on your PC
•
Advanced Settings
– configure settings such as default input resolution, logo
display, video overlay, Blank and Freeze mode, screen color when there is no
signal, power settings
•
Custom Resolutions
– save up to four custom resolution settings each for the
input and the output
•
Security
– activate/deactivate the security mode and change the password
Performing a Factory Reset:
Note:
Factory reset includes resetting the IP address.
•
From the OSD: Go to Menu > Setup > Factory Reset and press
Enter
to Confirm.
•
Using the front panel reset button: Press and hold the
Reset to XGA/720p
button while powering up the machine.