


DIP-Switch Settings
DIP-switches 1 to 4 are set to OFF (up) by default.
DIP 1
DIP 2
Video Input Selection Method
OFF
OFF
Last connected switching mode: The last physically-connected input has priority.
OFF
ON
Priority switching mode: When the input sync signal is lost, the input with a live signal and next in
priority is selected automatically (as set in the Video & Audio Settings web page)
ON
OFF
Manual input selection
ON
ON
Manual input selection
DIP 3
DIP 4
Audio Input Selection Method (for HDMI and DP)
OFF
OFF
Automatic audio selection:
If embedded audio is detected, use it as the audio source.
If embedded audio is not detected, use the analog audio input as the audio source.
OFF
ON
N/A
ON
OFF
Use the embedded audio as the audio source
ON
ON
Use the analog audio input as the audio source
For optimum range and performance use the recommended Kramer cables available at
www.kramerav.com/product/VP-429H2
Step 5: Connect the power
Connect the 12V DC power adapter to the
VP-429H2
and plug the adapter into the mains.
Safety Instructions
Caution:
There are no operator serviceable parts inside the unit.
Warning:
Use only the Kramer Electronics power supply that is provided with the unit.
Warning:
Disconnect the power and unplug the unit from the wall before installing.
for updated safety information.
Step 6: Operate the VP-429H2
Operate
VP-429H2
via:
•
Front panel buttons
•
Remote control switches
•
Embedded web pages via
the Ethernet
•
Remotely, by RS-232
serial commands
transmitted by a touch
screen system, PC, or
other serial controller
RS-232 Control / Protocol 3000
Baud Rate:
115,200
Parity:
None
Data Bits:
8
Command Format:
ASCII
Stop Bits:
1
Example: (Mute the Video on the HDMI output): #VMUTE 1,
0<CR>
Default Ethernet Parameters
IP Address:
192.168.1.39
Gateway Address:
192.168.1.1
Subnet mask:
255.255.0.0
TCP Port #:
5000
Reset
Output Resolution
(Front Panel Buttons):
Press and hold HDMI IN 1 and HDMI IN 2 SELECT buttons
simultaneously for a few seconds to reset the output
resolution to 1080p.
Factory Reset
(Rear Panel Button):
Short press to reboot, long press to reset the device to
factory default parameters.
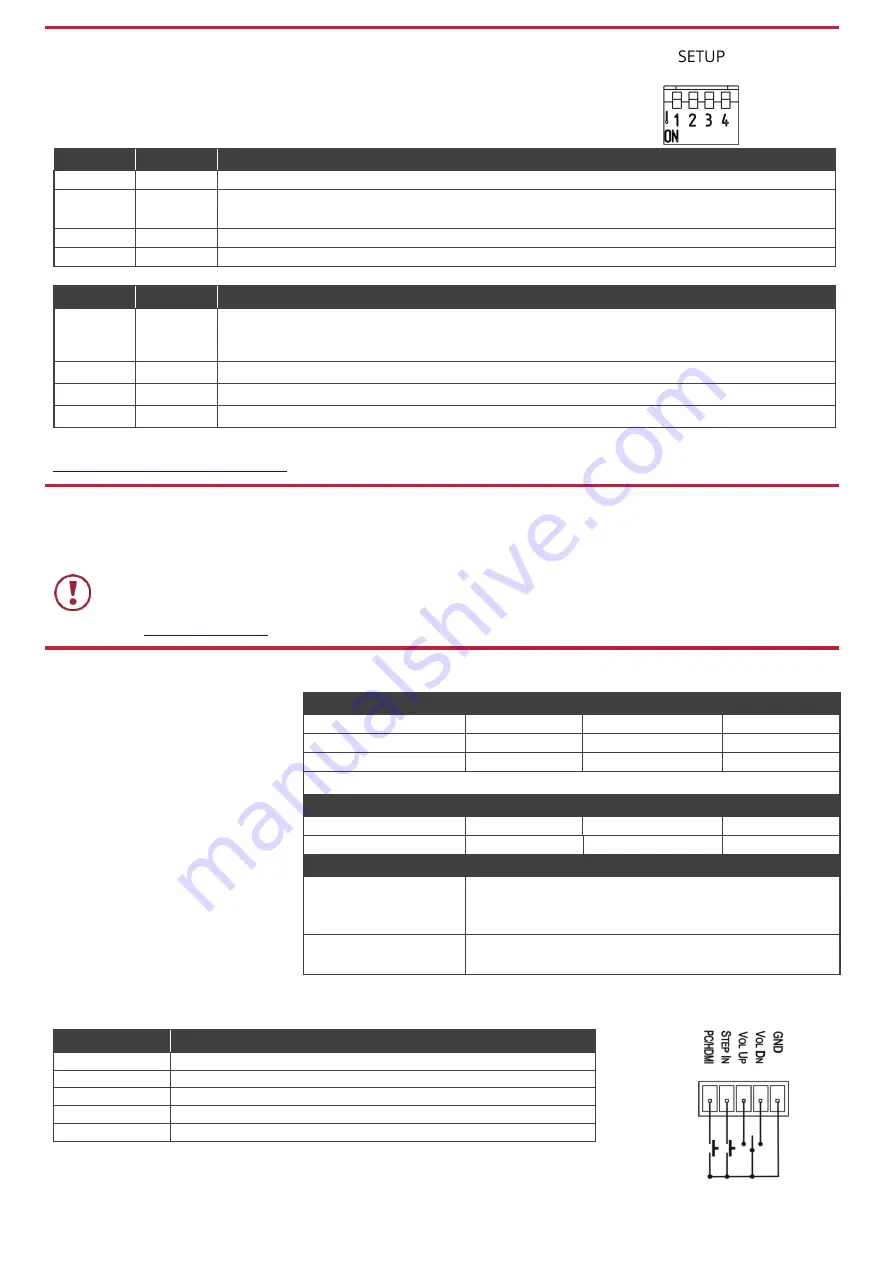
Use the Remote Control Switches to remotely select an input and activate an input via STEP-IN button
Momentarily connect the desired pin to the GND pin to perform the following functions:
Pin Name
Function
PC/HDMI
Press to cycle through the inputs.
STEP IN
Activate the step-in.
VOL UP
Increase the volume.
VOL DN
Decrease the volume.
GND
Connect to the common side of the switches.


