


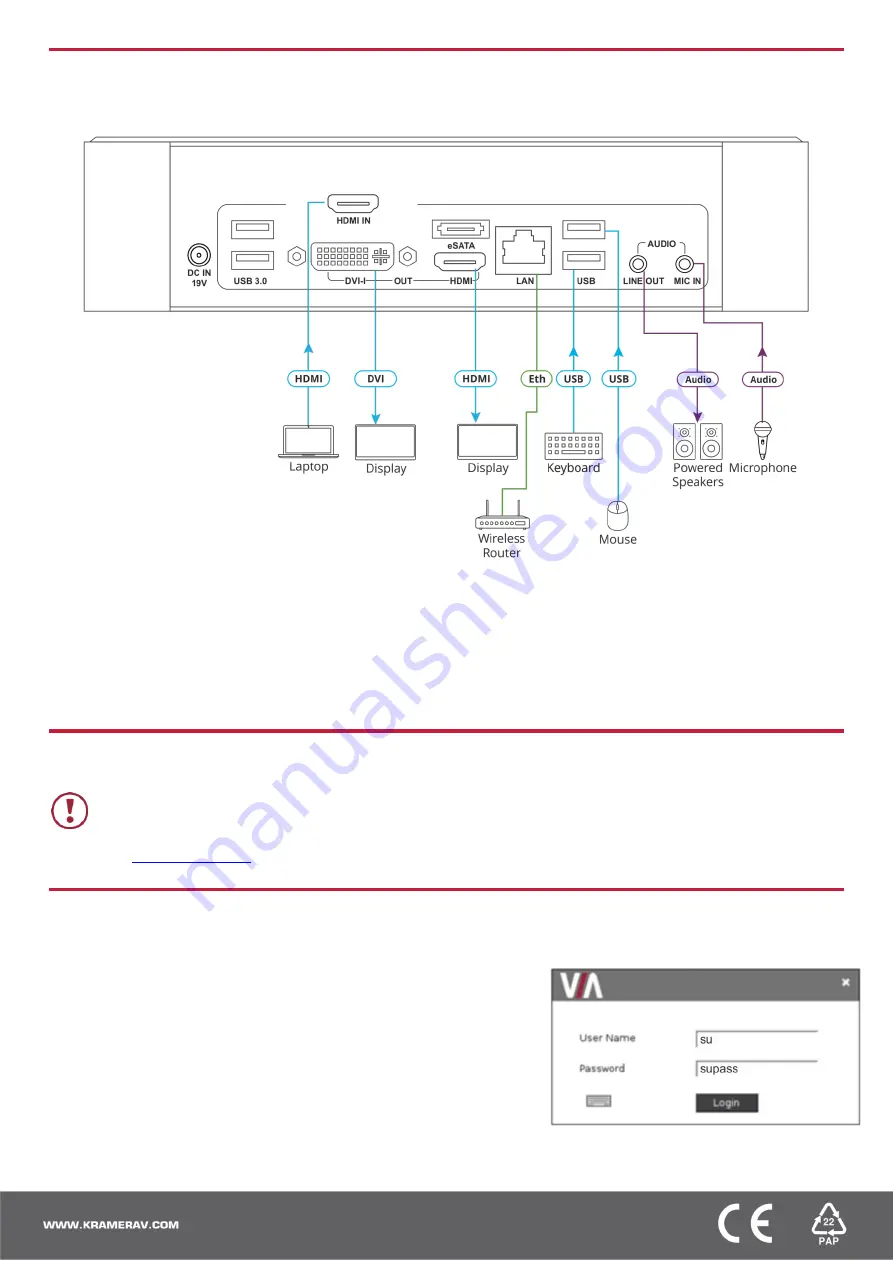
Step 4: Connect the inputs and outputs
Always switch OFF the power on each device before connecting it to your
VIA Campus PLUS
. For best results, we
recommend that you always use Kramer high-performance cables to connect AV equipment to
VIA Campus PLUS
.
1. Connect the keyboard and mouse.
2. Connect an HDMI display and/or a DVI display.
3. Connect a laptop or other HDMI source.
4. Connect a Local Area Network (LAN) cable for connection to your network.
OR
Use a wireless router for connecting to the device with Wi-Fi.
5. Connect powered speakers and a microphone.
Step 5: Connect the power
Connect the 19V DC power adapter to
VIA Campus PLUS
and plug it into the mains electricity.
Caution:
There are no operator serviceable parts inside the unit.
Warning:
Use only the Kramer Electronics power adapter that is provided with the unit.
Warning:
Disconnect the power and unplug the unit from the wall before installing.
See
for updated safety information.
Step 6: Configure VIA Campus PLUS
A wizard guides you through configuration. If you choose to skip the wizard, follow these steps for configuration:
1. On the
Kramer VIA
dashboard, click
Features
>
Settings
.
2. Enter the User Name (default = su) and Password (default = supass) and
click
Login
.
The VIA Settings window appears.
3. The VIA Settings tabs are:
LAN Settings
– Configure your network parameters and apply
settings (DHCP is enabled by default).
System Controls
– Manage your display and audio settings, run
control panel, select your language, etc.
Third Party Apps
–Install/remove third party software applications.
4. When you have finished defining settings, click
Reboot
to apply all
settings. For more details, see the
VIA Campus PLUS
User Manual.