background image

KRAMER:  SIMPLE CREATIVE TECHNOLOGY


Connecting the VA-1DVI Virtual EDID 


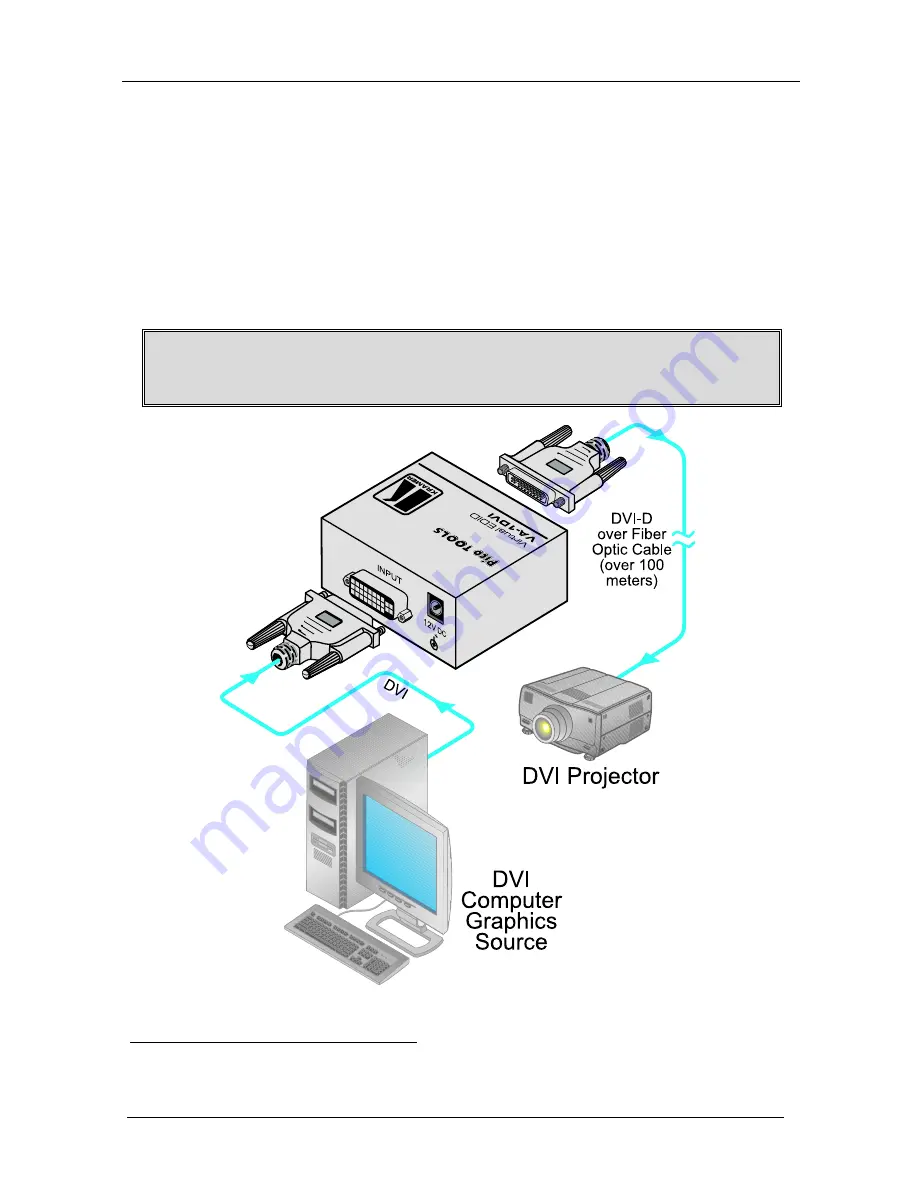
5.2  Reading the EDID 

For the PC to read the EDID information, as illustrated in Figure 3, do the 

following

1

1.  Connect a DVI source (for example, a DVI computer graphics source) to 

the INPUT DVI connector. 

2.  Connect the OUTPUT DVI connector of the 

VA-1DVI

 to the projector. 

3.  If required

2

, connect the 12V DC power adapter to the power socket and 

connect the adapter to the mains electricity. 

Turn the DVI source ON only after connecting the 

VA-1DVI

, so it can acquire 

the EDID properly 


Figure 3: Connecting the VA-1DVI Virtual EDID 


1 Switch OFF the power on each device before connecting it to your VA-1DVI 
2 Usually, the PC can supply power to the unit 

Summary of Contents for VA-1DVI

Page 1: ...Kramer Electronics Ltd USER MANUAL Model VA 1DVI Virtual EDID...

Page 2: ...I Virtual EDID 4 5 1 Acquiring the EDID 4 5 2 Reading the EDID 6 6 Technical Specifications 7 Figures Figure 1 VA 1DVI Virtual EDID 3 Figure 2 VA 1DVI Acquiring the EDID from the Display Device 5 Figu...

Page 3: ...r Each package includes the following items VA 1DVI Virtual EDID This user manual2 2 Getting Started We recommend that you Unpack the equipment carefully and save the original box and packaging materi...

Page 4: ...Connect only good quality connection cables thus avoiding interference deterioration in signal quality due to poor matching and elevated noise levels often associated with low quality cables Avoid int...

Page 5: ...splay size luminance data and for digital displays only the pixel mapping data 4 Your VA 1DVI Virtual EDID Figure 1 and Table 1 define the VA 1DVI Virtual EDID Top Side Panel Lower Side Panel Top Side...

Page 6: ...ction 5 2 5 1 Acquiring the EDID For the VA 1DVI to acquire the EDID information as illustrated in Figure 2 do the following 1 Connect the OUTPUT DVI connector to the input DVI connector of the displa...

Page 7: ...Connecting the VA 1DVI Virtual EDID 5 DVI Projector Figure 2 VA 1DVI Acquiring the EDID from the Display Device...

Page 8: ...DVI connector 2 Connect the OUTPUT DVI connector of the VA 1DVI to the projector 3 If required2 connect the 12V DC power adapter to the power socket and connect the adapter to the mains electricity Tu...

Page 9: ...nal 5Vpp TTL OUTPUT 1 x DVI 2 Dual Link DVI 1 0 1 2Vpp on a DVI Molex 24 pin female connector DDC signal 5Vpp TTL BANDWIDTH 3 3Gbps CONTROLS Capture EDID button POWER SOURCE 12V DC 40mA DIMENSIONS 6cm...

Page 10: ...KRAMER SIMPLE CREATIVE TECHNOLOGY 8...

Page 11: ...or the latest information on our products and a list of Kramer distributors visit our Web site www kramerelectronics com where updates to this user manual may be found We welcome your questions commen...

Reviews: