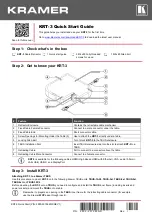
KRT-3 Quick Start (P/N: 2900-301022QS REV 1)
P/N:
2 9 0 0 - 3 0 1 0 2 2 QS
Rev: 1
Scan for full manual
KRT-3 Quick Start Guide
This guide helps you install and use your
KRT-3
for the first time.
Go to
www.kramerav.com/downloads/KRT-3
to download the latest user manual.
Step 1: Check w
hat’s in the box
KRT-3
Cable Retractor
1 Quick start guide
3 M4x50 Fully threaded
screws for wood
1 M5x25 Allen bolt
Step 2: Get to know your KRT-3
#
Feature
Function
1
Retractor Enclosure
Contains the retractable cable mechanism.
2
Fixed Cable Female Connector
Connect to a male connector under the table.
3
Fixed Cable End
Short connector cable.
4
Screw Openings for Mounting Under the Table (3)
Use to attach the
KRT-3
directly under a table.
5
Locking Allen Bolt
Turn to lock
KRT-3
to the TBUS enclosure.
6
TBUS Installation Slot
Insert TBUS enclosure side into the slot to attach
KRT-3
to a
TBUS.
7
Retracting Cable
Pull to connect to a connector above the table.
8
Retracting Cable Male Connector
Connect to a female connector.
KRT-3
is available for the following cables: HDMI (High Speed HDMI with Ethernet), VGA, audio (3.5mm),
LAN, USB, USB-C, and DisplayPort.
Step 3: Install KRT-3
Attaching KRT-3 to a Kramer TBUS
Use this procedure to mount
KRT-3
onto the following Kramer TBUS units:
TBUS-1AXL
,
TBUS-3xl
,
TBUS-4xl
,
TBUS-5xl
,
TBUS-6xl
and
TBUS-10XL
.
Before mounting the
KRT-3
onto
a
TBUS
,
you need to configure and install the
TBUS
inner
frame (including inserts and
power sockets) and mount the
TBUS
onto a table.
Remember to prepare an opening in the
TBUS
inner frame for the retracting cable connector (for example,
use the Kramer
WCP
pass-through insert).


