The use of good judgment and common sense is necessary by the operator in using this loader. The front
and rear wheels should be set for the widest wheel tread to assure best stability. Use extra caution when
rear wheel weights and tire ballast are added to a loader-equipped tractor. DO NOT ram into frozen dirt
piles, frozen manure piles, ice, etc., with great momentum where sudden shock loads are encountered.
Serious and costly damage may result to both the loader and the tractor.
When scraping or back dragging do not extend the attachment cylinders more than one half of the
cylinder’s stroke. A limited amount of leveling may be done, when the loader valving is arranged with a
float control. This will prevent damage to cylinder rods. Never ride in the bucket.
Before operating the loader, be sure no one is standing near it. Only one person, the operator, should be on
the tractor. Remain at the controls and under no circumstances leave the tractor unattended with the bucket
in a raised position.
Never lift a person in the bucket or walk under a raised bucket.
Never drive your loader-equipped tractor down a hill that is steeper than 15 degrees. Carry all loads low
and use care on side hills.
Always keep unused PTO shaft clutch levers disengaged.
Keep hands, feet, and clothing away from all moving parts.
Hydraulic oil, under pressure, can cause injury. Be sure that all connections are tight and that all pressure
is relieved before disconnecting any lines.
Care must be taken with your loader cylinders. Nicks, scratches, rust, or other shaft damage can result in
worn packing causing cylinder leakage and subnormal performance.
MOVE SLOWLY
USE COMMON SENSE
BE CAREFUL FOR YOUR OWN SAKE AND THAT OF OTHER PEOPLE
TRACTOR & SAFETY POINTERS
Page 7
Summary of Contents for Pro 2585
Page 8: ...SAFETY DECALS Page 6...
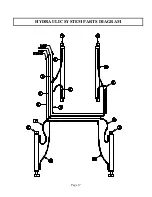
Page 19: ...HYDRAULIC SYSTEM PARTS DIAGRAM Page 17...
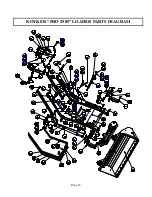
Page 20: ...KOYKER PRO 2585 LOADER PARTS DIAGRAM Page 18...
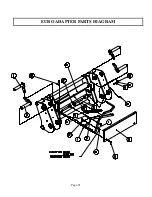
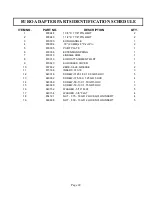
Page 23: ...EURO ADAPTER PARTS DIAGRAM Page 21...
Page 25: ...BUCKET PARTS DIAGRAM Page 23...
Page 27: ...ACCUMULATOR KIT PARTS DIAGRAM Page 25...


