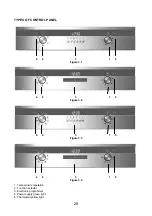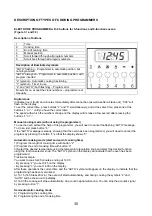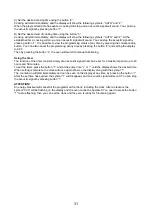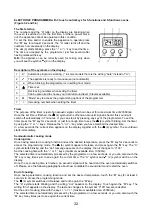
A) Set the desired cooking time using the button “2”.
Cooking will start immediately, and the display will show the following symbols: “AUTO” and “2”.
When the programmed time has expired, cooking will stop, and an acoustic signal will sound. You can stop
the acoustic signal by pressing button “1”.
B) Set the desired end of cooking time using the button “3”.
Cooking will start immediately, and the display will show the following symbols: “AUTO” and “2”. At the
established time, cooking will stop, and an acoustic signal will sound. You can stop the acoustic signal by
pressing button “1”. It is possible to view the programming status at any time by pressing the corresponding
button. You can also cancel the programming at any time by pressing the button “2” and setting the display
to 0.00.
Then by pressing the button “4”, the oven will switch to manual functioning.
Using the timer.
The function of the timer consists simply of an acoustic signal that can be set for a maximum period up to 23
hours and 59 minutes.
To set the timer, press the button “1”, and at the same time “+” or “-“ until the display shows the desired time.
When setting is complete, the clock will once again show on the display along with the symbol “1”.
The countdown will start immediately and can be seen on the display at any time, by pressing the button “1”.
After the set time has expired, the symbol “1” will disappear, and an acoustic signal will sound. You can stop
the acoustic signal by pressing button “1”.
ATTENTION!
An energy blackout will cancel all the programmed functions, including the clock. After a blackout, the
symbol “0.00” will be flashing on the display and the oven cannot be operated. You need to press the button
“1” to stop flashing, then you can set the clock and the oven is ready for functioning again.
31
Summary of Contents for OKB552CFX
Page 2: ......
Page 5: ...Схема встраивания Рис 1 3 ...
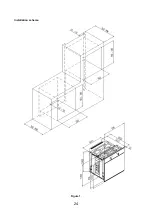
Page 26: ...Installation scheme Figure 1 24 ...
Page 44: ...12300189430 ...

