Each time you press the CALIB button you will cycle through the fol-
lowing settings.
0: 440 Hz, 1: 441 Hz, 2: 442 Hz, 3: 443 Hz, 4: 444 Hz, 5: 445 Hz, 6:
436 Hz, 7: 437 Hz, 8: 438 Hz, 9: 439 Hz
3
When you have selected the desired calibration setting, wait ap-
proximately two seconds without pressing any buttons. The new set-
ting will blink several times in the note name display indicating that
the calibration has been set. The
pitchblack PRO
will automatically
return to tuner mode.
Meter display setting
You can specify the display pattern that’s shown on the meter’s display.
You can choose one of three patterns. The default setting is “1: Regular
meter”.
TIP
If the AC adapter is unplugged after the setting is changed, it will
return to the default setting.
1.
Press the DISPLAY button.
The current setting is shown for several seconds on the display
(lit
blinking).
2.
While this setting is shown, press the DISPLAY button to select the
desired display pattern. The setting will change each time you press
the button.
1: Regular meter
Tune your instrument so that the center LED of the meter display
is lit up. The LED illumination will move from the center toward the
right if the note is sharp, or from the center toward the left if the note
is flat.
2: Strobe meter
Tune your instrument so that the illumination stops flowing in the
meter display. The illumination will flow from left to right if the note is
sharp, or from right to left if the note is flat.
3: Half-strobe meter
Tune your instrument so that the stream stops and only the center
LED is lit up. The right side of the meter display will strobe if the note
is sharp, and the left side of the meter display will strobe if the note
is flat. When the pitch is correct, only the center LED will light up.
3.
When you’ve chosen the desired setting, wait for two seconds with-
out pressing any buttons.
The display indication will blink several times, and the meter display
setting will be made. The tuner will then return to its normal state,
allowing you to tune.
Cable check function
CABLE CHECK
INPUT 1
When the cable is connected, the cable check function will start
and the results will be shown on the CABLE CHECK LEDs.
Normal:
Disconnected or short circuit:
TIP
Cable checking can only be done with mono cables. Stereo
cables cannot be checked.
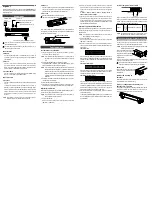
Installing rack-mounting adapters
By installing the included rack-mounting adapters, the tuner can
be attached to an EIA standard rack or case, etc., with the appro-
priate rack screws.
TIP
There is no difference between the left and right rack-mount-
ing adapters.
Align the rack-mounting
adapters with the mounting
slots on the tuner, and then
slide in the adapters from the
back.
Securely install the adapters so that they lock into place and will
not slip out.
If the tuner is attached to the rack without sufficiently install-
ing the adapters, the tuner may fall and become damaged.
Removal
Release the lock on the back of
the tuner, and then slide out the
adapter to remove it.
Rack-mounting holes
Use these holes to attach the
tuner to an EIA standard rack or
case with the included screws.
Using rack-mounting adapters as a stand
By installing the rack-mounting adapters in the mounting slots on
the bottom of the tuner, it can be positioned at an easy-to-read
angle when it is placed on a table.
DC 9 V IN jack
Connect the included AC adapter to this jack.
Never use any AC adapter other than the one that’s included.
Fasten the AC adapter’s power cord in place by hooking it on the cord
hook to prevent the included AC adapter’s plug from being discon-
nected from the terminal.
cord hook
Operation
Tuning procedure
1.
Connect the device to be tuned to the INPUT 1 jack (guitars, etc.) or
the INPUT 2 jack (keyboards, etc.).
TIP
If a device is connected to the INPUT 1 jack on the front panel,
the INPUT 2 jack on the rear panel will be disabled and cannot be
used.
2.
Press the STANDBY/ON button to turn on the tuner.
The POWER ON LED will light up, and the calibration setting (0–9)
will flash in the note display for a few seconds.
TIP
If there is no user input for up to 4 hours, the auto power-off func-
tion will automatically put the tuner in the standby power mode.
Holding down the MUTE button and pressing the STANDBY/ON
button while the tuner is turned on will disable the auto power-off
function.
3.
Set the calibration, meter display, and mute function settings as
necessary.
4.
Play a single note on your instrument.
5.
Tune while watching the meter display. The note display will indicate
the note name that is closest to the pitch you input.
Adjusting the calibration
You can specify the calibration (standard pitch for tuning, middle A on a
piano=A4). The default setting is “0: 440 Hz”.
TIP
If the AC adapter is unplugged after the setting is changed, it will
return to the default setting.
1
Press the CALIB button.
The current setting is shown for several seconds on the display
(lit
blinking).
2
While the current calibration setting is shown in the note name dis-
play, press the CALIB button again to adjust the setting.
Description
1.
Bouton
CALIB
2.
Bouton
DISPLAY
3.
Ecran
4.
Affichage d’accordage
5.
Témoin
POWER ON
6.
Témoin
CABLE CHECK
7.
Prise
CABLE CHECK
8.
Prise
MUTE
9.
Bouton
MUTE
,
Témoin
MUTE
10.
Prise
INPUT 1
(mono)
11.
Bouton
STANDBY/ON
12.
adaptateur de montage en rack
Beschreibung
1. CALIB
-Taster
2. DISPLAY
-Taster
3.
Display
4.
Meteranzeige
5. POWER ON
-Diode
6. CABLE CHECK
-Diode
7. CABLE CHECK
-Buchse
8. MUTE
-Buchse
9. MUTE
-Taster, Diode
10. INPUT 1
-Buchse
11. STANDBY/ON
-Taster
12.
Rack-Montageadapter
Controles
1.
Botón
CALIB
2.
Botón
DISPLAY
3.
Pantalla
4.
Pantalla del medidor
5.
LED
POWER ON
6.
LED
CABLE CHECK
7.
Jack
CABLE CHECK
8.
Jack
MUTE
9.
Botón
MUTE,
LED
MUTE
10.
Jack
INPUT 1
(mono)
11.
Botón
STANDBY/ON
12.
adaptadores de montaje en bastidor
1
2
3
4
5
9
6 7 8 10
12
12
11
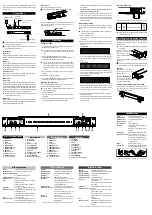
Parts of the pitchblack PRO
1. CALIB
button
2. DISPLAY
button
3.
Display
4.
Meter Display
5. POWER ON
LED
6. CABLE CHECK
LED
7. CABLE CHECK
jack
8. MUTE
jack
9. MUTE
button, LED
10. INPUT 1
jack (mono)
11. STANDBY/ON
button
12.
rack-mounting adapter
Thank you for purchasing the Korg
pitchblack PRO
rackmount tuner.
To help you get the most out of your new instrument, please read this
manual carefully.
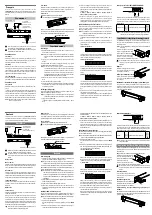
Connections
To your effect
pedals or amps etc.
Guitar or bass
Foot switch, etc.
Line out device(effecter,
keyboard, etc.)
AC adapter
(included)
To AC outlet
INPUT 2
DC 9V IN
OUTPUT
INPUT 1
MUTE
Turn off the power to all devices before you connect an instrument
to avoid damaging your equipment.
The INPUT 1/2, CABLE CHECK and OUTPUT jacks are mono.
Stereo (TRS) cables will not work.
Front panel
INPUT1 jack
Connect a cable from the INPUT 1 jack to the instrument to be tuned. If
a cable is connected to this jack, the INPUT 2 jack on the rear panel will
be disabled.
MUTE jack
Connect a latching (alternating) foot switch to this jack to enable or dis-
able the mute function without using the MUTE button. When the mute
function is enabled, the MUTE LED will light up, and the signal will not
be output from the OUTPUT jack.
CABLE CHECK jack
Connect one end of a standard mono instrument cable to the INPUT 1
jack and the other end to the CABLE CHECK jack.
Rear panel
OUTPUT jack
Connect a cable from the OUTPUT jack to your effect pedals, amp, etc.
The signal that is input from the INPUT jack passes through the buffer
and is sent to the OUTPUT jack. By pressing the MUTE button, you can
enable or disable the mute function for the signal that is output from the
OUTPUT jack. When the mute function is enabled, the MUTE LED will
light up, and the signal will not be sent from the OUTPUT jack.
TIP
When the tuner is in the standby power mode, the signal will not
be sent from the OUTPUT jack.
INPUT 2 jack
Connect a cable from the INPUT 2 jack to the line level output device to
be tuned. If a cable is connected to the INPUT 1 jack on the front panel,
this jack will be disabled and cannot be used.
Specifications
Tuning:
12-note equal temperament
Detection range:
E0 (20.60 Hz)–C8 (4186 Hz), sine wave
Calibration range:
A4 = 436–445 Hz (1 Hz steps)
Detection accuracy:
±1 cent
Input impedance:
1 M-ohm (tuner on)
Connects:
Front: INPUT 1 jack, CABLE CHECK
jack, MUTE jack
Rear: INPUT 2 jack, OUTPUT jack, DC
9V IN jack
Power supply:
DC9V (
) (Included AC adapter)
Dimensions (W x D x H):
Tuner only: 430 mm × 49 mm × 44 mm /
16.93" x 1.93" x 1.73" (including extensions)
With rack-mounting adapters: 482 mm ×
49 mm × 44 mm / 18.98" x 1.93" x 1.73"
(including extensions)
Weight:
Tuner only: 363g / 12.80 oz.
Included items:
Owner’s manual, AC adapter, 4x Screws/
washers, 2x Rack-mounting adapter
* Appearance and specifications are subject to change without notice for improvement.
Fiche technique
Gamme:
Tempérament égal (12 intervalles chromatiques)
Plage de détection:
E0 (20.60Hz)~C8 (4186Hz), onde sinus
Plage de calibrage du diapason:
A4= 436~445Hz (par pas de 1Hz)
Précision de la détection:
±1 cent
Impédance d’entrée:
1 MΩ (accordeur activé)
Prises:
Panneau avant: Prise INPUT 1, Prise CABLE
CHECK, Prise MUTE
Panneau arrière: Prise INPUT 2, Prise OUT-
PUT, Prise DC 9V IN,
Alimentation:
DC 9V (
) Adaptateur secteur (inclus)
Dimensions (L x P x H):
Accordeur seul:430mm x 49mm x 44mm (pieds
en caoutchouc compris)
Avec adaptateurs de montage en rack:482mm x
49mm x 44mm (pieds en caoutchouc compris)
Poids:
Accordeur seul: 363g
Accessoires fournis:
Manuel d’utilisation, Adaptateur secteur, vis/
rondelles x4, adaptateur de montage en rack x2
* Les caractéristiques et l’aspect du produit sont susceptibles d’être modifiés sans avis préalable..
Especificaciones
Afinación:
temperamento igual de 12 notas
Rango de detección:
E0 (20.60Hz)–C8 (4186Hz), onda sinusoidal
Rango de calibración:
A4= 436–445Hz (incrementos de 1Hz)
Precisión de detección:
±1 centésima
Impedancia de entrada:
1 MΩ (afinador activado)
Conexiones:
Panel frontal:jack INPUT 1, jack MUTE, jack
CABLE CHECK
Panel posterior: jack INPUT 2, jack OUTPUT,
jack DC 9V IN
Alimentación:
9V CC (
), Adaptador de CA (incluido)
Dimensiones (Anch. x Prof. x Alt.):
Solo afinador:430mm x 49mm x 44mm (inclu-
yendo los tacos de goma)
Con adaptadores de montaje en bastidor:
482mm x 49mm x 44mm (incluyendo los tacos
de goma)
Peso:
Solo afinador:363g
Elementos incluidos:
Manual de usuario, adaptador de CA, 4x torni-
llos/arandelas, 2x adaptadores de montaje en
bastidor
* El acabado y las especificaciones están sujetas a cambio sin previo aviso para mejorar el producto.
Technische Daten
Stimmung:
12 Noten, gleichschwebende Stimmung
Erkennungsbereich:
E0 (20.60Hz)–C8 (4186Hz), Sinuswelle
Kammertonfrequenz:
A4= 436–445Hz (in 1Hz-Schritten)
Genauigkeit:
± 1 Cent
Eingangsimpedanz:
1MΩ (Stimmfunktion aktiv)
Anschlüsse:
Vorderseite: INPUT 1-Buchse, MUTE-
Buchse, CABLE CHECK-Buchse
Rückseite: INPUT 2-Buchse, OUTPUT-
Buchse, DC 9V IN-Buchse
Stromversorgung:
DC 9V (
) (Netzteil mitgeliefert)
Abmessungen (B x T x H):
Nur Tuner: 430mm x 49mm x 44mm (inklu-
sive Gummifüße)
Mit Rack-Montageadaptern: 482mm x
49mm x 44mm (inklusive Gummifüße)
Gewicht:
Nur Tuner: 363g
Lieferumfang:
Bedienungsanleitung, AC-Netzteil ,4x
Schrauben/Beilagscheiben, 2x Rack-
Montageadapter
* Änderungen der Ausführung und technischen Daten ohne vorherige Ankündigung vorbehalten.


