


Sampling mode
340
4. If you check Normalize and execute, the data will be
normalized. In this case, the Level setting will be
ignored.
If you wish to specify Level to modify the level of the
sample data, do not check Normalize.
Each increase of +6 dB will approximately double the height
of the waveform shown on the display. +12 dB will be an
increase of approximately 4X, and +18 dB will be
approximately 8X. Conversely, each decrease of –6 dB will
halve the level, so that –6 dB will be 1/2X and –12 dB will be
approximately 1/4X. Executing the Level command with
positive (+) settings may cause the sound to clip (i.e., distort
at the point that amplification beyond the maximum level is
impossible). Once the sample data has been boosted beyond
the clipping point, re-executing this command with negative
(–) settings of Level will simply lower the overall level of the
clipped signal –the waveform will remain distorted.
Also, if executing Level with negative (–) settings causes any
portion of the sample data to reach a zero level, the zero data
will not return to its original state even if you re-execute
Level
with positive (+) settings.
5. In “Save to No.,” specify the save destination sample
number. By default, an unused sample number will be
selected.
For stereo samples, use “Save to No.(L)” and “(R)” to
specify the save-destination of the L and R channels.
6. To execute the Normalize/Level Adjust command, press
the OK button. To cancel, press the Cancel button.
Be aware that if sample data of an extremely low level
is normalized, any noise included in the sample will
also be amplified.
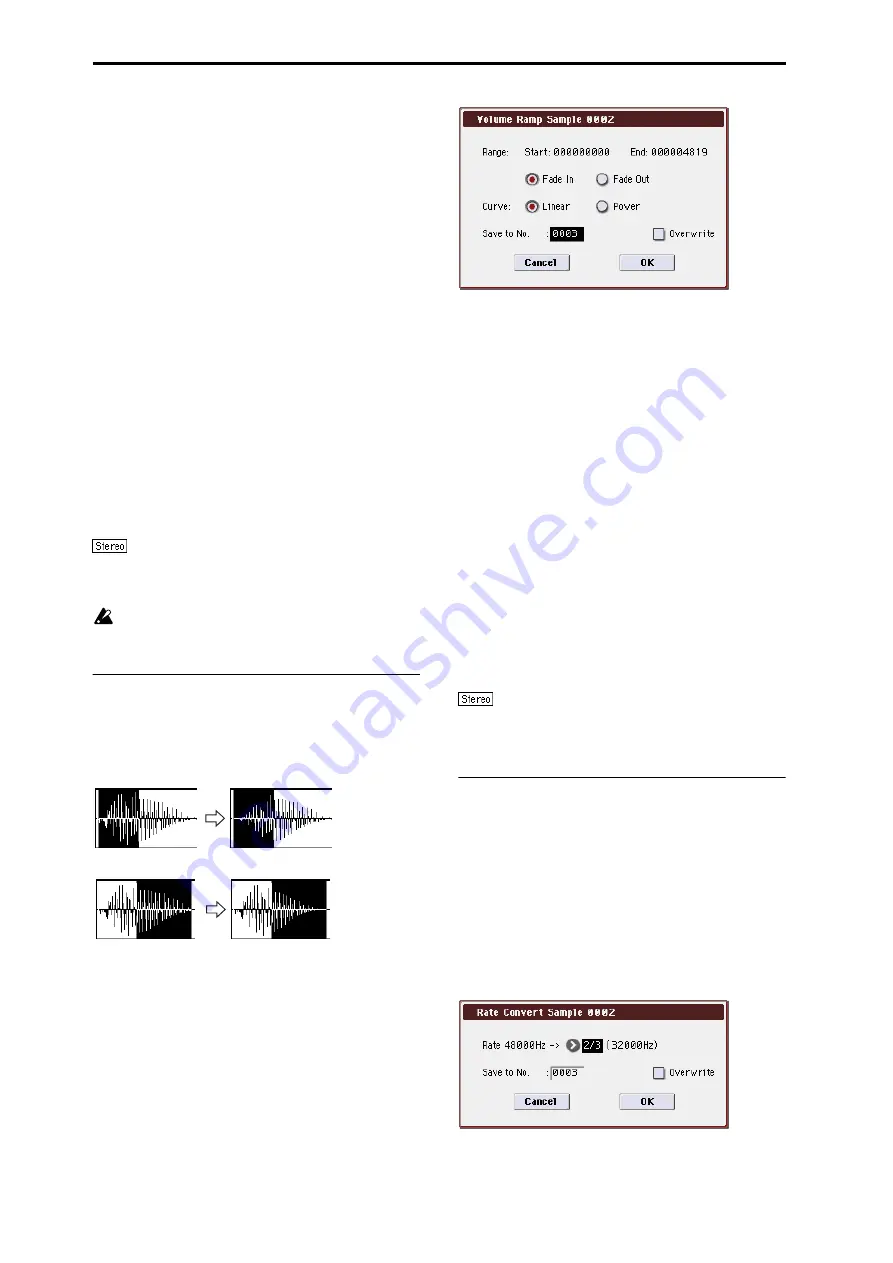
Volume Ramp
This command modifies the data values (volume) between
the Edit Range Start–Edit Range End. You can make the
volume gradually increase (Fade In) or decrease (Fade Out)
from the Edit Range Start to the Edit Range End.
1. Use Sample Select (1–1b) to select the sample that you
wish to edit, and use Edit Range Start and Edit Range
End to specify the editing range.
You can press the SAMPLING START/STOP switch or Play
button to hear the portion on which Volume Ramp will be
executed.
2. Select “Volume Ramp” to open the dialog box.
3. The range to be edited is shown by Range “Start” and
“End.”
4. Use the radio buttons to select the type of volume ramp.
Fade In:
The volume at Range “Start” will be zero, and will
gradually increase toward “End.”
Fade Out:
The volume will gradually decrease from the
Range “Start” volume until it reaches zero at “End.”
5. In Curve, specify the way in which the volume will
change.
Linear:
The volume will change linearly. For normal fade-in
or fade-out, select Linear.
Power:
The volume will change non-linearly. When you use
the Mix menu command to combine a faded-in waveform
with a different faded-out waveform (i.e., crossfade), using a
Linear fade-in/out may produce an impression that the
volume has dropped in the middle of the curve. In such
cases, use Power to perform the fade-in/out.
6. In “Save to No.,” specify the save destination sample
number. By default, an unused sample number will be
selected.
For stereo samples, use “Save to No.(L)” and “(R)” to
specify the save-destination of the L and R channels.
7. To execute the Volume Ramp command, press the OK
button. To cancel, press the Cancel button.
Rate Convert
This command lowers the sampling rate (frequency) of the
sampled data by 2/3, 1/2, 1/3, 1/4, or 1/6. You can use this
command to create “down-sampling” effects. The sample
data is thinned to convert it to the lower sampling
frequency.
The Rate Convert command is always executed on all
waveform data of the selected sample, regardless of the
“Start” and “End” settings.
1. Use Sample Select (1–1b) to select the sample that you
wish to edit.
2. Select “Rate Convert” to open the dialog box.
3. The sampling rate of the selected sample is shown at
the right of “Rate.” At the right of the “
→
” you can
select the desired amount of the sampling rate conver-
Fade In
Fade Out
Summary of Contents for M3
Page 1: ...4 E ...
Page 306: ...Sequencer mode 296 ...
Page 364: ...Sampling mode 354 ...
Page 430: ...Media mode 420 ...
Page 534: ...Effect Guide 524 ...
Page 646: ...Appendices 636 ...


