3
ENGLISH
Introduction:
• Please be sure to use only your finger to operate this product. It could be damaged,if you
try to operate it by pen or by any other sharp object, instead of your finger-tip
• The multi-touchpad can also be damaged by dropping it or by dropping something on it
• The multi-touchpad is not waterproof. Please do not use liquids or have them in close
proximity when you’re you are using the multi-touchpad
• Do not use alcohol or chemicals to clean the multi-touchpad
Product Description:
1) Mode Button:
Switch between mouse mode/keypad mode
• Mouse mode: For mouse & multi-touch functions
(you can start to operate after installing the software)
• Keypad mode: You can key-in the number by touch
function
2) Mode Indication Light:
Mouse mode — Blue light off (default)
Keypad mode — Blue light on
3) Touchpad/keypad area
4) USB connector
5) Left button:
Blue light off (while in mouse mode): the function is the same as the mouse’s left button
Blue light on (while in keypad mode): start the calculator in your computer
6) Right button
Blue light off (while in mouse mode): the function is the same as the mouse’s left button
Blue light on (while in keypad mode): the function is the same as the keyboard’s backspace
button
Connecting the multi-touchpad to the computer:
• Check whether the computer has a free USB port. Connection
to a USB hub is also possible, but check the power capacity of
the hub first
• Connect the USB cable of the multi-touchpad to the computer
• The multi-touchpad will be available after the computer has
indentified it
How to use the multi-touchpad:
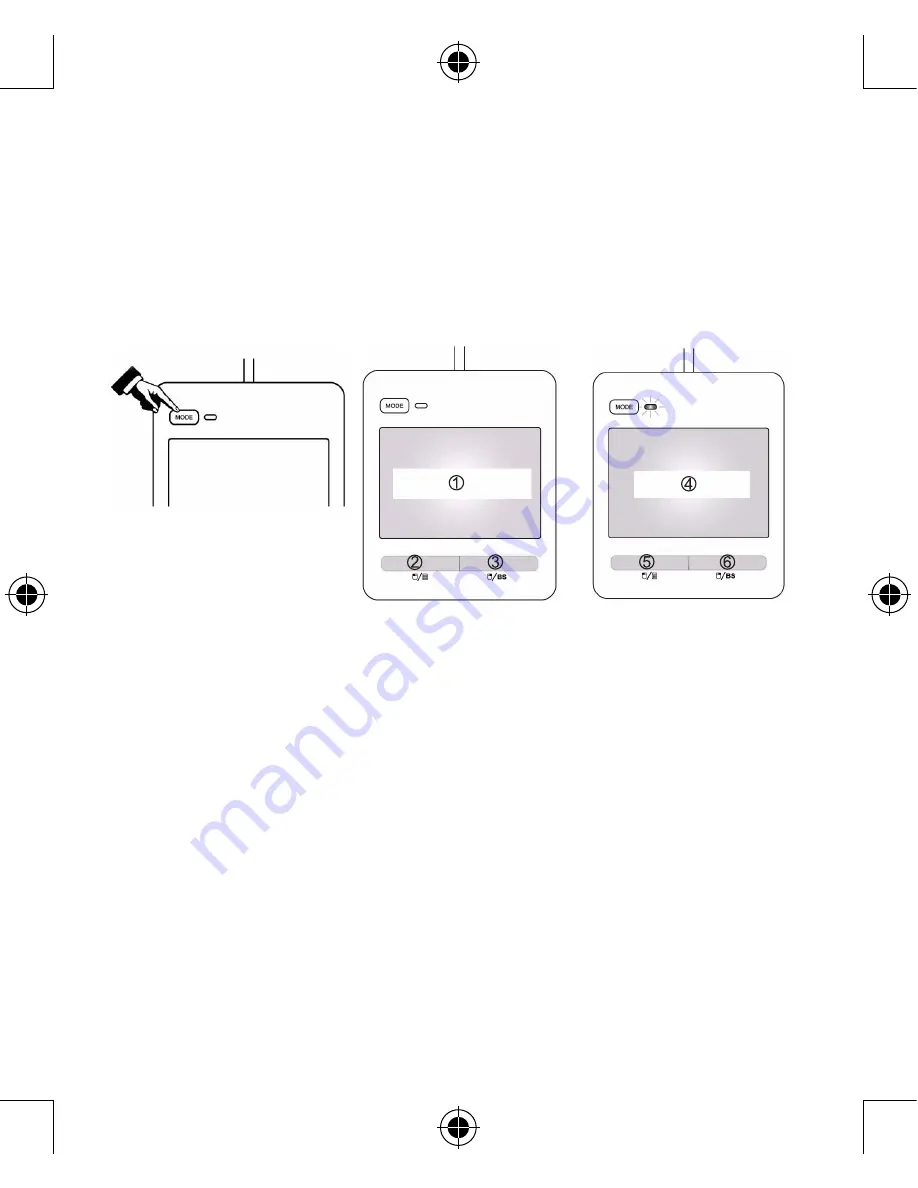
To switch between the two different functions, the mode-button has to be pressed (pic1).
The multi-touchpad will operate as touch-mousepad when connected. The LED indicator will
not be lit. The two buttons, (picture below), will function as left and right mouse buttons. (pic2)
After pressing -- the mode-button the multi-touchpad can be used as a numeric keypad, the
indication LED will be blue for reference. The two buttons underneath will now function as a
calculator button and a backspace button. (pic3)
pic1
pic2
pic3
1
Touchpad area
2
Mouse left button
3
Mouse right button
4
Keypad area
5
Calculator button
6
Backspace button
Software Installation:
• Insert the driver CD into your CD/DVD-ROM drive. Your CD should start automatically.
If it does not, follow the steps as below:
I. Select “Start” → “My Computer”.
II. Right-click the CD/DVD-ROM drive icon. Then click Auto-play.
• Follow the instructions on the screen.
Summary of Contents for CMP-KEYPAD 60
Page 4: ...4...
Page 5: ...5...
Page 10: ...10...
Page 11: ...11...
Page 16: ...16...
Page 17: ...17...
Page 22: ...22...
Page 23: ...23...
Page 28: ...28...
Page 29: ...29...
Page 34: ...34...
Page 35: ...35...
Page 40: ...40...
Page 41: ...41...
Page 46: ...46...
Page 47: ...47...
Page 52: ...52...
Page 53: ...53...
Page 58: ...58...
Page 59: ...59...
Page 64: ...64...
Page 65: ...65...
Page 68: ...68 1 2 3 4 USB 5 6 backspace USB USB hub USB...
Page 69: ...69 1 LED 2 LED backspace 3 1 2 3 1 2 3 4 5 6 Backspace CD CD DVD ROM CD I II CD DVD ROM...
Page 70: ...70...
Page 71: ...71...
Page 73: ...73 CD ROM...
Page 76: ...76...
Page 77: ...77...
Page 82: ...82...
Page 83: ...83...
Page 88: ......


