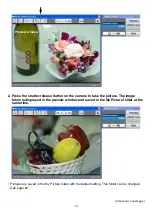
Konica Minolta DiMAGE Transfer Software Manual Download Page 5

- 5 -

S

OFTWARE UPDATE LICENSE AGREEMENT

GRANT OF LICENSE

Konica Minolta Photo Imaging U.S.A., Inc. ("Konica Minolta") grants you a license to use one or more copies of the Software specifi-
cally for the purpose of copying the Firmware into a Camera in order to update the Camera, subject to the license restrictions set
forth below.
You may copy the Software as necessary to update one or more Cameras that you own, as long as the Software is used only with a
Konica Minolta camera product. You may also make one backup copy of the Software.
You may not distribute the Software to others, whether or not such others may own Cameras.

COPYRIGHT

The software is owned by Konica Minolta and its Licensors and protected by copyright laws and international treaties. You may not
copy the software other than as expressly provided in this license. You may not reverse engineer, decompile, or disassemble the
Software.

TERM

This license is effective until terminated. You may terminate it at any time by destroying the Software together with all copies in any
form. It will also terminate if you fail to comply with any term or condition of this Agreement. You agree upon such termination to
destroy the Software together with all copies in any form.

LIMITED WARRANTY

If you use the Software during the original warranty period of your Camera, as evidenced by a copy of your purchase receipt for your
Camera, Konica Minolta will warrant that the Software performs substantially in accordance with the accompanying written materials
for the remainder of the original warranty period of your Camera. If you load and use the Software after the original warranty period of
your Camera has expired, then you accept the Software "AS IS" without any express warranty.
Konica Minolta does not warrant that the functions contained in the Software will meet your requirements or that operation of the
Software will be interrupted or error free. You assume responsibility for operation of the Software to achieve your intended results,
and for the installation, use, and results obtained from the Software.
Subject to any applicable legislation which prohibits the following exclusions, KONICA MINOLTA MAKES NO OTHER WARRANTIES
OF ANY KIND, EITHER EXPRESS OR IMPLIED, INCLUDING THE IMPLIED WARRANTIES OF MERCHANTABILITY AND FITNESS
FOR A PARTICULAR PURPOSE. Some states and countries, including England and Australia, do not allow the exclusion of implied
warranties, or have legislation that imposes certain statutory warranties that cannot be excluded, so the above exclusion may not
apply to you. This warranty gives you specific legal rights and you may also have other rights.

LIMITATIONS OF REMEDIES

Subject to any applicable legislation which prohibits the following limitations, Konica Minolta's entire liability and your exclusive reme-
dy shall be the replacement of the Software not meeting Konica Minolta's "Limited Warranty", provided that you notify Konica Minolta
or your dealer within the original warranty period of your Camera and have a copy of your purchase receipt for your Camera. This
remedy is not available if failure of the Software is the result of misuse, abuse, or a failure to follow the operating instructions in the
accompanying written materials, or if you load and use the Software after the original warranty period of your Camera has expired.
IN NO EVENT WILL KONICA MINOLTA OR ITS SUPPLIERS, LICENSORS OR DEALERS BE LIABLE TO YOU FOR ANY INCIDEN-
TAL OR CONSEQUENTIAL DAMAGES, INCLUDING ANY LOST PROFITS, LOST SAVINGS, OR OTHER DAMAGES ARISING OUT
OF THE USE OR INABILITY TO USE THE SOFTWARE EVEN IF ADVISED OF THE POSSIBILITY OF SUCH DAMAGES. Some
states and countries, including England and Australia, do not allow the limitation or exclusion of liability for incidental or consequential
damages, or have legislation which restricts the limitation or exclusion of liability, so the above limitation may not apply to you.

GENERAL

If the Software was obtained in the United States, this Agreement is governed by the laws of the State of New York without regard to
its conflicts of laws rules. If obtained outside the United States, this Agreement is governed by the laws of the country in which it was
obtained.

U.S. GOVERNMENT RESTRICTED RIGHTS

The Software and documentation are provided with RESTRICTED RIGHTS. Use, duplication, or disclosure by the Government is
subject to restrictions as set forth in subdivision (b)(3)(ii) of The Rights in Technical Data and Computer Software clause 201.574-
4000. Contractor / manufacturer is Konica Minolta Photo Imaging U.S.A., Inc. 725 Darlington Avenue, Mahwah, NJ 07430

EUROPEAN UNION PROVISIONS

If this Software is used within a country of the European Union, nothing in this Agreement shall be construed as restricting any rights
available under the European Community Software Directive (91/250/EEC).

Summary of Contents for DiMAGE Transfer

Page 1: ...DiMAGE T DiMAGE Transfer for ransfer for MAXXUM 7D DYNAX 7D MAXXUM 7D DYNAX 7D ...

Page 2: ...rety without the prior permission of Konica Minolta TABLE OF CONTENTS System requirements 3 About DiMAGE Viewer DiMAGE Master 3 Camera firmware update 4 Cameras requiring update 4 Software Update License Agreement 5 Preparing the CompactFlash card 6 Updating the camera firmware 7 Installation 8 Uninstalling DiMAGE transfer 11 Starting up the software 12 Quit 14 Taking pictures 14 Preview window 17...

Page 3: ...ter 200MB or more of available hard disk space after installation A True Color 24 bit or greater monitor with a minimum resolution of 1024 X 768 XGA ABOUT DIMAGE VIEWER DIMAGE MASTER DiMAGE Viewer or DiMAGE Master can be launched from DiMAGE Transfer DiMAGE Viewer is installed from the DiMAGE Viewer CD ROM supplied with the camera Many editing and image processing functions are available DiMAGE Ma...

Page 4: ...check the Maxxum Dynax 7D firmware version press the menu button and then press the display button The version is displayed under the camera name B The version number is followed by e or u to denote the product region Press the central button of the controller to close the screen A MAXXUM 7D MAXXUM 7D Ver 1 00e OK B If the camera has the 1 10 or later version do not update the firmware To update t...

Page 5: ...AR PURPOSE Some states and countries including England and Australia do not allow the exclusion of implied warranties or have legislation that imposes certain statutory warranties that cannot be excluded so the above exclusion may not apply to you This warranty gives you specific legal rights and you may also have other rights LIMITATIONS OF REMEDIES Subject to any applicable legislation which pro...

Page 6: ...a with a CF card inside to your computer If the camera is not compatible with the computer system a CF card reader connected to your computer can be used instead 1 Double click the downloaded file 7dv110 exe to decompress it The update files named km023 app and km023 brd are created 2 Copy the update files onto the CF card The files should not be copied into a folder such as the DCIM folder PREPAR...

Page 7: ...that ver 1 10 is displayed The version number is followed by e or u denoting the product region E UPDATING THE CAMERA FIRMWARE MAXXUM 7D MAXXUM 7D Ver 1 10e OK E C D Updating Notes After updating delete the update files from the CF card format the card or remove the files using a computer If the files remain on the card the update procedure may repeat If the update was not performed correctly or a...

Page 8: ... downloaded file dtv100e exe to decompress it The installation file named DiMAGE Transfer Installer exe is created If you download two separate files dtv100e1 exe and dtv100e2 zip save them in the same folder and double click the dtv100e1 exe file the installation file is created 2 Double click the DiMAGE Transfer installer exe file to begin installation 3 The welcome window opens Click Next to co...

Page 9: ...y the directory in which to install the software 6 The name of the default program folder is displayed To install the software icons in this folder click Next Installation begins To install the software icons in another folder select one of the folders listed in the existing folders box below Click Next to begin installation 7 When the software installation has been completed a message is displaye...

Page 10: ...window opens Click Next to continue 10 The license agreement appears If you accept the agreement click Yes Installation of the USB driver begins Read the entire license agreement carefully before continuing If you do not agree to the terms click No to exit the installation program ...

Page 11: ...ndows XP 1 Quit the software 2 Select Start Control Panel Add or Remove Programs 3 Select DiMAGE Transfer for Maxxum 7D Dynax 7D 4 Click Change Remove Windows 2000 Professional 1 Quit the software 2 Select Start Settings Control Panel Add Remove Applications 3 Select DiMAGE Transfer for Maxxum 7D Dynax 7D 4 Click Change Remove ...

Page 12: ...r s USB port The plug should be firmly attached Only one camera can be connected to the computer The camera should be connected directly to the computer s USB port Attaching the camera to a USB hub may prevent proper operation A memory card is not necessary Windows logo testing message Windows XP or Digital signature not found message Windows 2000 Professional may appear when the camera is connect...

Page 13: ...AGE Transfer for Maxxum 7D Dynax 7D Windows 2000 Professional Choose Start Programs DiMAGE Transfer for Maxxum 7D Dynax 7D DiMAGE Transfer for Maxxum 7D Dynax 7D The main window opens When connected the remaining frames and the hard disk space is displayed at the lower right corner of the camera LCD monitor ...

Page 14: ...System standby will not work until DiMAGE Transfer is closed If the low battery warning appears on the camera DiMAGE Transfer cannot be used The computer and the camera are disconnect automatically after transferring the data Use of the AC Adapter sold separately is recommended for extended use NOTES 2 Click the quit button in the lower right corner of the main window TAKING PICTURES 1 Click Previ...

Page 15: ... the picture The image taken is displayed in the preview window and saved in the My Picture folder at the same time Continued on next page Pictures are saved in the My Picture folder with the default setting This folder can be changed See page 22 Preview window ...

Page 16: ...up menu options listed below can not be used Transfer mode File number memory Folder name Select folder New folder Clean CCD Reset default If the low battery warning appears on the camera DiMAGE Transfer cannot be used The computer and the camera are disconnect automatically after transferring the data Use of the AC Adapter sold separately is recommended for extended use NOTES When taking pictures...

Page 17: ... the image Click and drag on the image to scroll Rotate 90 degrees to left button Click to rotate the image 90 counterclockwise Rotate 90 degrees to right button Click to rotate the image 90 clockwise Display horizontally Click to display the image horizontally Show first image To display the first image saved in the destination folder1 Keyboard shortcut Home key Show previous image To display the...

Page 18: ...ton Close button Grab tool button Show last image Show next image Show previous image Display horizontally Histogram button To show the histogram of the image displayed in the preview window Close button To close the preview window Click histogram button to show the histogram of the image displayed in the preview window ...

Page 19: ...isplayed Total number of images saved in the destination folder Image size UPDATING THE FILE LIST When image data is saved with DiMAGE Viewer DiMAGE Master or Windows Explorer when using DiMAGE Transfer press the F5 key on the keyboard to update the file list so images are displayed correctly in the preview window ...

Page 20: ...proved editing and processing tools compared with DiMAGE Viewer DiMAGE Viewer version 2 3 7 or later is required to view images taken by a Maxxum Dynax 7D VIEWING IMAGES WITH DIMAGE SOFTWARE 1 Click DiMAGE Viewer in the main window the DiMAGE Viewer or DiMAGE Master is launched automatically and the image thumbnails saved in the destination folder are shown If both the DiMAGE Viewer and DiMAGE Mas...

Page 21: ... the shutter release button on the camera to take pictures Images taken are added automatically to the DiMAGE Viewer or DiMAGE Master thumbnail display Images taken are added automatically to the thumbnail display ...

Page 22: ...remaining frames counter displays a dash and the preferences button is active 2 Click the preferences button in the main window The preferences window opens FILE DESTINATION Images are saved in the My Picture folder This can be changed 1 Click View next to the file destination option to open the folder tree ...

Page 23: ...umber is attached automatically and cannot be changed Use alphanumeric characters which are appropriate in file names in Windows operating systems Invalid character cannot be used If the serial number exceeds 99999 additional pictures cannot be saved in the destination folder A new folder must be selected or made or the file name changed Click OK to close the preferences window and applies all cha...

Page 24: ... 2004 Konica Minolta Photo Imaging Inc under the Berne Convention and the Universal Copyright Convention 9224 7306 11 X B502 ...

Reviews: