Konica Minolta Digital Revio KD-500Z User Manual Download Page 43

43

3

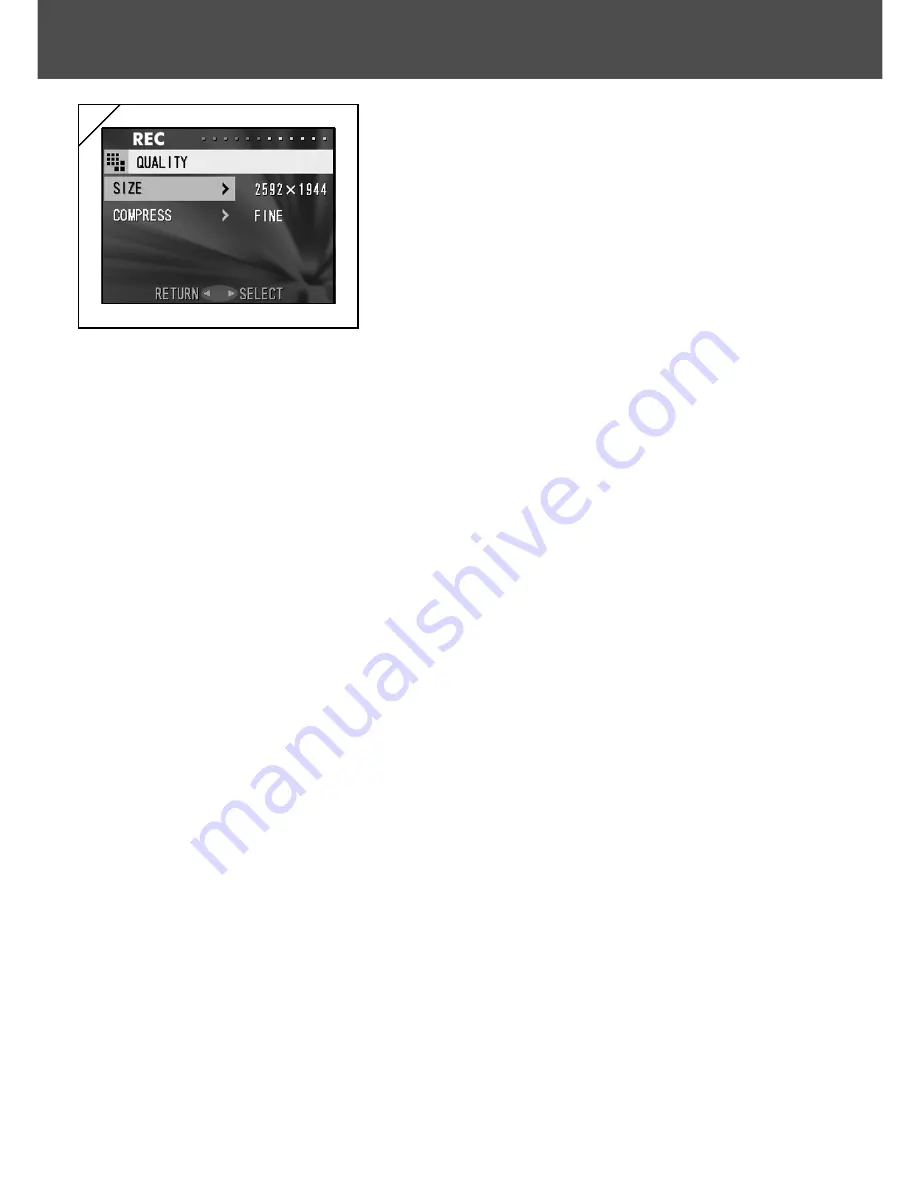
3. After selecting the menu, pressing 

 will

display the set-up screen (screen 3) of the
menu. After selecting the desired content
with 

 or 

, pressing 

 or the MENU/SET

button will complete the set-up and will
return you to screen 1.

4. You can cancel the REC Menu mode at Step 1 (REC Menu screen) on

the left page by pressing 

, or pressing 

 or the MENU/SET button after

selecting “RETURN”. This will close the menu and return you to the through
image (picture shooting image).

• For details of each set-up menu, refer to the pages hereafter.
• If you press the shutter button half-way even when you are setting the menu, the

display returns to the through image (picture shooting mode).

Using the REC Menu

 (Cont’d)

Summary of Contents for Digital Revio KD-500Z

Page 1: ...sage of this product please read this User s Manual and warranty card carefully and keep them in a safe place for future reference Before accepting the warranty card please make sure that the date of...

Page 2: ...or Extended Camera Use The camera body may become hot when used for a long period of time but it doesn t mean that the camera is broken However if the camera keeps touching the skin for a long time th...

Page 3: ...Power ON OFF 23 Setting the Menu Language Date and Time 24 Inserting Removing Cards 26 Basic Operation Taking Pictures 29 Holding Your Camera 29 Viewfinder and Indicator LEDs 29 Taking Pictures using...

Page 4: ...e Set up Menu 60 Setting with the REC BASIC Menu 61 Selecting the Image Size 62 Basic Playback Erasing Playback 64 Playing Back Pre recorded Images 64 Playing Back Movies 66 Playing Back Voice Memos 6...

Page 5: ...Auto Power OFF Time 98 Resetting the File Numbers 98 Setting Memory Priority 99 Changing Languages 99 Taking Still Images with Sound 100 Customizing the Camera 101 Restoring the Default Settings 104 O...

Page 6: ...gree of danger or damage that may occur if the displayed content is not followed or the product is misused Warning This symbol indicates that misuse may result in serious injury and even death Caution...

Page 7: ...r repair the camera yourself Fire and or electrical shock may occur as a result For repair or internal inspection consult the dealer from whom you bought the product Do not allow the camera to get wet...

Page 8: ...allow metals wires necklaces etc to come into contact with batteries Fluid leakage heat fire and damage may occur as a result Caution Do not point the lens directly at the sun or at a strong light sou...

Page 9: ...ying out non photographic operations on the camera disconnect the AC adapter for safety Do not leave the camera in locations such as A location exposed to direct sunlight or inside a car etc where the...

Page 10: ...rub the eye Immediately flush the eye with water and seek medical attention About the LCD monitor Due to the characteristics of liquid crystals the brightness of the LCD monitor may appear uneven wit...

Page 11: ...ery the packaged item or purchased separately Read the user s guide on the battery and the charger thoroughly and use them accordingly You cannot charge the battery in the camera When disposing of rec...

Page 12: ...function or damage may occur as a result Do not touch the terminals with hands or metal objects Damage to the components may occur as a result of static electricity Before handling an SD Memory Card M...

Page 13: ...ages that have been changed or added will not only play back on the camera but may cause the camera to malfunction as well Always format SD Memory Cards Multi Media Cards Memory Stick using this camer...

Page 14: ...14 Names of Parts Camera Body Microphone Shutter Button Light Sensor Strap Holder USB Terminal Self timer LED Flash Viewfinder Window Lens Cover Main Switch Lens...

Page 15: ...Display Button P 16 Play Button P 16 LCD Monitor Battery Sub cap Battery Card Cover Menu Set Button P 16 4 way Button P 16 Speaker Zoom Buttons P 16 Red LED Green LED Viewfinder Eyepiece Tripod Socket...

Page 16: ...s so it should be turned OFF when you are shooting through the viewfinder e Delete Button For deleting unwanted photos r Zoom Buttons For operating the optical and digital zoom functions t 4 way Butto...

Page 17: ...lt if the strap wraps around the neck When carrying the camera hanging from the strap take care so that it is not accidentally hit nearby objects Place the camera on a stable surface before installing...

Page 18: ...ack in an area with a temperature between 0 C 32 F and 40 C 104 F Charging time will vary with the surrounding temperature and the condition of the battery pack Before using new battery packs or batte...

Page 19: ...ith the terminals facing inside the camera After making sure the battery pack is properly installed close the battery card cover securely Make sure that the battery pack is facing the right way If the...

Page 20: ...hot Contact with the batteries can lead to burns Never open the battery card cover while the camera is accessing the card or processing images p 32 To recharge the battery DR LB4 do not use any charge...

Page 21: ...sted and found to comply with the limits for a class B digital device pursuant to Part 15 of the FCC Rules These limits are designed to provide reasonable protection against harmful interference in a...

Page 22: ...ll power After reading the Important Safety Precautions pp 7 10 in this manual and the warnings supplied with the AC adapter connect the adapter as instructed 1 Connect the AC adapter to the power sup...

Page 23: ...n With the power ON it is possible to shoot pictures Also the LCD display will be lit 3 When you wish to turn the power OFF slide the lens cover just a little in the direction indicated by the arrow T...

Page 24: ...the lens cover or pressing the PLAY button The language selection screen will automatically appear on the LCD monitor By pressing or select the desired language and push the MENU SET button 2 You will...

Page 25: ...ton and the settings are complete If you select NO with and press the MENU SET button the current settings are invalidated and you will return to screen 3 Setting the Menu Language Date andTime Cont d...

Page 26: ...ord in an emergency If you wish to use an aftermarket card any of the following are appropriate SD Memory Card Multi Media Card Memory Stick All three will be called card hereafter First turn OFF the...

Page 27: ...e right way If the card is forcefully inserted facing the wrong way it will damage the connector There are two card slots When a SD Memory card or MultiMedia Card are used insert them in the slot at t...

Page 28: ...and the red LED will come on If you open the battery card cover while the red LED is flashing image processing may be interrupted or hindered While the red LED is still lit make sure that you DO NOT o...

Page 29: ...that your fingers hair or the strap do not cover the lens flash or the light sensor Taking Pictures Auto focus Mark Align the crosshairs on the subject of your picture Viewfinder and Indicator LEDs In...

Page 30: ...ash charging Formatting the card Flashing Warning that your hands are shaking Both Red and Green LEDs On Camera ready to shoot Flash fires USB cable is being connected Flashing System error Card has i...

Page 31: ...take and determine the size of the subject using the zoom buttons Also put the auto focus mark on the subject you wish to bring into focus If you press the TELE Telephoto Zoom button the camera zooms...

Page 32: ...While the card is processing image data you cannot operate the camera Once the red and green LEDs disappear the recording has finished Do not open the battery card cover while the red and green LEDs a...

Page 33: ...not too close to the subject then align the subject to the auto focus mark in the center of the viewfinder For the shooting distance see page 32 If the subject is too dark such as a person in the shad...

Page 34: ...re compose your photo and press the shutter button all the way to take the picture When re composing the photo do not change the shooting distance If the distance has changed repeat the procedure The...

Page 35: ...eparately model DR LB4 or to use the AC adapter sold separately model DR AC4 1 Once the power supply is turned on by opening the lens cover the LCD monitor will come on and a through image the image t...

Page 36: ...AE Lock functions are used p 101 e Exposure Compensation The compensation value will be displayed For details of how to adjust the exposure see pages 50 and 101 r Shooting Mode The selected shooting m...

Page 37: ...take a picture for a long time close the lens cover The default auto power off time is set at three minutes This can be changed in the set up menu p 98 When using an AC adapter the auto power off func...

Page 38: ...g remains in effect even if you switch the power OFF and back ON Using the custom function p 101 enables you to set up your favorite shooting modes Selecting the Shooting Mode 1 Turn the power on so t...

Page 39: ...o 2 0m 6 6ft If the shooting range is not in the above range the picture may appear too bright when it is too close and the picture may appear dark without enough lighting when it is too far It is rec...

Page 40: ...ith a slow shutter speed Shutter speeds will be slower so use a tripod to prevent shaking If the subject is moving the picture will be blurred Off Flash Override Use this mode for places such as museu...

Page 41: ...lephoto 0 5m 1 6ft to Distant View Mode Use this mode when shooting a distant subject such as scenery or buildings Always use a tripod The flash will not come on The self timer function can be used in...

Page 42: ...e changed unless otherwise described Setting with the REC DETAILS Menu 1 Turn the power ON with the LCD monitor on through image display Pressing the MENU SET button will display the REC menu screen 2...

Page 43: ...the REC Menu mode at Step 1 REC Menu screen on the left page by pressing or pressing or the MENU SET button after selecting RETURN This will close the menu and return you to the through image picture...

Page 44: ...heir initial settings 1 Select RESET and press 2 A confirmation screen will appear To change settings back use or to select YES and press the MENU SET button The settings are completed and you will re...

Page 45: ...r of images remaining will change and be displayed on the LCD monitor When quality is the priority select FINE when the number of photos is more important select NORMAL 1 Select QUALITY and press 2 Us...

Page 46: ...ression ratio Use or to select the desired compression ratio then press either or the MENU SET button You will return to screen 2 with your chosen compression ratio displayed If you press the setting...

Page 47: ...the memory does not have enough space 4 640 480 pixels approximately 300 000 pixels As this mode produces the smallest file size it is best for sending via email for use in home pages etc Standard num...

Page 48: ...LCD monitor will not turn off Please view the LCD monitor while shooting your movies 1 Select MOVIE and press 2 Select ON with or and enter your selection with either or by pressing the MENU SET butt...

Page 49: ...g a movie the sound is also being recorded so take care not to cover the microphone on the top of the camera with your fingers etc 2 As long as the camera s power is ON you can continue to take movies...

Page 50: ...rough image mode is entered and the adjusting exposure compensation bar is displayed If you press the cursor moves toward the plus side while pressing moves it toward the minus Select the desired comp...

Page 51: ...nd you will return to screen 1 To return to normal still image shooting set the mode to AUTO Available Modes AUTO Default The camera adjusts the white balance automatically DAY LIGHT Ideal for taking...

Page 52: ...through image mode is entered and on the bottom of the screen the brightness adjustment bar appears If you press the cursor moves to the plus side and the screen gets brighter Pressing produces the op...

Page 53: ...press either or the MENU SET button The setting is completed and you will return to screen 1 If you press the selection is invalidated and you will return to screen 1 3 From screen 1 when you press yo...

Page 54: ...ill return to screen 1 Center weighted metering In this mode the camera sets the exposure according to the metering for the central part of the whole frame It is ideal for taking photos where the brig...

Page 55: ...slow so use a tripod to keep the camera steady 1 Select SLOW SHUTTER and press 2 Use or to select ON then press either or the MENU SET button When the setting is completed you will return to screen 1...

Page 56: ...the shutter button and recording begins If you do not press the shutter button you can return to screen 1 without making a recording by pressing the MENU SET button When the available recording time...

Page 57: ...t the still photo to which you wish to attach a voice comment Sound cannot be recorded to a photo displayed in the movie mode If you press the MENU SET button the selection is invalidated and you will...

Page 58: ...select the appropriate setting and then press the MENU SET button If you decide not to erase select CANCEL or press the DELETE button again 3 When the THIS DELETE sign disappears erasing has finished...

Page 59: ...t MONOCHROME and press 2 Use or to select SEPIA or B W then press either or the MENU SET button When the setting is completed you will return to screen 1 If you press the selection is invalidated and...

Page 60: ...ng the Set up Menu By setting each item on the set up menu to your preferences you can customize your camera to suit you 1 Select SETUP and press 2 You will enter the SET UP Menu mode For details see...

Page 61: ...h the following screens QUALITY p 62 MOVIE MONITOR SETUP RETURN When you are on REC Menu screen you can cancel the REC Menu mode by pressing or pressing or the MENU SET button after selecting RETURN T...

Page 62: ...photos 1600 1200 About 160 photos 640 480 About 640 photos About 20 photos The number of photos you can take varies depending on the subject When there are files other than images or when the quality...

Page 63: ...63...

Page 64: ...he PLAY button and the last recorded photo will be played back on the LCD monitor When the camera s power is OFF with the lens cover closed you can play back images by holding down the PLAY button for...

Page 65: ...The magnification ratio is displayed when images are enlarged and played back t Remaining Battery Power Display When the battery is in use the remaining power is displayed in two levels p 19 y Image N...

Page 66: ...movie image 2 If you press the shutter button the movie images will be played back When playback is finished the display returns to screen 1 Symbols displayed when a movie is played back are recordin...

Page 67: ...time is displayed in the upper right of the screen 2 Press the shutter button and the voice memo is played back When the memo finishes the display returns to screen 1 Take care not to cover the speake...

Page 68: ...ee Then use the TELE zoom button to zoom in every time you press the TELE button the image is enlarged further The zoom ratio is displayed on the LCD monitor To zoom back out press the WIDE zoom butto...

Page 69: ...ng the viewfinder to shoot images with the LCD monitor off After the LCD monitor displays the last image that you have taken it will automatically turn back to off When using the LCD monitor for shoot...

Page 70: ...nd a screen appears indicating the media type to be erased and prompting you to select the frame range Press or to select THIS the selected image or ALL and press the MENU SET button If you decide not...

Page 71: ...1 ADD REC p 91 SET UP p 91 RETURN 3 After selecting the menu press and in the same way as the REC menu p 42 the setting screen of the selected menu will be displayed After selecting the desired conten...

Page 72: ...surrounded by a red frame Use or to move the frame and select the image you wish to display or erase Pressing when the first frame is selected or on the last frame will switch the screen to the next...

Page 73: ...t first FROM is selected so press To select a different item press or 3 The media types will be displayed Using or select the media on which the image you wish to copy is recorded then press or the ME...

Page 74: ...Returning to screen 2 select UNIT Then the screen shown left screen 5 appears After pressing use or to choose SELECT If one or multiple frames are to be selected or ALL ON Then press either or the MEN...

Reviews: