


25
1. Touch
Settings]
2. Touch
to
change
the
file
name
1.
按
[文件/名稱/
主題/其他]
2.
按
更改
檔
案名稱
Fax/Scan
Function
傳
真
/掃描功能
C
hange
fi
le nam
e
Switch
to
place
original
between
the
feeder
and
platen
glass
and
combine
them
into
a
single
file
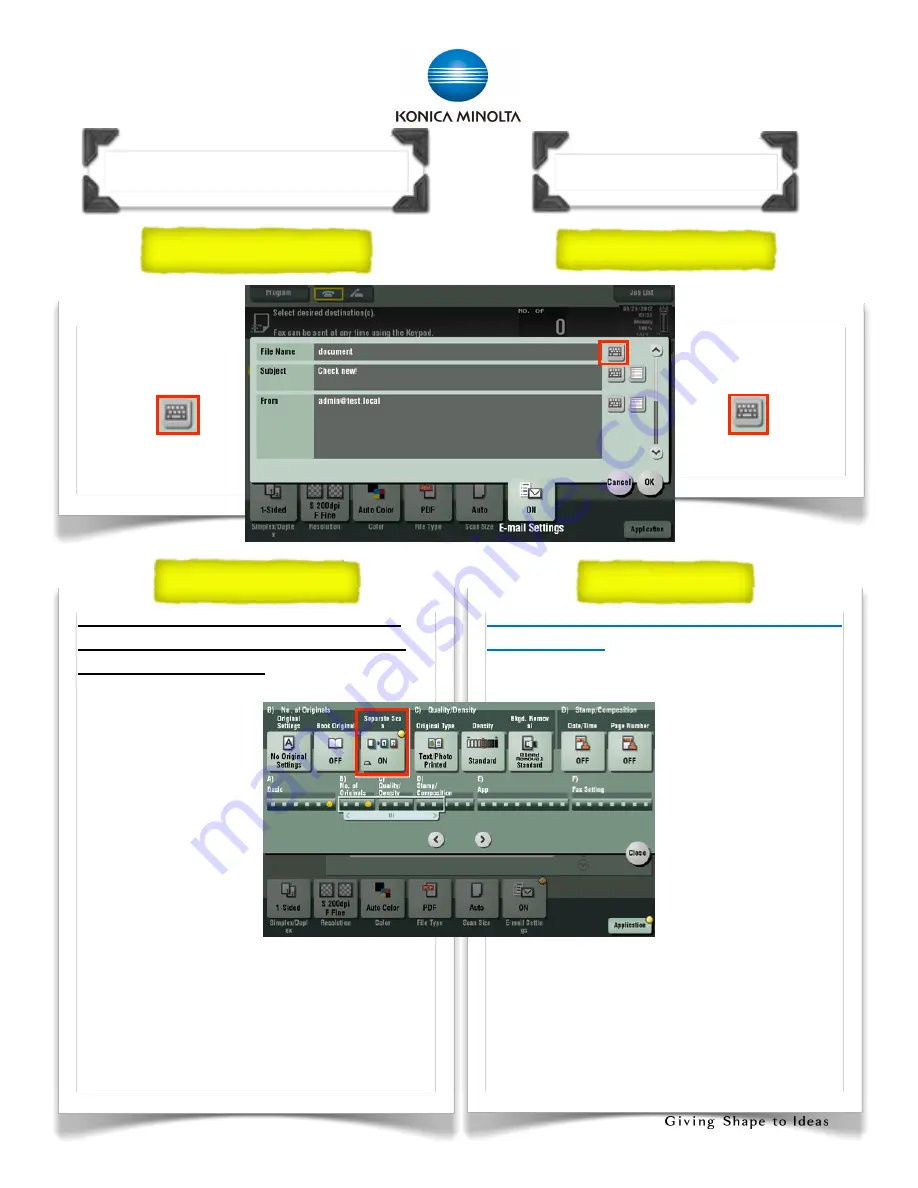
1. Touch
[Application]
2. Touch
[B)No.
of
Originals]
3. Press
[Start]
4. Load
the
next
originals
and
then
press
[Start];
Repeat
these
steps
to
complete
whole
set
of
document.
5. After
all
originals
are
scanned,
touch
[Finished]
and
press
[Start]
文件可於自動送稿器或鏡面交替掃描
並
合
併為
一個
檔
案
1.按[應用]
2.按[B.)分離掃描]
3.按[Start]
4.放置下一張原稿,
再按
[Start];
重複
以上動作去完成餘下
的原稿°
5. 完成掃描後,按[完成],再按[Start]
S
epara
te
sca
n
分離掃描
更改檔案名稱


