Konica Minolta Bizhub 3602 Quick Reference Download Page 2

3

Flex, fan, and align the paper edges before loading.

4

Load the paper.

Note: 

Load European envelopes with the flap entering the

printer first.

Warning—Potential Damage: 

Do not use envelopes with

stamps, clasps, snaps, windows, coated linings, or self

stick

adhesives.

5

From the control panel, set the paper size and paper type to
match the paper loaded.

Setting the size and type of the
specialty media

1

From the home screen, navigate to:

 > 

Paper

 > 

 > 

Tray Configuration

 > 

 > 

Paper

Size/Type

 > 

2

Select a paper source, and then configure the size and type of
the specialty media.

Printing

Printing from a computer

Note: 

For labels, card stock, and envelopes, set the paper size

and paper type in the printer before printing the document.

1

From the document that you are trying to print, open the Print
dialog.

2

If necessary, adjust the settings.

3

Print the document.

Note: 

For details of the function of the printer driver, refer to the

Help of the printer driver.

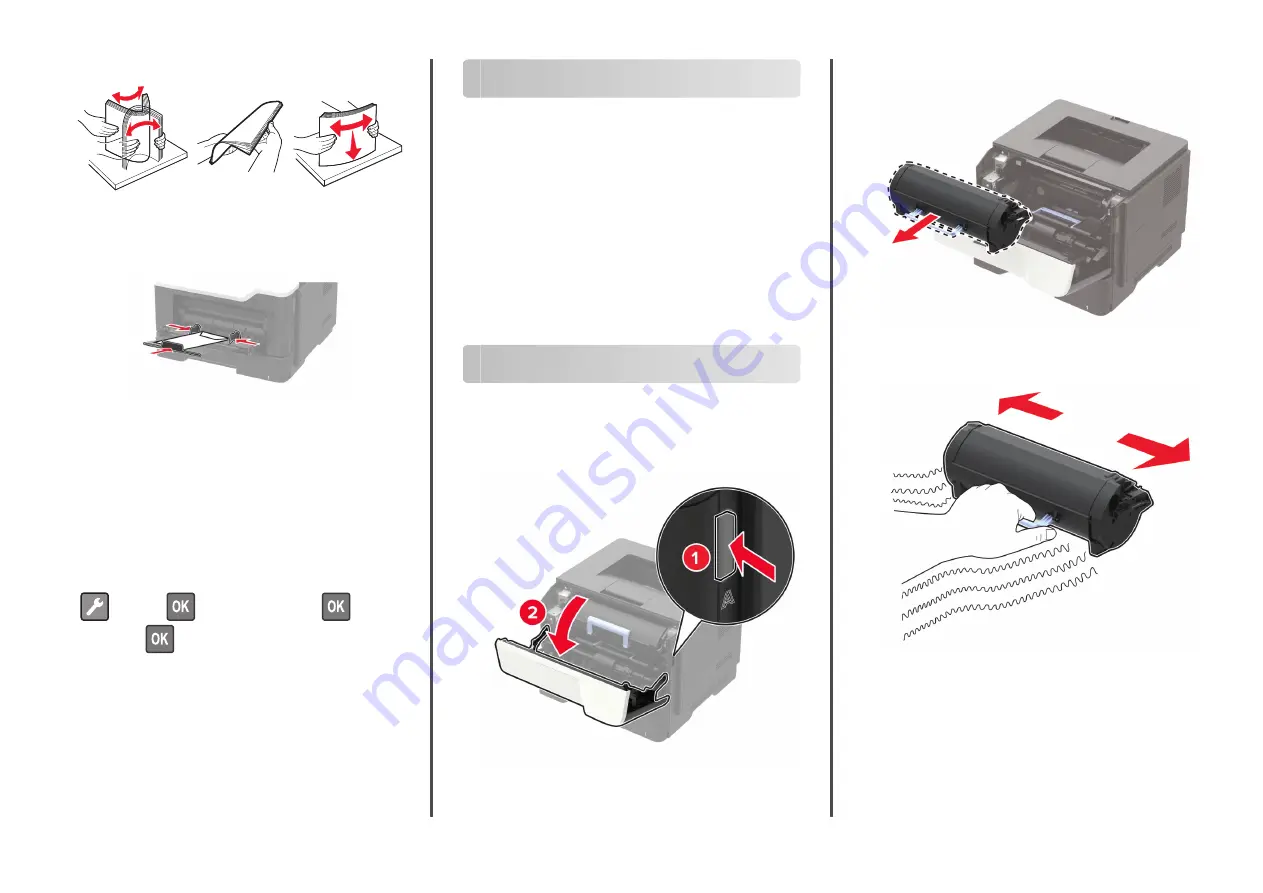
Maintaining the printer

Replacing the toner cartridge

1

Open the front door.

2

Remove the used toner cartridge.

3

Unpack the new toner cartridge, and then shake it three times
to redistribute the toner.

4

Insert the new toner cartridge.

Note: 

Use the arrows inside the printer as guides.


2

Summary of Contents for Bizhub 3602

Page 1: ...ding 3 Flex fan and align the paper edges before loading 4 Load the paper stack with the printable side facedown Notes To avoid paper jams make sure that the stack height is below the maximum paper ll...

Page 2: ...re the size and type of the specialty media Printing Printing from a computer Note For labels card stock and envelopes set the paper size and paper type in the printer before printing the document 1 F...

Page 3: ...emove the toner cartridge 3 Remove the used imaging unit 4 Unpack the new imaging unit and then shake it three times to redistribute the toner Warning Potential Damage Do not expose the imaging unit t...

Page 4: ...dicator Do not slide paper into the tray Load paper as shown in the illustration Make sure that the paper guides are positioned correctly and are not pressing tightly against the paper or envelopes Pu...

Page 5: ...s Jam location 1 Standard bin 2 Rear door 3 Tray x 4 Multipurpose feeder 5 Front door Paper jam in the front door 1 Remove the tray 2 Open the front door 3 Remove the toner cartridge 4 Remove the imag...

Page 6: ...ents are removed 6 Insert the imaging unit Note Use the arrows inside the printer as guides 7 Insert the toner cartridge Note Use the arrows inside the printer as guides 8 Close the front door 9 Inser...

Page 7: ...t 2 Remove the jammed paper Note Make sure that all paper fragments are removed 3 Close the rear door Paper jam in the standard bin Remove the jammed paper Note Make sure that all paper fragments are...

Page 8: ...gments are removed 3 Insert the tray Paper jam in the multipurpose feeder 1 Remove paper from the multipurpose feeder 2 Remove the jammed paper Note Make sure that all paper fragments are removed 3 Fl...

Reviews: