background image

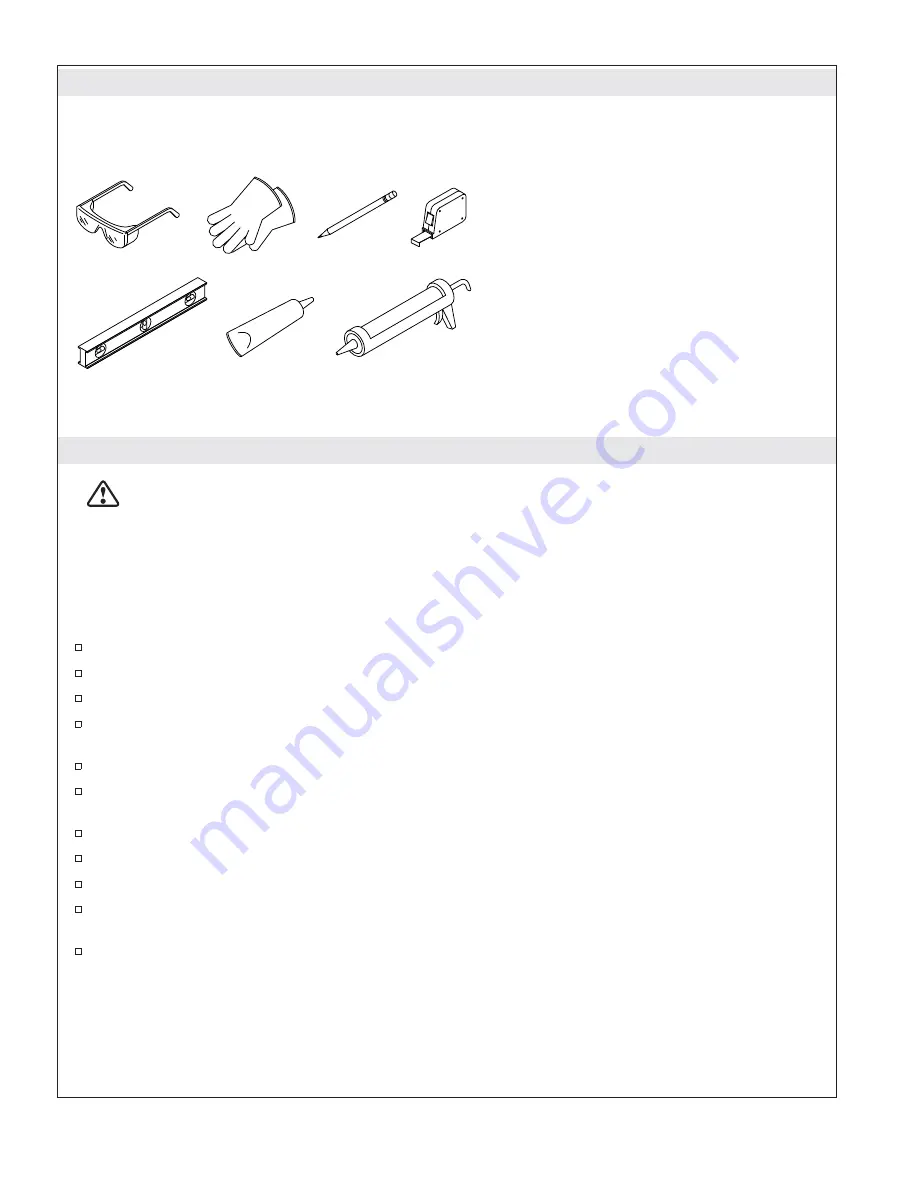
Tools and Materials

Before You Begin

CAUTION: Risk of personal injury.

Do not sit on the bath rim. The integrated shroud is not

designed to support weight.

IMPORTANT!

To ensure a successful installation, install the bath on a level finished floor.

IMPORTANT!

Carefully follow the silicone sealant manufacturer’s instructions for application and curing

time.

NOTE:

Your product may appear different from that shown. The installation procedure is the same.

Observe all local plumbing and building codes.

Determine the location of the bath.

Make sure that the subfloor offers adequate support for the bath.

Unpack and inspect the bath and components for damage. Return the bath and components to the
carton until installation.

For installations with limited or no access from below, install with a drain elbow and gasket.

To simplify future maintenance, make sure that all plumbing connections around the bath are easily
accessible.

Two people are needed to install this product.

This bath features an integral overflow.

Install a floor-, wall-, or rim-mounted faucet with this back-to-wall bath.

If installing a rim-mount faucet, make sure that there is no interference above or below the rim
before drilling any holes.

This bath conforms to CSA B45.5/IAPMO Z124. All dimensions are nominal.

Plus:
• 

Drop Cloth

• Wood Blocks
• 1-1/2" Tailpiece
• 1/2" (13 mm) Exterior Grade Plywood
   (for Rim-mount Faucet)

Construction 
Adhesive

100% Silicone
Sealant

Optional:

For installations with limited or no access
below the bath.

• 

1-1/2" Straight or 90 Degree PVC Drain Elbow

  (KOHLER 1069646 or Equivalent)
• Drain Elbow Gasket (KOHLER 1068203 or
  Equivalent)

1396992-2-A

2

Sterling

Summary of Contents for Sterling Unwind 96129-0

Page 1: ...Installation Guide Seamless Freestanding Bath Fran ais page Fran ais 1 Espa ol p gina Espa ol 1 1396992 2 A...

Page 2: ...n For installations with limited or no access from below install with a drain elbow and gasket To simplify future maintenance make sure that all plumbing connections around the bath are easily accessi...

Page 3: ...on the bath rim Make sure the faucet trim fits on the bath rim without overhanging Make sure that there is no interference above or below the rim before drilling any holes Refer to the installation in...

Page 4: ...n NOTE Recommended for installations with access below the bath Position and install a standard PVC or brass drain pipe Drain Elbow Installation NOTE Recommended for installations with limited or no a...

Page 5: ...ll the faucet and trim according to the faucet and trim instructions Make sure that there is adequate support under the bath rim to support the faucet Refer to the Prepare the Rim Mount Faucet Optiona...

Page 6: ...nt to the drain hole From the inside of the bath install the drain body and gasket From the bottom of the bath apply a bead of 100 silicone sealant between the drain hole and the drain body Install th...

Page 7: ...nd locknut are not required when installing to a drain elbow NOTE Do not use plumbers putty With help carefully tilt the bath on its back Apply construction adhesive to each of the bath feet and aroun...

Page 8: ...l times to check that the drain opens and closes properly Close the drain Fill the bath to the overflow and check for leaks Apply a continuous bead of 100 silicone sealant between the edges of the bat...

Page 9: ...composants pour d tecter tout dommage Remettre la baignoire et les composants dans l emballage jusqu l installation Pour les installations avec acc s limit ou sans acc s partir du dessous installer a...

Page 10: ...binet sur rebord s assurer qu il n y ait pas d interf rence au dessus ou au dessous du rebord avant de percer des trous Cette baignoire est conforme la norme CSA B45 5 IAPMO Z124 Toutes les dimensions...

Page 11: ...baignoire S assurer que la garniture du robinet s adapte sur le rebord de la baignoire sans surplomber S assurer qu il n y ait pas d interf rence au dessus ou au dessous du rebord avant de percer des...

Page 12: ...ns avec acc s sous la baignoire Positionner et installer un tuyau d vacuation standard en PVC ou en laiton Installation du coude de drain REMARQUE Recommand pour les installations avec acc s limit ou...

Page 13: ...staller le robinet et la garniture conform ment aux instructions qui les accompagnent S assurer que le support sous le rebord de la baignoire est ad quat pour soutenir le robinet Se reporter la sectio...

Page 14: ...int rieur de la baignoire installer le corps du drain et le joint d tanch it partir du fond de la baignoire appliquer un boudin de mastic d tanch it la silicone 100 entre le trou du drain et le corps...

Page 15: ...lors de l installation sur un coude de drain REMARQUE Ne pas utiliser de mastic de plombier Avec de l aide basculer la baignoire avec pr caution sur son dos Appliquer de la colle mastic sur chacun des...

Page 16: ...rnier s ouvre et se ferme correctement Fermer le drain Remplir la baignoire jusqu au trop plein et rechercher des fuites Appliquer un boudin continu de mastic d tanch it la silicone 100 entre les bord...

Page 17: ...fique que no est n da ados Vuelva a colocar la ba era y los componentes en la caja hasta el momento de instalaci n En instalaciones con acceso limitado o sin acceso desde abajo instale con un codo de...

Page 18: ...fer a de montaje al reborde antes de taladrar cualquier orificio verifique que no haya interferencias sobre o abajo del reborde Esta ba era satisface la norma CSA B45 5 IAPMO Z124 Todas las dimensione...

Page 19: ...se de que la guarnici n de la grifer a se ajuste al reborde de la ba era sin sobresalir Antes de taladrar los orificios verifique que no haya interferencias sobre o abajo del reborde Para determinar e...

Page 20: ...con acceso por abajo de la ba era Coloque e instale un tubo de desag e est ndar de PVC o de lat n Instalaci n del codo de desag e NOTA Se recomienda en instalaciones con acceso limitado o sin acceso p...

Page 21: ...a y su guarnici n de acuerdo a las instrucciones de la grifer a y de la guarnici n Aseg rese de que haya el soporte adecuado bajo el reborde de la ba era para soportar la grifer a Consulte la secci n...

Page 22: ...a instale el cuerpo del desag e y el empaque Desde el fondo de la ba era aplique un hilo continuo de sellador 100 de silicona entre el orificio para el desag e y el cuerpo del desag e Instale la arand...

Page 23: ...able tipo Mack ni la contratuerca NOTA No use masilla de plomer a Con ayuda incline cuidadosamente la ba era sobre su parte posterior Aplique adhesivo de construcci n a cada una de las patas de la ba...

Page 24: ...r que el desag e abra y cierre correctamente Cierre el desag e Llene la ba era hasta el rebosadero y verifique que no haya fugas Aplique un hilo continuo de sellador 100 de silicona entre los bordes d...

Page 25: ...1396992 2 A...

Page 26: ...1396992 2 A...

Page 27: ...1396992 2 A...

Page 28: ...USA 1 800 STERLING 1 800 783 7546 M xico 001 877 680 1310 SterlingPlumbing com 2019 Kohler Co 1396992 2 A...

Reviews: