1071632-2A/Rev04
2
NOTE:
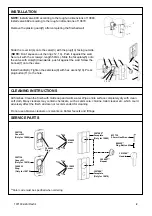
Install valve 880 according to the rough-in dimensions of 10880,
install valve 882 according to the rough-in dimensions of 10879.
Remove the plastic guard(1) after completing the finished wall.
Slide the cover kit(4) onto the valve(3) with the plug(13) facing outside
(
NOTE:
Don’t squeeze out the rings 12, 14). Push it against the wall.
Secure it with the screws(2, length 50mm). Slide the faceplate(5) onto
the valve with slots(6) downwards, push it against the wall. Screw the
bonnet(7) onto the valve.
Install handle(8): Tighten the setscrew(9) with hex wrench(10). Press
plug button(11) to the hole.
INSTALLATION
SERVICE PARTS
CLEANING INSTRUCTIONS
All finishes: Clean the finish with mild soap and warm water. Wipe entire surface completely dry with clean
soft cloth. Many cleaners may contain chemicals, such as ammonia, chlorine, toilet cleaner etc. which could
adversely affect the finish and are not recommended for cleaning.
Do not use abrasive cleaners or solvents on Kohler faucets and fittings.
1
3
4
2
5
7
9
10
11
14
13 12
8
3007136
Cover Kit
(Only for 10880)
3007134
Cover Kit
(Only for 10879)
3006903
Ring
(Only for 10879)
833730
2.5mm Hex Wrench
880002**
Plug Button Kit
3006902
Ring
3010384**
Handle
6
3007084**
Faceplate
(Only for 10879)
3006927**
Bonnet
3007085**
Faceplate
(Only for 10880)
3010602
Screw
**Color code must be specified when ordering
3010602
Screw


