


PUSH BUTTON INSTALLATION
NOTE:
Remove the package and screw out the nut. Make the
button through the tank cover as shown. Be noted that the
button shall be kept level. Arrange big and small flush buttons
according to the label of water consumption on the tank.
Tighten the nut from beneath the tank cover.
TANK COVER INSTALLATION
NOTE:
Press down the spring and insert the button into the
installation position on the tank cover. Release the spring to
lock it. Be noted not to let the steel wire of the flush valve
resting on the lever of the fill valve.
-7-
Fig.#16
16
Fig.#17
17
Spring
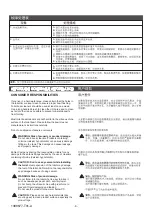
SYMPTOMS
CORRECTIVE ACTION
1. Poor Flush
A. Adjust the tank water level to match the waterline.
B. Fully open the water supply shut-off valve.
C. Clear obstructions from the trapway, jet, or bowl rim holes.
D. Clear obstructions from the waste line.
A. Adjust the chain for proper slack so the seal is not held off the flush valve seat.
B. Clean or replace the seal if it is worn, dirty, or misaligned with the flush valve seat, or
if the flush valve seat is damaged. Replace the flush valve seal or flush valve.
C. Clean the fill valve seat/seat washer of debris, or replace the piston/seat washer
assembly.
D. Remove the tank and tighten the flush valve nut if flush valve gasket is leaking. Do
not overtighten. If leakage continues, replace the gasket.
E. Adjust the tank water level if it is too high.
2. No Flush
IMPORTANT:
Use only genuine Kohler parts as shown to avoid property damage.
4. Tank takes excessive time to fill.
5. There is excessive noise when the
tank is filling.
3. The fill valve turns on/off by itself
without the toilet being flushed, or it
runs allowing water to enter the tank.
A. Reconnect the chain to the trip lever or flush valve.
B. Adjust the chain assembly to remove excessive slack.
A. Fully open the water supply shut-off valve.
B. Clean the valve inlet, valve head, or supply line. Flush the lines.
A. Partially close the water supply shut-off valve if the water pressure to the toilet is too
high. Check the toilet performance following any such adjustment.
B. Remove dirt or obstructions from the valve head. Flush the lines.
1388677-T01-A


