background image

-3-

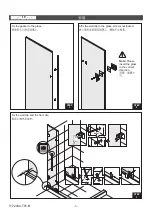
STEP

1

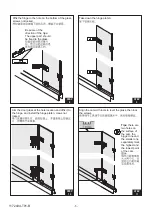
Fix the gasket to the glass.

STEP

2

Affix the wall clip to the glass ,screws not locked.

Note:

Please

insert the glass
in the correct
direction.

INSTALLATION

STEP

3

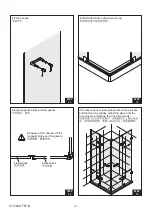
Fix the wall clip and the floor clip.

30

30

6mm

6mm

1172434-T01-B

Summary of Contents for MEMOIRS K-36937T

Page 1: ...re completely and correctly installed prior to installing your shower door Prepare waterproof layer to wall and floor of the showering area It is not allowed for any presence of electric switches and sockets Make sure the floor drain runs smoothly Before starting the door installation lay out and identify all the parts Use the exploded view illustrated on page 2 for reference For the installation ...

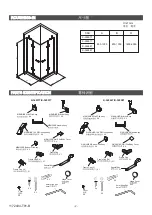
Page 2: ...Cover X4 Frame Cap LH X1 Frame Cap LH X1 Frame Cap RH X1 Frame Cap RH X1 Frame Cap X1 Frame Cap X1 Special Key X1 Cover X8 4mm Allen Key 4mm X2 X2 X4 Hinge Cover X20 SINGULIER Bracket Assy X2 SINGULIER Handle Assy SINGULIER Wall Clip Assy X4 SINGULIER Bottom Clip Assy X2 SINGULIER Wall Clip Body Cover X4 Special Key X1 Cover X8 4mm Allen Key 4mm X2 X2 X4 Hinge Cover X20 K 36944T K 36958T H B A MEM...

Page 3: ...e gasket to the glass STEP 2 Affix the wall clip to the glass screws not locked Note Please insert the glass in the correct direction INSTALLATION STEP 3 Fix the wall clip and the floor clip 30 30 6mm 6mm 1172434 T01 B ...

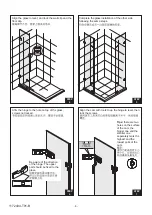
Page 4: ...the hole on top of the glass screws not locked Be aware of the direction of the hinge The upper part should be fixed to the glass STEP 6 1mm Align the cam with tools to up the hinge to level then lock the screws Tips there are two holes on the surface of the cam the bigger one and the smaller one separately mark the highest and the lowest point of the cam STEP 7 1172434 T01 B ...

Page 5: ...ffix the hinge to the hole on the bottom of the glass screws not locked Be auare of the direction of the hige The upper part should be fixed to the glass Align the cam with tools to level the glass then lock the screws Tips there are two holes on the surface of the cam the bigger one and the smaller one separately mark the highest and the lowest point of the cam 1172434 T01 B ...

Page 6: ...gnetic stripe and the gasket Be aware of the direction of the magnetic stripe and the gasket Fixed Glass Active Glass If the door opens unwell please loosen the wall clip and the floor clip slightly adjust the glass until the door closed completely then lock the screws STEP 15 1172434 T01 B ...

Page 7: ... 7 Fix the tierod STEP 16 STEP 17 Fix the cover caps to the wall clips 0mm 0mm STEP 18 Fix the cover caps to the hinges 1172434 T01 B ...

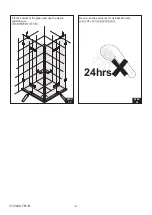
Page 8: ... 8 STEP 19 STEP 20 Fix the bottom of the glass and use the water resistant gel Do not use the enclosure for at least 24 hours 24 24hrs 1172434 T01 B ...

Reviews: