


button to select the function item, press button to adjust/setup,
Basic Operation
10
Basic Operation
Power on/off
1. Connect to the power supply with the power code, and the adapter.
2. -To turn on the TV
Press
POWER/
button on the TV or remote control.
-To turn off the TV
Press
POWER/
button on the TV or remote control.
Input Source select
Press
SOURCE
button on the TV set or remote control to display input
source menu, and use
CH+/-
button on the TV set or
Ĥ0ĥ!
button
on remote control to select the input source, press
OK
button on the
remote control to enter.
Note: Before you select the input source, make sure the
connections are prepared.
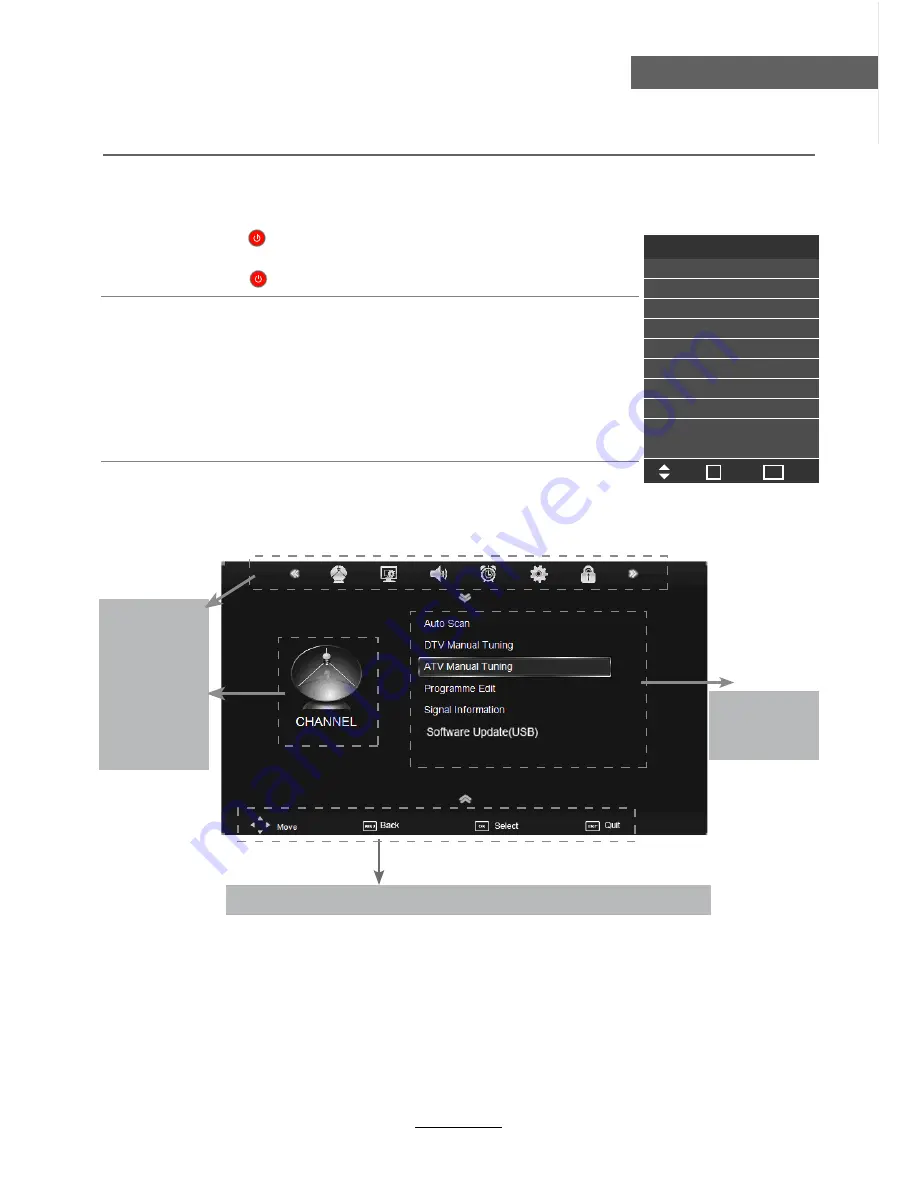
Basic OSD Menu operation
Press
MENU
button to display the OSD menu as below:
Use
/
Ĥ
/
ĥ
Ĥ
ĥ
button to select the main menu, and press
button to enter the submenu.
In the submenu, use
/
Ĥ ĥ
ĥ
or press
OK
button to enter the submenu.
* (Press
MENU
button to return to the upper menu.)
* (Press
EXIT
button to exit the menu display.)
Note1: Only when you input the suitable signal, the relevant items can be activated
Note2: Please operating the OSD menu according to hint on the bottom of the banner.
Main menu
CHANNEL
PICTURE
SOUND
TIME
OPTION
LOCK
Submenu
(Chanel menu
for example)
Hint---
you should operate the OSD menu according to the hint.
Input Source
Move
Select
Quit
OK
DTV
ATV
YPBPR
PC
HDMI1
HDMI2
HDMI3
Blu-Ray
AV
USB
EXIT
Summary of Contents for KGN1080PBD32VBA
Page 1: ...KGN W s USER MANUAL...
Page 3: ...1 Safety Precautions Power Supply...
Page 4: ...2 Safety Precautions Installation...
Page 5: ...3 Safety Precautions Use and Maintenance...
Page 6: ...4 Safety Precautions Important Safety Instructions...
Page 7: ...5 Safety Precautions Important Safety Instructions...


