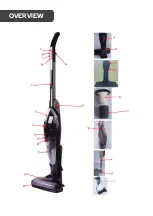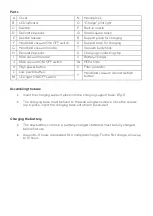
Parts
A
Cover
N
Handle lock
B
LED indicator
O
“Charge” pilot light
C
Dustbin
P
Built-in nozzle
D
Decorative pieces
Q
Small square brush
E
Dustbin release
R
Support piece for charging
F
Handheld vacuum ON/OFF switch
S
Support base for charging
G
Handheld vacuum handle
T
Vacuum body hook
H
Decorative pieces
U
Charging conducting strip
I
Main vacuum handle
V
Battery charger
J
Main vacuum ON/OFF switch
W
HEPA filter
K
High power button
X
Filter protector
L
Low power button
Y
Handheld vacuum cleaner detach
button
M LED light ON/OFF switch
Assembling the base
Insert the charging support piece into the charging support base. (Fig. 1)
The charging base must be fixed to the wall using two screws. Once the screws
are in place, insert the charging base onto them to secure it.
Charging the battery
The new battery comes in a partially-charged state and must be fully charged
before first use.
Around 6–8 hours are needed for a complete charge. For the first charge, allow up
to 10 hours.
Summary of Contents for KAVACST296A
Page 1: ...2 IN 1 CORDLESS 29 6V STICK VACUUM CLEANER KAVACST296A ...
Page 2: ......
Page 4: ...OVERVIEW ...


