background image


2.3  Cancel  


With  Cancel  icon  highlighted,  pressing  the  OK/Capture  button  to  cancel  all  action  and 
return back to the state of Live View. Nothing will be saved onto the SD card.  


2.4  Memory full  


OK  

button  


Once the 

memory of your

 SD card is full, 

the 

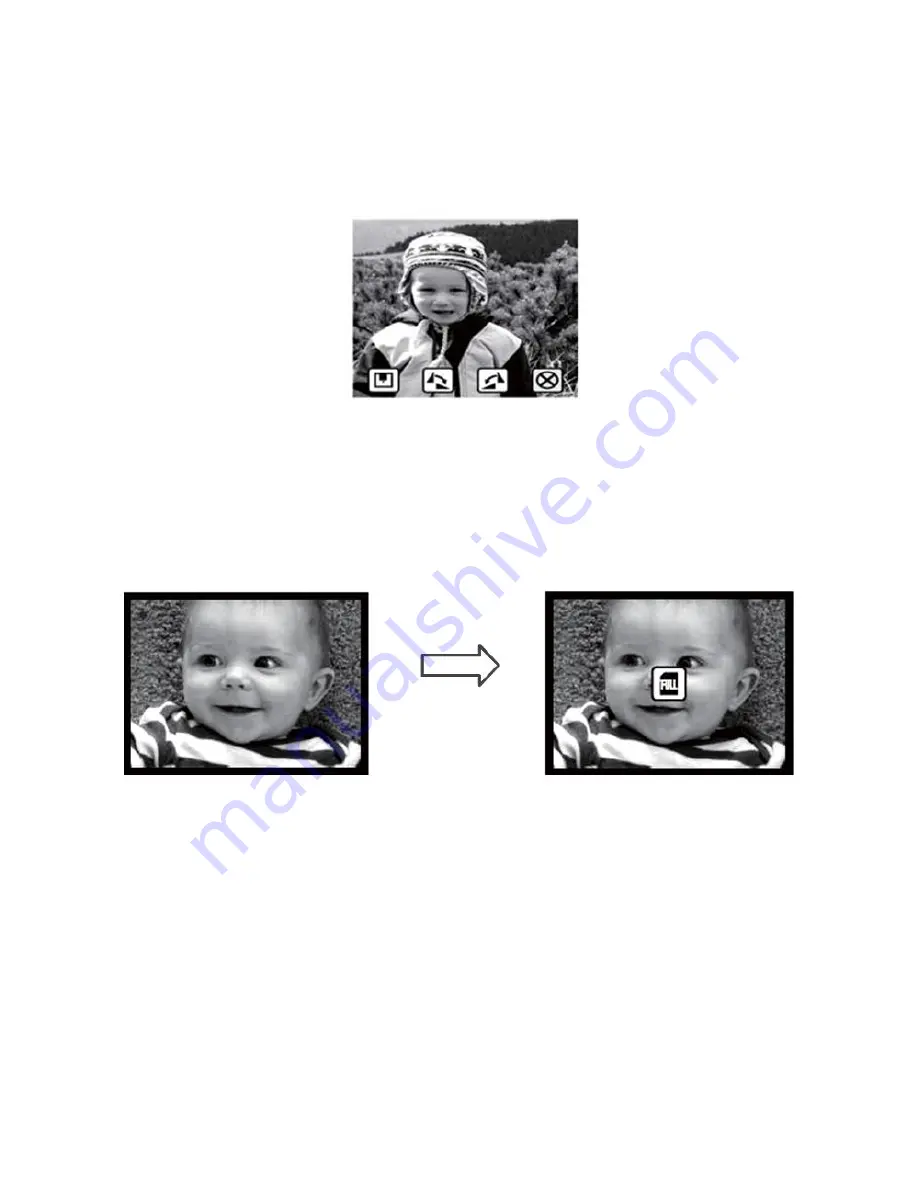
user can see a FULL icon showing on the 

display. User can either upload the saved images to PC or replace with another SD card for 
continuing capture.  

21 

Summary of Contents for KASCNCMB51A

Page 1: ......

Page 2: ...Index I Unpack Combo Scan II 2 II Install film into the film holder 3 III Quick Start 6 IV Operation Guide 14 1 ...

Page 3: ......

Page 4: ...e film into the holder entitled Slides Only 1 Open the slide holder as illustrated 2 Place slide in recessed slot in holder 3 Close the slide holder Install Negative Film into holder entitled Negative Film Only 1 Open the film holder as illustrated 3 ...

Page 5: ...numbers from left to right on top of film when install negative film into holder If the image is upside down Figure 2 2 the image can be corrected by pressing Down Flip button before capturing Figure 2 3 Alternative enter the playback mode and press Mode button to select Flip function Figure 2 4 Figure 2 2 4 ...

Page 6: ...Down Flip button Flip hard key Flip Press hard key on top of device in live view Figure 2 3 Playback button Press Playback button Mode Setting to select Flip function Refer to P 25 Figure 2 4 5 ...

Page 7: ...wer button Up Mirror Power status LED Left EV Playback Right Color Mode Setting Down Flip OK Capture SD card slot Film Slide slot Photo Business Card slot Slot for Backlight holder Power core port USB Port TV out jack 6 ...

Page 8: ...t Film into Film holder and Insert the film holder into the right side of the unit 2 Insert the back light holder at the rear side of the unit 3 Plug in power cable to the power port on the unit and one end to the power outlet Figure 3 1 Figure 3 1 7 ...

Page 9: ...t Enter media type menu to select the correct media for scanning Refer to P 29 Power button Media Type 5 Press OK Capture button to capture the image OK Capture button 6 Press on Playback button to playback the saved images Playback button 8 ...

Page 10: ...7 After capturing take out the SD card which stored the saved images 8 Alternative to 7 saved picture can be read directly without taking out the SD card from PC by entering MSDC mode Refer to P 31 9 ...

Page 11: ... if either one is attached Remove film slide holder by exiting Remove backlight holder by pressing the sliding to the left hand side down the handle and pull it out 2 Open the photo holder frame as illustrated place the photo on the base of the photo holder and close the photo holder frame 10 ...

Page 12: ...t the photo holder into the photo slot of the unit 4 Enter Media Type Mode to select the correct media for scanning Refer to P 29 Media Type 5 Press OK Capture button to capture the image OK Capture button 11 ...

Page 13: ...ove the film slide holder as well as the back light holder in the previous pages 2 Open the photo holder frame and place the business card on the base of the photo holder following the engraved guide line 3 Put the business card fixture on the top of photo holder 12 ...

Page 14: ...older with business card fixture into the photo slot of the unit 5 Enter media type menu to select the correct media for scanning Refer to P 29 Media Type 6 Press OK Capture button to capture the image OK Capture button 13 ...

Page 15: ...IV Operation Guide Live View Mode Capture Mode Playback Mode Setting Mode 14 ...

Page 16: ...e top left hand corner indicating the state in Live View Note select correct media type Refer to P 29 before capturing By default the setting is at Negative Film Unit will reset back to the default setting after power off 1 1 Mirror Hard Key Up Mirror Up Mirror button Save Exit OK Capture Press Up Mirror button to turn the image left to right press again vice versa 15 ...

Page 17: ...xit Down Flip OK Capture Down Flip button Press Down Flip button to turn the image upside down press again vice versa 1 3 EV Hard Key Up Save Exit Left EV OK Capture Down Press Left EV button to enter EV Brightness control 16 ...

Page 18: ...e exposure brightness with ranges of 3 to 3 Down button Press Down button to decrease exposure brightness with ranges of 3 to 3 1 4 Color Hard Key Up Save Exit Right Color OK Capture Down Press Right Color button to enter color control 17 ...

Page 19: ...ss Up button to increase Color with ranges of 3 to 3 Down button Press Down button to decrease Color with ranges of 3 to 3 Left Go Previous Right Go Next Press arrow hard key Left and Right to move between R G B 18 ...

Page 20: ...or 2 3 seconds to enter the Capture mode shown with four icons on the display Selected image Save to Memory Cancel Rotate 90 Rotate 90 Save to Memory save selected image to memory Rotate 90 rotate 90 degrees Rotate 90 continue rotate 90 degrees this is for adjusting images taken in portrait mode Cancel cancel all action and return to Live View 19 ...

Page 21: ...Rotate 90 degrees OK button User can manipulate rotate 90 or rotate 90 with the Left or Right button to highlight on the rotate 90 90 icon Press OK Capture button to do a clockwise or anti clockwise rotation and move to Save and Exit screen page Press again the OK Capture button to save the rotated image or exit without save The screen will return back to Live View 20 ...

Page 22: ...return back to the state of Live View Nothing will be saved onto the SD card 2 4 Memory full OK button Once the memory of your SD card is full the user can see a FULL icon showing on the display User can either upload the saved images to PC or replace with another SD card for continuing capture 21 ...

Page 23: ...he SD card by switching the bar to unlock position to continue use of the SD card 2 6 SD card error SD card error indicator If scanner cannot detect a good working SD card in the SD slot a warning icon with question mark will appear at the center of screen Either format the SD card Refer to P 30 or replace with another good SD card for continued operation 22 ...

Page 24: ...e Show Slide Show Indicator Once user enters the playback mode a slide show indicator is showing at the top left hand corner of screen The display will start playing all of the images that are stored on the SD card with 2 seconds interval between saved images User can pause the slide show by pressing either the Left or Right or Mode hard key 23 ...

Page 25: ......

Page 26: ...al Control Mode Press the Mode button one more time to enter Playback Edit Use Left and Right button to move to the desired icons and press OK button to confirm the action Rotate 90 Delete Rotate 90 Rotate 90 rotate image 90 degrees Rotate 90 rotate image 90 degrees Delete delete selected image stored in memory Press the Mode button to resume back to Playback Manual Control Mode 25 ...

Page 27: ...nt selected picture 3 6 Playback Delete OK button Delete With highlight on the Delete icon press OK button will delete the current selected picture and resume back to Playback Manual Control Mode If user intends to continue to delete the images repeat the process by pressing the Mode button and move to delete icon again and press OK button to confirm 26 ...

Page 28: ...tton If there are no images at all stored on the current SD card when pressing the Playback button a page with Question Mark symbol at the screen center will show up The page will remain for 2 seconds and resume back to Live View Mode 27 ...

Page 29: ...he Mode hard key to enter the Setting Mode Media Type USB Mode Format TV Out Media Type Select the type of media loaded in holder Format Format Internal memory or SD card TV out select NTSC or PAL according to TV system USB mode MSDC Mass Storage Device Class 28 ...

Page 30: ...4 1 Setting Media Type Color Negative film Business Plastic card Slide film B W Negative Photo Color Negative film Photo B W Negative film Business Card Plastic Card Slide 29 ...

Page 31: ...n from the left and press OK button to enter format confirmation page The highlight is at the Cancel icon by default User can press Left or Right button to move to Confirm or Cancel icon and press the OK button Note If there is no SD card inside the unit the unit will not allow you to scan any images at all Please insert an SD card and format it prior to scanning 4 3 Setting TV out OK button 30 ...

Page 32: ......

Reviews: