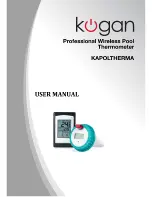
Kogan KAPOLTHERMA User Manual Download Page 12

3. Power up the third remote thermometer (if available) and set the

channel number dip switches, as described in Section 1.3. Verify 
the display reads Channel 3.

4. Power up the console last and wait about 3 minutes. Press the 

CHANNEL

 button on the top of the display to verify all three 

sensors are communicating to the console. 

5. Once verified, you are ready to install the remote thermometers.

4.6.2 Multi-channel Sensor Accuracy Note

Verify the temperature values match closely with the console and 
sensor array in the same location. The sensors should be within 3°C 
(the accuracy is ± 3°C).

Allow about 30 minutes for all sensors to stabilize.

4.7

Maintenance

We recommend inspecting the gasket inside the lid of the floating 
thermometer with each battery change. Moisten with pool gasket 
lubricant (available from most pool stores). Inspect for any moisture 
inside the floating thermometer. Replace the gasket every year.
To replace the gasket, slide the gasket over the float potion of the 
floating thermometer and insert into the gasket guide on the lid.

5. Glossary of Terms

Term

Definition

Accuracy

Accuracy is defined as the ability of a 
measurement to match the actual value of the 
quantity being measured.

Range

Range is defined as the amount or extent a value 
can be measured.

6. Specifications

1.12 Wireless Specifications

Line of sight wireless transmission (in open air): 300 feet under 
ideal conditions, 100 feet under most conditions.

Frequency: 433 MHz

Update Rate: 10 seconds on the remote, 90 seconds on the 
display console.

Version 1.4

               Page 11

Summary of Contents for KAPOLTHERMA

Page 1: ......

Page 2: ...e 8 4 2 2 Set Alarm Time 8 4 2 3 Set Date 9 1 8 Alarm Mode 9 4 3 1 Activating Deactivating the Alarm 9 4 3 2 Cancelling the Alarm 9 4 3 3 Snooze Alarm 9 1 9 Min Max Mode 10 1 10 C F Units of Measure 1...

Page 3: ...l in fresh chlorinated water Do not install in salt water Do not exceed the operational range 3 C to 60 C 2 Getting Started The Professional Wireless Pool Thermometer consists of a display console rec...

Page 4: ...r counterclockwise as shown in Figure 1 overleaf Be careful not to stress the sensor wire Figure 1 2 Insert two AA batteries and close the battery door as shown in Figure 2 Take care not to pinch the...

Page 5: ...ced in Table 1 the default is C DIP SWITCH FUNCTION 1 2 3 DOWN DOWN Channel 1 factory default setting UP DOWN Channel 2 DOWN UP Channel 3 DOWN F UP C factory default setting Table 1 6 Verify the corre...

Page 6: ...ery polarity before inserting batteries Remove the battery door on the back of the display Insert two AAA alkaline or lithium avoid rechargeable batteries in the back of the display console All of the...

Page 7: ...automatically switch to the normal mode and all further settings can be performed If the remote does not update please reference the troubleshooting guide in Section 7 1 4 Display Console Layout Note...

Page 8: ...erify the indoor and remote water temperature matches closely while in the same location The sensors should be within 3 C the accuracy is 3 C Allow about 30 minutes for both sensors to stabilize 3 Rem...

Page 9: ...the C F button for two seconds to advance rapidly 4 2 1Set Time 1 While in the TIME mode press the SET button and the hour will begin flashing Press the C F button to advance the hour Make special not...

Page 10: ...hile in the ALARM mode press the C F button to activate the alarm The alarm icon will appear 2 Press the C F button again to deactivate the alarm The alarm icon will disappear 4 3 2Cancelling the Alar...

Page 11: ...button on the top of the display to clear the maximum values to the current measured values 3 Press the MIN MAX button again to exit the min max mode 1 10 C F Units of Measure To toggle between C F te...

Page 12: ...ecting the gasket inside the lid of the floating thermometer with each battery change Moisten with pool gasket lubricant available from most pool stores Inspect for any moisture inside the floating th...

Page 13: ...eter sensor use lithium batteries in cold water climates 7 Troubleshooting Guide Problem Solution Wireless remote not reporting in to console The maximum line of sight communication range is 100m Move...

Page 14: ...ature values will disagree 8 Liability Disclaimer Please help in the preservation of the environment and dispose of used batteries via an authorized depot The electrical and electronic wastes contain...

Page 15: ...rate the equipment 10 Warranty Our product is covered by a Full 12 months warranty provided from the date of purchase If product develops a fault due to normal use we will repair the item with replace...

Reviews: