background image

This menu allows us to set the PVR Setting.

Press "UP" or "DOWN" cursor button to select desired item, 
press "LEFT" or "RIGHT" cursor button to change the setting.

TimeShift                                 On/Off

Timeshift to Record              On/Off

PS Record                                On/Off  

Standby after record                On/Off

PVR Setting

1

English

12

REC & MEDIA

HDD Information

In "REC" menu, select "HDD Information", press "OK" 
button to open HDD information window.

Press "EXIT" button to exit.

This menu can display some parameters of Removable Disk.

1

2

HDD Information

USB Disk A: xxxG bytes

Volume

Total Size

Free Size

Rec Size

TMS Size

File System

xxxx

xxxx

xxxx

xxxx

xxxx

xxx

Format

DVR Set

Timeshift

Timeshift to Record

PS Record

Standby after record

ON 

ON 

OFF 

OFF

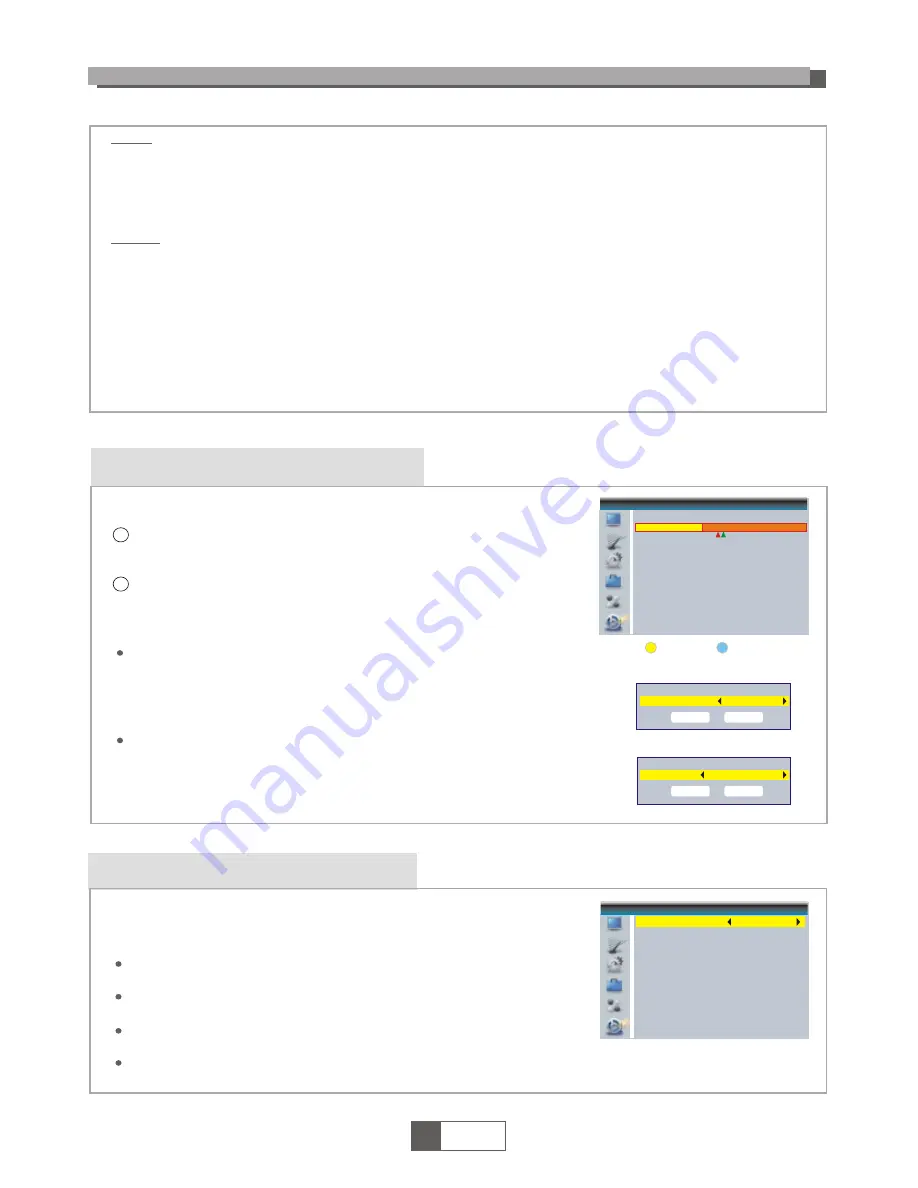
PVR Setting

DVR Set                 REC&TMS/Record/Timeshift

Press BLUE button to open DVR Set menu. 
Press "LEFT" or "RIGHT" cursor button to change DVR Type.
Select "OK" to confirm. Select "Cancel" to cancel.

Press YELLOW button to open Format menu.
Press "LEFT" or "RIGHT" cursor button to change Disk Mode.
Select "OK" to format. Select "Cancel" to cancel.

Format               FAT/NTFS

DVR Set

DVR Type

OK

REC& TMS

Cancel

Format

Disk Mode

OK

FAT

Cancel

Record:

Press "Red" button to  open rename window. 
Move the highlight to the program which you want to lock. Pressing "Green" 
button, it will ask you to input password. Default password is "0000". After 
input correct password, the program  is locked. If you want to unlock the 
program, press the "Green" button again.
Press "Yellow" button to make a delete mark on the program which 
you want to delete.
Return to parent directory.

Video:

Press "Blue" button to enter to edit sub-menu.
Press "1" button  to open the sort. You can sort by Name/Time/Size.
Return to parent directory.

"BLUE" button:  
"1" button: 
"EXIT" button:

"RED" button: 
"GREEN" button:
 

"YELLOW" button: 

"EXIT" button:

Summary of Contents for KALED19DVDWB

Page 1: ...WsZyydtd USER MANUAL...

Page 2: ...ccessories Do not place this videoproduct on an unstable cart stand tripod bracket or table The video product mayfall causing serious injury to a childor adult as well as serious damageto the video pr...

Page 3: ...EM SETUP System setup menu Language TV System Local Time Setting Timer Setting Parental Lock OSD Setting Favorite Auto Standby TOOLS Tools main menu Information Load Factory Setting Software Upgrade R...

Page 4: ...NTRODUCTION Remote sensor AC Mains Composite Video Coaxial Digital Audio TV aerial for an external TVaerial RF Loop through for an external device HDMI Output 1 English 1 USB port Standby button Down...

Page 5: ...ractive service 8 9 11 10 12 13 15 14 4 5 6 7 16 17 18 19 20 21 22 23 24 25 BACK Switch to previous channel EPG Open up Electronic Program GuideMenu Cursor CH VOL Cursor Navigation buttons used tonavi...

Page 6: ...ION There are many different types of TV and other equipment that you can connect to the STB In this manual you will see some of the most common ways to connect your equipment General Connecting a HiF...

Page 7: ...n selected Off 1 2 1 English 4 Welcome Region Language Display Mode Aspect Mode Poland English 576i Auto OK Auto Scan Channel Scan Aerial Adjustment LCN Press the MENU button to enter main menu Press...

Page 8: ...so selectthe required channel directlyfrom on screen channel list This is displayed using the STB smain menu See EditChannel in this manualfor operation detail 1 2 3 Accessing the EPG ofall channels 1...

Page 9: ...0007 Sky News 0001 No Name 0002 YooPlay Ga 0003 E4 1 0004 UKTV Histor 0005 SKY THREE 0006 Sky Spts Ne 0007 Sky News i Radio Channel list In the Edit Channelmenu select Radio ChannelList press OK butt...

Page 10: ...RGB LPCM Out TV System Region GMT Usage GMT Offset Summer Time Date Time France On GMT 01 00 Off xxxx xx xx 01 51 Local Time Setting xxxx xxx xxxx 4 1 2 3 Press the MENU button toenter main menu Press...

Page 11: ...nd channel and change the Password Favorite In Channel menu select Favorite press OK button to enter Favorite menu Select desired group press OK button to open the mock keypad Input letter and numeric...

Page 12: ...ttings Press EXIT button to exit We offer the functions foruser to upgrade software versionby OTA or by USB 1 English 9 4 1 2 3 Press the MENU button to enter main menu Press UP or DOWN button to high...

Page 13: ...NU button toenter main menu Press UP or DOWN buttonto highlight Game press RIGHT button to enter the Gamemenu Press UP or DOWN cursorbutton to highlight the desireditem and press OK button toenter the...

Page 14: ...rd Music Image Press RED button toshow Play List Move the highlight tothe file which youwant to add to playlist then press Green button to add Itwill mark a favorite icon on the file Press Yellow butt...

Page 15: ...VR Set menu Press LEFT or RIGHT cursor button to change DVRType Select OK to confirm Select Cancel to cancel Press YELLOW button to openFormat menu Press LEFT or RIGHT cursor button to change DiskMode...

Page 16: ...ess RECORD button to instantaneouslystart a record onthe current channel Press RECORD button againcan input duration Press STOP button tostop recording then aconfirmation window appears Select Yes to...

Page 17: ...uch as SAMSUNG HITACHI and SONY Some USB devices maybe can t be supported due toits quality NOTE Two Programs Recording in Difference TP When recording 2 FTA programs in difference TP user can tune to...

Page 18: ...d onyour TV Channel is scrambled Receiver off Handset not aimed correctly Front panel obstructed Hand set batteries exhausted 1 The batteries inyour remote control need replacing 2 There is an obstruc...

Reviews: