background image

6

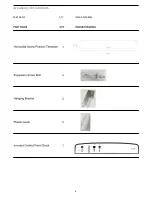
Accessory Kit Contents

PART NAME 

QTY 

IMAGE/DIAGRAM

ACCESSORY KIT CONTENTS

Summary of Contents for KA7VENTDRYA

Page 1: ...7kg Vented Dryer INSTRUCTION MANUAL INSTALLATION MANUAL MODEL KA7VENTDRYA ...

Page 2: ...2 THIS PAGE IS INTENTIONALLY LEFT BLANK ...

Page 3: ...4 Your Kogan Vented Dryer 5 Before First Use 5 Accessory Kit Contents 6 Control Panel 7 Quick Start guide 7 Installation Instructions 8 Operating Your Vented Dryer 11 Cleaning Maintenance 13 Troubleshooting 14 Warranty Information 15 ...

Page 4: ...the end of its drying program unless all items are quickly removed and spread out to ensure the heat is dissipated Ensure all objects are removed from pockets If the power cord is in any way damaged it must be replaced by the manufacturer its service agent or a qualified and licensed electrician UNPACKING During transportation protective packaging was used to protect the appliance against any dama...

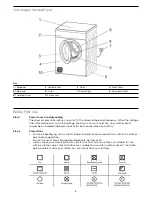
Page 5: ...Your clothes dryer should be on a dedicated power socket for both convenience and safety Step 2 Precautions Ensure all packaging user manuals paper and plastic are removed from within the clothes dryer before operation Ensure the vents aren t blocked and adequate air flow exists Always check your clothing articles care instructions to ensure they are suitable for use within a clothes dryer Not all...

Page 6: ...6 Accessory Kit Contents PART NAME QTY IMAGE DIAGRAM ACCESSORY KIT CONTENTS ...

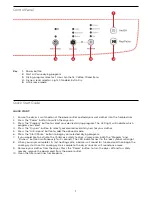
Page 7: ...level of dryness for your clothes 5 Press the Anti crease button to add the optional mode 6 Press the Start Pause button to begin your selected drying program 7 If you would like to activate the Child Lock safety feature simply press both the Program and Dryness button simultaneously for 3 seconds The LED indicator next to the lock symbol will alight 8 When your dryer completes its last heating cy...

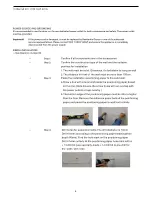
Page 8: ...8 Installation Instructions INSTALLATION INSTRUCTIONS ...

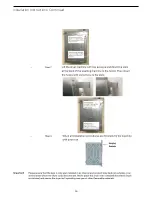
Page 9: ...9 Installation Instructions Continued INSTALLATION INSTRUCTIONS ...

Page 10: ...10 Installation Instructions Continued INSTALLATION INSTRUCTIONS ...

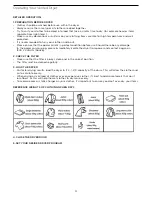
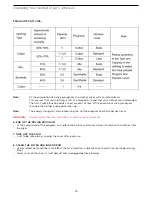
Page 11: ... any damage to the power cord or plug please immediately isolate the dryer from power and contact Kogan on 1300 2 KOGAN 56426 2 CHECK THE FILTER Make sure that the filter is always clean and in the correct position The filter must be cleaned regularly 3 LOAD THE DRYER For faster drying results load the dryer to 1 2 2 3 capacity of the drum This will allow the clothes and air to circulate evenly Wh...

Page 12: ...energy rating was calculated using the Cotton program and Extra dryness level WARNING Always follow the care instructions on each of your garments 6 END OF THE DRYING PROGRAM At the completion of the program an audible tone will sound to remind you to remove the clothes from the dryer 7 TAKE OUT THE PLUG Just to be safe always unplug the dryer after each use 8 CLEAN THE FILTER AND INNER DRUM Accum...

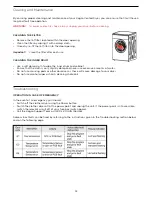
Page 13: ...rum and cabinet Ensure that the cloth is only slightly damp and never use excessive amounts of water Do not use scouring pads or other abrasives as these will cause damage to your dryer Do not use alcohol wipes or harsh cleaning chemicals Troubleshooting OPERATION IN CASE OF EMERGENCY In the event of an emergency you should Switch off the clothes dryer using the Power button Switch the clothes dry...

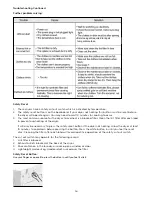
Page 14: ...essary to press the safety reset button if the dryer not heating Allow the dryer at least 10 minutes to cool down before pressing the button Press the white button in until you feel the reset click Cleaning the filter after each load will avoid repetitive operation of the safety cut out switch The cut out switch may operate for the following reason 1 Lint filter is blocked 2 Exhaust outlets blocke...

Page 15: ...laced if the goods fail to be of acceptable quality and the failure does not amount to a major failure WARRANTY TERMS CONDITIONS APPLIANCES DISHWASHERS LAUNDRY REFRIGERATION COOKING This document sets out the terms and conditions of the product warranties for Kogan Australia Appliances It is an important document Please keep it with your proof of purchase documents in a safe place for future refer...

Page 16: ...16 ...

Reviews: