3. Attaching Power Brush to Power Tube
Align the opening at the top of the power brush with that of the lower end of the power tube,
and insert until an audible ‘click’ is heard.
4. Attaching Power Tube to main assembly
Ensure upper and lower assembly have already been attached (Step 2, previous page)
before this step. This forms the “main assembly” referenced here.
Align the opening at the top end of the power tube with the opening in the main assembly,
and insert until an audible ‘click’ is heard.
5. Attaching the Power Brush to main assembly
The power brush head can be directly attached to the main assembly, without the power
tube in place. Follow the same steps as above, with just the power brush inserting into the
main assembly.
6. Assembly of Accessory Brushes with Vacuum Cleaner
These same steps are also applicable for the long crevice nozzle and 2-in-1 upholstery brush.
Summary of Contents for C9 PRO
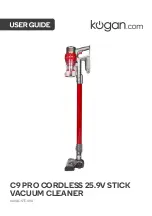
Page 1: ...C9 PRO CORDLESS 25 9V STICK VACUUM CLEANER KAVACSTC09A...
Page 2: ......
Page 13: ...NOTES...
Page 14: ......
Page 15: ......


