Kodak PIXPRO AZ401 User Manual Download Page 46

45

44

45

ISO

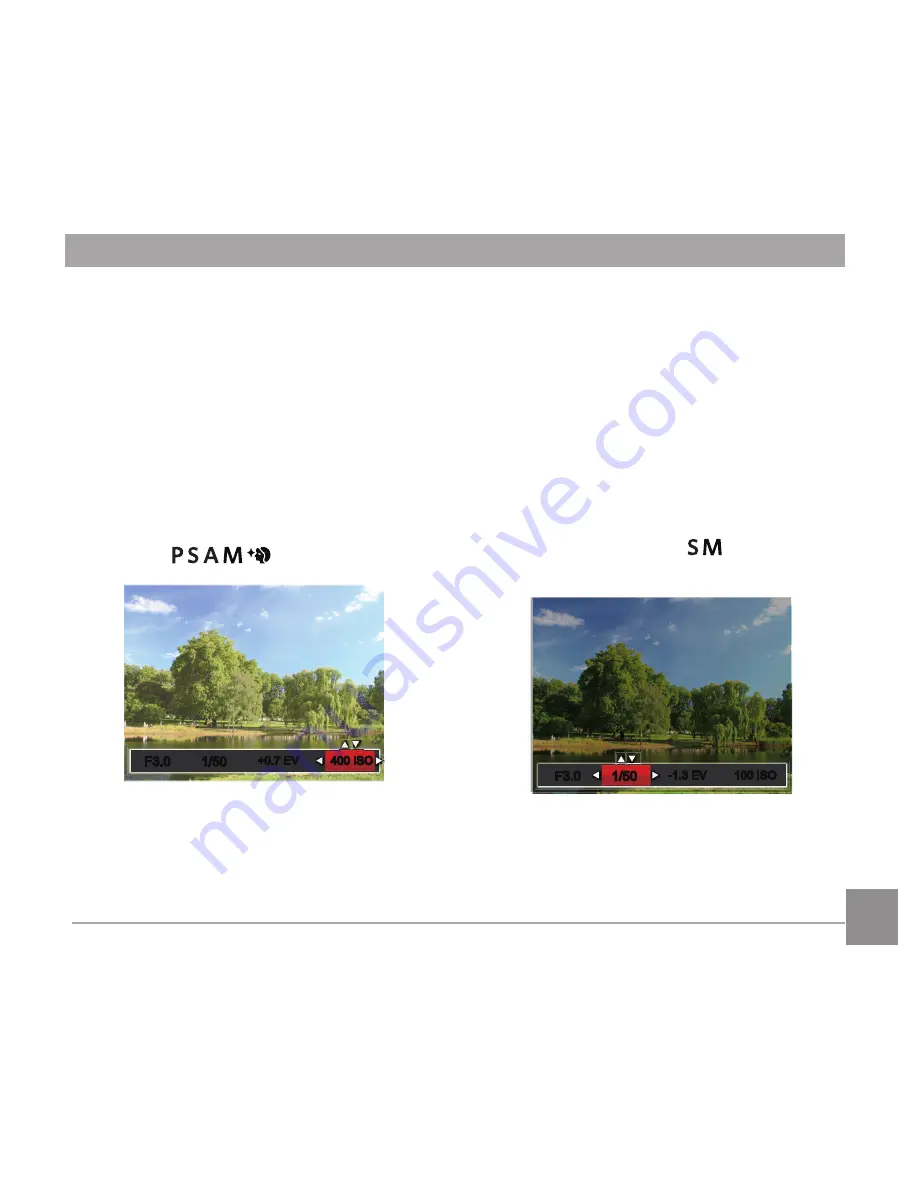
The ISO function allows you to set the 

sensitivity of the camera's light sensor 

based on the brightness of the scene. To 

improve the camera's sensor performance 

in darker environments, a higher ISO value 

is required. A lower ISO value is needed 

when shooting in brighter conditions.
Pictures taken at higher ISO settings will 

generally have more noise than those 

taken at lower ISO settings. (This can be 

adjusted in           Mode)

F3.0

F3.0

1/50

1/50

+0.7 EV

400 ISO

+0.7 EV

400 ISO

The camera's ISO settings include: Auto, 

80 100, 200, 400, 800, 1600 and 3200.

Shutter Adjustment

For shutter speed, the camera may 

automatically set the aperture value 

corresponding to the manually set 

shutter speed to obtain the most suitable 

exposure value. The movement of an 

object may be shown by adjusting the 

shutter speed. A higher shutter value can 

help you more clearly capture fast moving 

objects, while a lower shutter value can 

better show the movement of objects. 

(This can be adjusted in     Mode)

-1.0 EV

F3.0

F3.0

1/50

100 ISO

1/50

100 ISO

-1.3 EV

-1.3 EV

Summary of Contents for PIXPRO AZ401

Page 1: ...User Manual KODAK PIXPRO AZ401 DIGITAL CAMERA...

Page 2: ...ce that may cause undesired camera operation For Customers in Europe CE mark indicates that this product complies with the European requirements for safety health environment and customer protection C...

Page 3: ...used for identification purposes only and are properties of their respective owners and holders This manual provides you with instructions on how to use your new KODAK PIXPRO Digital Camera Every eff...

Page 4: ...es in contact with the camera turn the camera off immediately remove the battery and the memory card and dry it completely within 24 hours When you take the camera from a cold environment to a warmer...

Page 5: ...ns to avoid short circuiting discharging excessive heat or possible leakage Do not attempt to disassemble batteries Do not expose batteries to water Always keep battery contacts dry Do not heat batter...

Page 6: ...memory card Copy the data to your computer before you edit the files When the camera is stored for long periods of time be sure to download your photos and remove the memory card Store the memory car...

Page 7: ...video Do not expose the camera s LCD to water In a humid environment only wipe it with a soft dry cleaning cloth If the LCD is damaged pay particular attention to the liquid crystal in the screen If a...

Page 8: ...the First Power On 18 Resetting your Language 18 Set your Language Date Time 18 Resetting Date Time 19 MODE OVERVIEW 20 Display Setting 20 Overview of the Screen Icons in Photo Shooting Mode 21 LCD Sc...

Page 9: ...ng 44 Exposure Compensation 44 ISO 45 Shutter Adjustment 45 Aperture Adjustment 46 Using Quick Recording 46 i Button Function Menu 47 PLAYBACK 48 Viewing Photos and Videos 48 Thumbnail View 49 Using Z...

Page 10: ...ion 61 Movie Menu 62 Expo Metering Exposure Metering 62 Video Quality 63 OIS Optical Image Stabilization 63 Movie Setting Menu 64 Digital Zoom 65 Custom Settings 65 Playback Menu 66 Playback 67 HDR Hi...

Page 11: ...82 Transferring Files to Your Computer 83 Video System 84 Set Eye Fi Card Connection Mode 85 Supported HDMI Connections 86 Connecting HDMI Ready TV 86 Connecting to a PICTBRIDGE Compatible Printer 87...

Page 12: ...ng with the following accessories If anything is missing or appears to be damaged please contact your retailer or our customer service center Accessories Included Neck Strap AA Alkaline Battery 4 Lens...

Page 13: ...12 Installing Lens Cap and Neck Strap...

Page 14: ...er Button 3 Strap Eyelet 4 Exposure Compensation Button 5 Continuous Shot Button 6 Power Switch 7 AF Assist Beam Self Timer Lamp 8 Mode Dial 9 Flash Lamp 10 Flash Button 11 Microphone 12 Speaker 13 Le...

Page 15: ...ro HDMI Port 20 AF Button Up Button 21 Flash Button Right Button 22 Delete Button Self Timer Button Down Button 23 Display Button 24 Battery Cover Switch 25 Battery Cover 26 Playback Button 27 Tripod...

Page 16: ...elow Installing Battery and Memory Card Please use brand name batteries such as Energizer or Duracell for optimal performance Do not mix new and old batteries or use different brands of batteries When...

Page 17: ...pacity of 4GB to 32GB The camera is not compatible with Micro SD Ultra Ultra Plus Extreme XC or adapters for any of these other memory cards To remove your memory card open the battery cover door gent...

Page 18: ...with both hands being careful not to block the flash and lens with fingers 2 Point the lens toward the object you want to take a picture of and then frame it with the LCD 3 Use the Zoom button to sele...

Page 19: ...First Power On 1 When you turn the camera on for the first time the language selection screen will appear 2 Press the arrow buttons to select your desired language 3 After you press the button to con...

Page 20: ...e button or right arrow button to enter the menu 3 Press the up down arrow buttons to select Date Time and press the button or right arrow button to enter the menu 4 Press the left right arrow buttons...

Page 21: ...not display any additional icons on screen Display Setting MODE OVERVIEW Classic Displays the camera parameters on screen 0 3 EV 400 ISO 1234 SD 16M 1 50 00 56 00 F3 0 F3 0 Full Camera parameters wit...

Page 22: ...rity Custom Settings Manual Mode 2 Macro Mode 3 Zoom Display By turning the Zoom lever 4 Memory Card Built In Memory 5 Battery Status 6 White Balance Adjustable in Mode 7 Color Effect Adjustable in Mo...

Page 23: ...ash Mode Force Off Flash Auto Force Flash Slow Sync Slow Sync Red Eye Red Eye Reduction 21 Self Timer Self Timer Off Self Timer 2 sec Self Timer 10 sec Self Timer Smile 22 HDR Adjustable in Mode 23 Ey...

Page 24: ...om lever 5 Memory Card Built In Memory 6 Battery Status 7 Color Effect 8 Video Quality 9 Remaining Recording Time 10 Exposure Compensation EV Value 11 Image Stabilization 12 Focus Frame 13 Eye Fi On w...

Page 25: ...POF File 2 File Protection 3 Memory Space indicating the current number of photos and total number of photos for card memory size 4 Memory Card Built In Memory 5 Battery Status 6 Zoom Magnification Ar...

Page 26: ...ting allows you to choose a specific shutter speed so the camera will adjust the aperture automatically to ensure correct exposure Aperture Priority Allows you to choose a specific aperture and the ca...

Page 27: ...otos and videos for the best possible results Follow these steps 1 Turn the Power Switch to turn the camera on 2 Turn the Mode dial to 3 Compose your picture in the LCD and press the shutter button ha...

Page 28: ...e left right arrow buttons to select a setting to adjust 3 Press the up down arrow buttons to adjust the setting 4 Press the button to confirm the settings and enter the shooting screen When Program A...

Page 29: ...erture Priority When selecting Aperture Priority Mode you can adjust the aperture size EV value and ISO value Selecting a large aperture opening will emphasize the point of focus and show a blurry bac...

Page 30: ...n and press the up down arrow buttons to select 3 Press the left right arrow buttons to select Face Beautifier Effects and press the button to confirm and return to photo shooting mode 1234 0 3 EV 400...

Page 31: ...the Shutter button to capture the image Save Cancel 4 When you finish shooting the first photo two target icons will display on the LCD at left and right sides Move the camera to the right until the r...

Page 32: ...hooting effect in Panorama Mode please keep moving horizontally and keep unnecessary shaking to a minimum In panorama mode up to 4 photos can be captured when the image size is set at 2MP You can sele...

Page 33: ...scape For landscapes and outdoor shots Vivid reproduction of greens and blues Portrait Most suitable for capturing people focusing on their face Snow For snowy conditions Reproduces natural clear whit...

Page 34: ...cus on their faces Night Portrait When you take portraits at night or in low light conditions automatically adjusts the exposure for people and night scenes Backlit Portrait When the sun or any other...

Page 35: ...select Movie Mode Movie Mode 2 Press down the Shutter Button to start recording 3 Once you are finished press the Fast Video Recording Button or the Shutter Button to stop recording and return to the...

Page 36: ...e above press the left right arrow buttons to select the capture mode that you want to define as and press the button to enter the shooting screen 3 As shown in the figure above press the button and c...

Page 37: ...ings menu and select Yes after setup Otherwise the parameter settings will not be saved in the case of switching the camera on off or in mode switching If you want to remove the parameter setting in C...

Page 38: ...the camera to zoom in or out on the subject while taking pictures Using the Zoom Function BASIC OPERATION 0 3 EV 400 ISO 1234 00 56 00 SD Zoom Indicator When the Optical Zoom reaches the threshold as...

Page 39: ...lowing 3 modes Single AF The focus frame appears on the center of the LCD to focus on the subject Multi AF The camera automatically focuses the subject in a wide area to find the focus point Object Tr...

Page 40: ...eft arrow button to enter the Macro menu 2 Press the left right arrow buttons to select the following 2 modes Macro Off Select this option to disable macro Macro On Select this option to make focusing...

Page 41: ...nds after the shutter button is pressed Self Timer 10 sec A single picture is shot 10 seconds after the shutter button is pressed Self Timer Smile Press the shutter button and a picture will be taken...

Page 42: ...ed off Flash Auto Camera flash goes off automatically based on existing light conditions Force Flash The flash will engage with each shot even if there is enough available light to take the photo with...

Page 43: ...ce Menu AWB 2 Press the left right arrow buttons to select from the following 8 modes AWB Daylight Cloudy Fluorescent Fluorescent CWF Incandescent Manual WB Fully press the shutter button to detect th...

Page 44: ...buttons to select the following 4 modes Single Continuous Shot 3 Shots Time Lapse Take pictures based on the preset interval 30sec 1min 5min 10min 3 Press the button to confirm the settings and exit t...

Page 45: ...Setting options F3 0 F3 0 1 50 100 ISO 1 50 100 ISO 2 0 EV 2 0 EV 3 Press the up down arrow buttons to adjust the option values 4 Press the button to complete the setting and enter shooting mode Expo...

Page 46: ...ted in Mode F3 0 F3 0 1 50 1 50 0 7 EV 400 ISO 0 7 EV 400 ISO The camera s ISO settings include Auto 80 100 200 400 800 1600 and 3200 Shutter Adjustment For shutter speed the camera may automatically...

Page 47: ...ll keep both the background and main object in clear focus This can be adjusted in Mode F3 0 F3 0 100 ISO 1 0 EV 1 0 EV 100 ISO 1 50 1 50 Using Quick Recording In Photo Shooting Mode press the Recordi...

Page 48: ...select the Image Color Setting Menu 2 Press the left right arrow buttons to select the image color setting options Normal There are 7 image color options in Photo Shooting Mode Normal Vivid Sepia Bla...

Page 49: ...ory or on the Memory Card 3 To play a selected video clip press the button to enter the movie playback mode An operation guide appears on the screen when playing back a video Press the appropriate but...

Page 50: ...he photos and videos on the screen W Zoom Out T Zoom In 1 Slide the Zoom Lever to switch between 3 x 3 and 4 x 4 thumbnails 2 Press the arrow buttons to select a picture or video clip to view and pres...

Page 51: ...w buttons to navigate and select a portion of the photo to be zoomed in on 6 Press the button to return the image to its original scale Movie images cannot be magnified When playing back photos you ca...

Page 52: ...de 2 Press the left right arrow buttons to select the photos and videos to be deleted 3 Press the down arrow button and the deletion screen is displayed 4 Press the up down arrow buttons to select Del...

Page 53: ...2 Press the button to enter the slide option except for video files 3 Press the left right arrow buttons to select slideshow playing or Cancel to return to the Playback screen Slideshow 4 Press the b...

Page 54: ...to the following pages for more details about each setting Expo Metering Exposure Metering Use this setting to select the target size of the camera s field of view to be metered There are 3 options Ai...

Page 55: ...er the image quality becomes As the number of recorded pixels lessen you will be able to record and store more images on a memory card OIS Optical Image Stabilization This mode can help reduce photo b...

Page 56: ...DR High Dynamic Range With the HDR function pictures that are overexposed may be corrected to optimize the highlights and lowlights captured to more accurately represent the actual scene Use of tripod...

Page 57: ...eautifier Mode Face Beautifier Mode has 3 effects Effect 1 Skin Soften Effect 2 Skin Soften Eye Brightening Effect 3 Skin Soften Eye Brightening Eye Enlargement Scene Select a Scene Mode under SCN Mod...

Page 58: ...57 Shooting Menu in the Shooting Mode O Available X Unavailable Options Shooting Modes O O O O O O 16M O O O O O O O O O O O O O O O O O O O O O O O X X X X X X O...

Page 59: ...buttons to pick the item to be selected and press the button or right arrow button to enter the menu 5 Press the up down arrow buttons to select an option and press the button to confirm Photo Shooti...

Page 60: ...uto Focus Assist Beam In a darker environment the AF assist beam setting can be turned on for better focus Digital Zoom This setting is for adjusting digital zoom If this function is disabled only opt...

Page 61: ...mp on the photo image Off Date Date Time Quick Review This option allows quick review of the photos immediately after they are taken Each photo is displayed on the LCD screen for the selected time The...

Page 62: ...aces as clear as possible in Photo Mode There are 2 options Off On Custom Settings Custom settings stores the current photo shooting mode and its parameters The stored mode and parameters are directly...

Page 63: ...confirm Expo Metering Exposure Metering Use this setting to select the target size of the camera s field of view to be metered Expo Metering AiAE There are 3 options AiAE Artificial Intelligence AE A...

Page 64: ...480 30 Class 4 69 Minutes The longest recording time is 29 minutes at one time When recording in higher pixel resolutions for extended periods of time this can cause the camera to generate heat This i...

Page 65: ...ect and press the button to enter the menu Press SET To Enter Menu 3 Press the up down arrow buttons to select and press the button or right arrow button to enter the menu 4 Select the items to be set...

Page 66: ...the current movie shooting mode and its parameters The stored mode and parameters are automatically used in Custom Settings Mode Digital Zoom This setting is for adjusting Digital Zoom If this functi...

Page 67: ...e up down arrow buttons to select the desired playback and press the button to enter 3 Press the left right arrow buttons to select an option and press the button to confirm Normal Mode Press SET To C...

Page 68: ...time settings HDR High Dynamic Range With the HDR function pictures that are overexposed may be corrected to optimize the highlights and low lights captured to more accurately represent the actual sce...

Page 69: ...settings screen 3 Press the left right arrow buttons to select Touch up options or Cancel to return to the Playback screen Red Eye Reduction Skin Soften Eye Brightening Eye Enlargement Cancel 4 Press...

Page 70: ...the button select the settings and press the button to display the settings screen 3 Press the left right arrow buttons to select the rotation direction or Cancel to return to the Playback Screen Tur...

Page 71: ...t right arrow buttons to select the photos to be edited 2 Press the button select the settings and press the button to display the settings screen 3 Press the left right arrow buttons to select 1024 o...

Page 72: ...oto 1 In Playback Mode press the left right arrow buttons to select the photos to be edited 2 Press the button to select the image color setting menu 3 Press the left right arrow buttons to select the...

Page 73: ...ow buttons to select and press the button or right arrow button to enter the menu 4 Press the up down arrow buttons to select the item to be set and press the button or right arrow button to enter the...

Page 74: ...e up down arrow buttons to select an option and press the button to confirm Protect To prevent any pictures or videos from being accidentally erased use this setting to lock one or all of the files To...

Page 75: ...e photo or video Date Folder Delete all photos in the Date Folder All Delete all photos or videos 3 Press the up down arrow buttons to select an option and press the button to confirm The indicator me...

Page 76: ...rompt appears Select to change and save the picture Select to cancel changes and return to the trim prompt screen The image cannot be clipped trimmed again once it has been clipped to 640 X 480 DPOF D...

Page 77: ...lect the item to be set and press the button or right arrow button to enter the menu 5 Press the arrow buttons to select an option and press the button to confirm Refer to the following pages for more...

Page 78: ...Power Saver LCD Power Off Time Turn Off Time Auto 3 Min 5 Min Normal 1 Min 3 Min Best 30 S 1 Min Language Refer to the Resetting your language section on page 18 World Time The Zone Setting is a usefu...

Page 79: ...o enter the menu 2 Press the up down arrow buttons to select an option LCD Brightness Normal 2 2 1 1 Normal 3 Press the button to confirm Battery Type Please choose the right type of battery before us...

Page 80: ...w buttons to select and press the button or right arrow button to enter the menu 3 Press the up down arrow buttons to select Format and press the button or right arrow button to enter the menu 4 Press...

Page 81: ...on to confirm If there is no card available in the camera this function will not be displayed File Numbering After you take a picture or video clip the camera will automatically save it with a sequent...

Page 82: ...t arrow button to enter the menu 4 When there is a new firmware version on a memory card select Yes to update Reset Use this setting to restore the camera to its original default settings 1 Press the...

Page 83: ...s will allow you to ensure that the camera is correctly configured to connect with a computer 1 Press the button press the up down arrow buttons to select and press the button to enter the menu 2 Pres...

Page 84: ...u would copy any typical folder or file Follow the steps below to connect the camera to a computer 1 Make sure the computer is turned on 2 Connect one end of the micro USB cable to the USB AV OUT port...

Page 85: ...enter the menu 2 Press the up down arrow buttons to select and press the button or right arrow button to enter the menu 3 Press the up down arrow buttons to select TV System and press the button or ri...

Page 86: ...n press the up down arrow buttons to select and press the button to enter the menu 2 Press the up down arrow button to select and press the button or right arrow button to enter the menu 3 Press the u...

Page 87: ...a cable with a high resolution output terminal which should be purchased separately to connect the camera to the television which meets HDMI standards 2 The camera will be automatically detected by t...

Page 88: ...The camera s USB port can be set to connect with either a PC or a Printer the following steps will ensure that the camera is correctly configured to connect with a printer 1 Press the button press the...

Page 89: ...o the USB port on the printer If the camera is not connected to a PICTBRIDGE compatible printer the following error message will appear on the LCD The error message above will also appear if the USB m...

Page 90: ...er to the following sections for more detailed information on each setting Print with Date If you have set the date and time on your camera the date and time will be recorded and saved with each photo...

Page 91: ...cel to cancel printing Print without Date Use this setting to print the photos without dates on them 1 In the PICTBRIDGE Menu select Print without Date and the screen as shown below appears 2 Press th...

Page 92: ...Cancel to cancel printing Print Index You can print all photos in the camera via this function 1 In the PICTBRIDGE Menu select Print Index and the screen as shown below appears 2 Select Yes and press...

Page 93: ...75 1 In the PICTBRIDGE Menu select Print DPOF Images and the screen as shown below will appear 2 Select Yes and press the button to confirm select Cancel to cancel printing Exit Select Exit to exit th...

Page 94: ...4 Megapixels Lens Focal Length 4 3mm Wide 172mm Tele 35mm Film Equivalent 24mm Wide 960mm Tele F Number F3 0 Wide F6 8 Tele Lens Construction 11 groups 15 elements Optical Zoom 40x Focusing Range Norm...

Page 95: ...File Format Still Image Exif 2 3 JPEG Movie MOV Image H 264 Audio Linear PCM Monaural Shooting Modes Auto Mode Program AE Shutter Priority Aperture Priority Manual Mode Face Beautifier Panorama Mode...

Page 96: ...AE AiAE Center Weighted Average Spot Fixed to Center of Frame Face AE Exposure Control Method Program AE AE Lock Available Shutter Prior AE Aperture Prior AE Exposure Compensation 2 EV in 1 3 Step Inc...

Page 97: ...Multi Language Support 27 Languages Jacks AV OUT USB 2 0 Micro 5 pin USB HDMI Type D Eye Fi Support Yes Power AA Alkaline Battery 4 AA Ni MH Battery 4 Not Included Shooting Capability Battery Perform...

Page 98: ...et Fireworks Night Portrait Night Landscape is enabled this prompt message is displayed when the photo shooting screen is displayed for the first time This message will disappear after 2 seconds Built...

Page 99: ...Full Indicates that the SD card is full Replace SD card with another that has available memory This message will disappear after 2 seconds Memory Full Indicates that the camera memory is full Erase Fi...

Page 100: ...iting speed will be slower and recording will not continue Replace the memory card with a Class 4 or higher SD card This message will disappear after 2 seconds Cannot write to SD card The photo shooti...

Page 101: ...and the camera returns to normal playback mode Unable to recognize files The format of the file to be viewed is not supported or the file is corrupted so it cannot be properly read This message disapp...

Page 102: ...for high magnification above 15X Optical Zoom Images and video files cannot be saved The memory card is full The memory card is locked Use another memory card or delete unnecessary files Unlock the m...

Page 103: ...mance Cannot write to the memory card The memory card has been locked Release the write lock of the memory card or replace with another card Too many movies to process The number of pictures or folder...

Page 104: ...that are referred to in this document are trade names trademarks or registered trademarks of their respective owners and holders The owners and holders are not affiliated with JK Imaging Ltd our prod...

Reviews: