Kodak KB30 - 35 Mm Camera Manual Download Page 27

27

Kodak and Sensalite are trademarks.

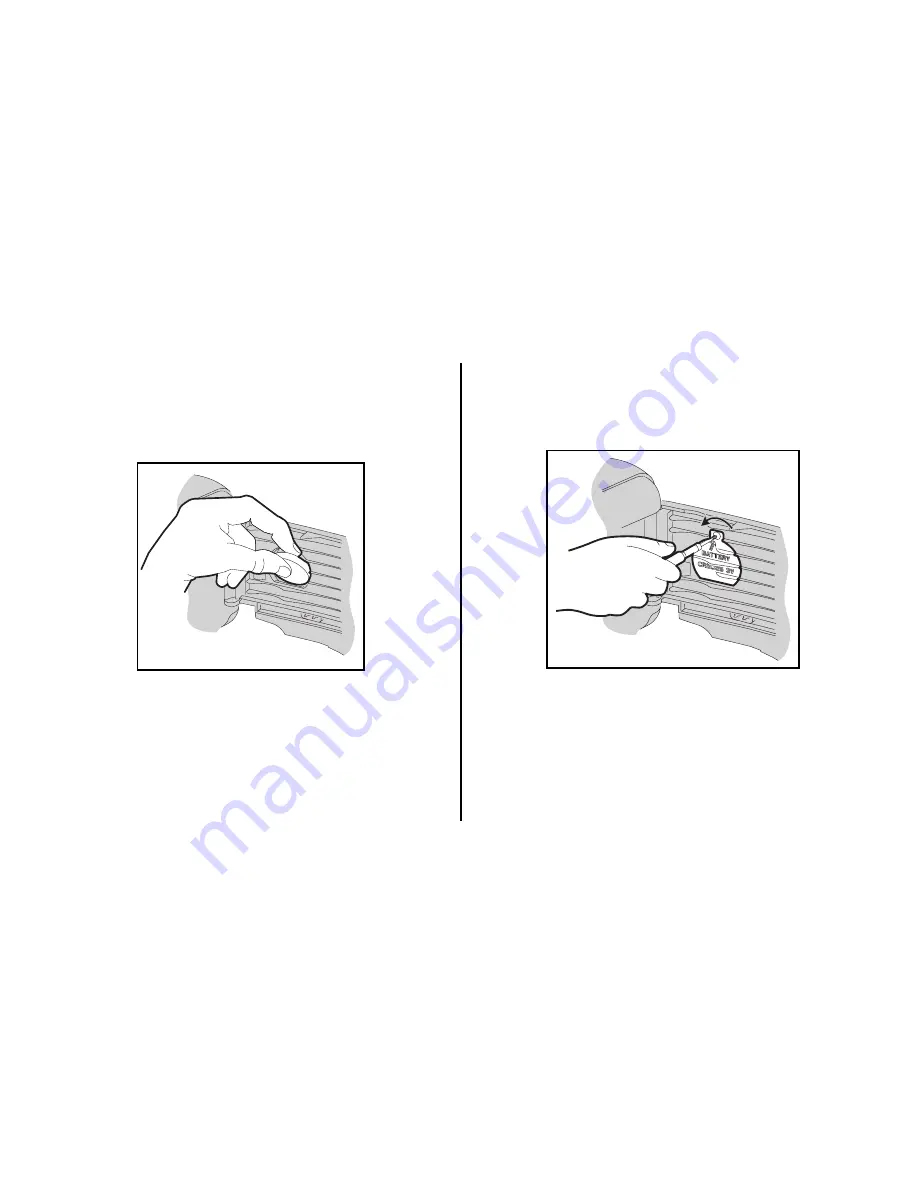
2. Remove the battery cover and

insert a new 3-volt lithium
CR 2025 (+ side down) battery.

3. Replace the battery cover and

reattach the screw. Reset the
date and time.

Date back subject to minor
appearance and specification
changes.

Summary of Contents for KB30 - 35 Mm Camera

Page 1: ...1 KB30 35 Camera...

Page 2: ...2 Getting to Know Your Camera 1 2 3 4 6 7 8 9 5 11 10...

Page 3: ...3 12 13 14 15 16 19 20 21 22 23 24 17 18...

Page 4: ...Camera 5 Camera Identification 6 Specifications 7 Loading the Batteries 8 Loading the Film 9 Taking Pictures 13 Taking Flash Pictures 17 Unloading the Film 21 Troubleshooting 22 For Owners of the Qua...

Page 5: ...t 1 800 242 2424 Kodak Canada only from 8 30 a m to 5 00 p m Eastern time Monday through Friday at 1 800 465 6325 ext 36100 for the Toronto area call 416 766 8233 ext 36100 Visit our web site at www k...

Page 6: ...7 Film Window 18 Film Door 19 Film Load Mark 20 Tripod Socket 21 Film Take Up Spool 22 Film Chamber 23 Battery Door Latch 24 Film Door Latch 1 Shutter Button 2 Picture Counter 3 Viewfinder 4 Red Eye R...

Page 7: ...econd Aperture f 8 0 for flash daylignt Film Speed DX ISO 100 200 or 400 Focus Range Daylight 4 ft 1 2 m to infinity Flash Unit KODAK SENSALITE Flash Power Source 2 AA size alkaline batteries Dimensio...

Page 8: ...s to come on Battery Tips Remember to keep spare batteries with you at all times Read and follow all warnings and instructions supplied by the battery manufacturer Keep batteries away from children Do...

Page 9: ...ed film If in sunlight turn your back to the sun and load the film in the shade of your body 1 Push up on the FILM DOOR LATCH 24 to open the FILM DOOR 18 2 Insert the flat end of the film cartridge ov...

Page 10: ...l the tip reaches the FILM LOAD MARK 19 Lay the film flat between the film guide rails If the end of the film extends past the film load mark gently push the excess back into the cartridge FILM TIP HE...

Page 11: ...DOW 17 you should see the film information through the window Do not open the film door after you start taking pictures or you will ruin the film GA24 100 21 5 Slide the LENS COVER 8 completely open t...

Page 12: ...until the PICTURE COUNTER 2 shows 1 If the picture counter does not move reload the film into the camera and repeat the film loading instructions NOTE The picture counter starts at S and each dot wit...

Page 13: ...e LENS COVER 8 completely open to uncover the LENS 9 and to turn the FLASH 5 on 2 For a sharp picture stand at least 4 ft 1 2 m from your subject 3 Look through the VIEWFINDER EYEPIECE 15 to see your...

Page 14: ...UTTER BUTTON 1 to take the picture After you take the picture the film automatically advances to the next picture frame Be careful not to cover the flash and picture taking lens with your fingers 5 Cl...

Page 15: ...3 Slide the SELF TIMER SWITCH 10 into latched position 4 Press the SHUTTER BUTTON 1 to start the timer The self timer will run for approximately 8 seconds before the picture is taken The self timer sw...

Page 16: ...tures at the subject s level Kneel down to take pictures of children and pets Hold your camera vertically to capture tall narrow subjects such as waterfall skyscraper or a single person Add interest t...

Page 17: ...y shade or on dark overcast days you need flash Your camera features an automatic flash that fires when you need it 1 Slide the LENS COVER 8 completely open to uncover the LENS 9 and to turn the FLASH...

Page 18: ...ke the picture Be careful not to cover the flash and picture taking lens with your fingers IMPORTANT To prevent battery drain turn off the flash by closing the lens cover when you are not using it 4 1...

Page 19: ...ill stay on as long as the shutter button is partially depressed 3 Have your subject look directly at the red eye reduction lamp before you take the picture 4 Press the shutter button completely down...

Page 20: ...NS COVER 8 completely open to uncover the LENS 9 and to turn the FLASH 5 on 2 Push and hold the FILL FLASH FLASH OFF SWITCH 6 in either the fill flash or flash off position for desired option 3 While...

Page 21: ...in the locked position to start the motorized film rewind Wait until the motor stops before you open the film door 2 Open the FILM DOOR 18 and remove the film Using Mid Roll Rewind If you don t want t...

Page 22: ...not operate completely Batteries improperly Insert batteries as loaded in camera shown on battery door Flash not ready Wait for the flash ready light to glow Film not properly Reload the film See load...

Page 23: ...he lens cover fails to glow completely Batteries weak or dead Replace with 2 fresh AA size alkaline batteries Batteries improperly Insert batteries as loaded in camera shown on battery door Shutter bu...

Page 24: ...four formats month day year day month year year month day or time day hour minute directly onto the film Date and Time Imprinting Press the Mode Button a to select the desired data type then take the...

Page 25: ...desired data type 2 Use the Select Button b to move between different parts of the displayed data With the data displayed pressing the select button in succession causes the settings for year month an...

Page 26: ...26 3 Press the Adjust Button c to change the blinking display b Replacing the Date Back Battery 1 Open the film door Remove the screw from the battery cover using a small screw driver b a c M...

Page 27: ...emarks 2 Remove the battery cover and insert a new 3 volt lithium CR 2025 side down battery 3 Replace the battery cover and reattach the screw Reset the date and time Date back subject to minor appear...

Page 28: ...28 Consumer Imaging EASTMAN KODAK COMPANY Rochester NY 14650 2 97 Pt No 916 5127 Kodak and Sensalite are trademarks Printed in U S A...

Reviews: