A-61670 August 2014
1-5
10
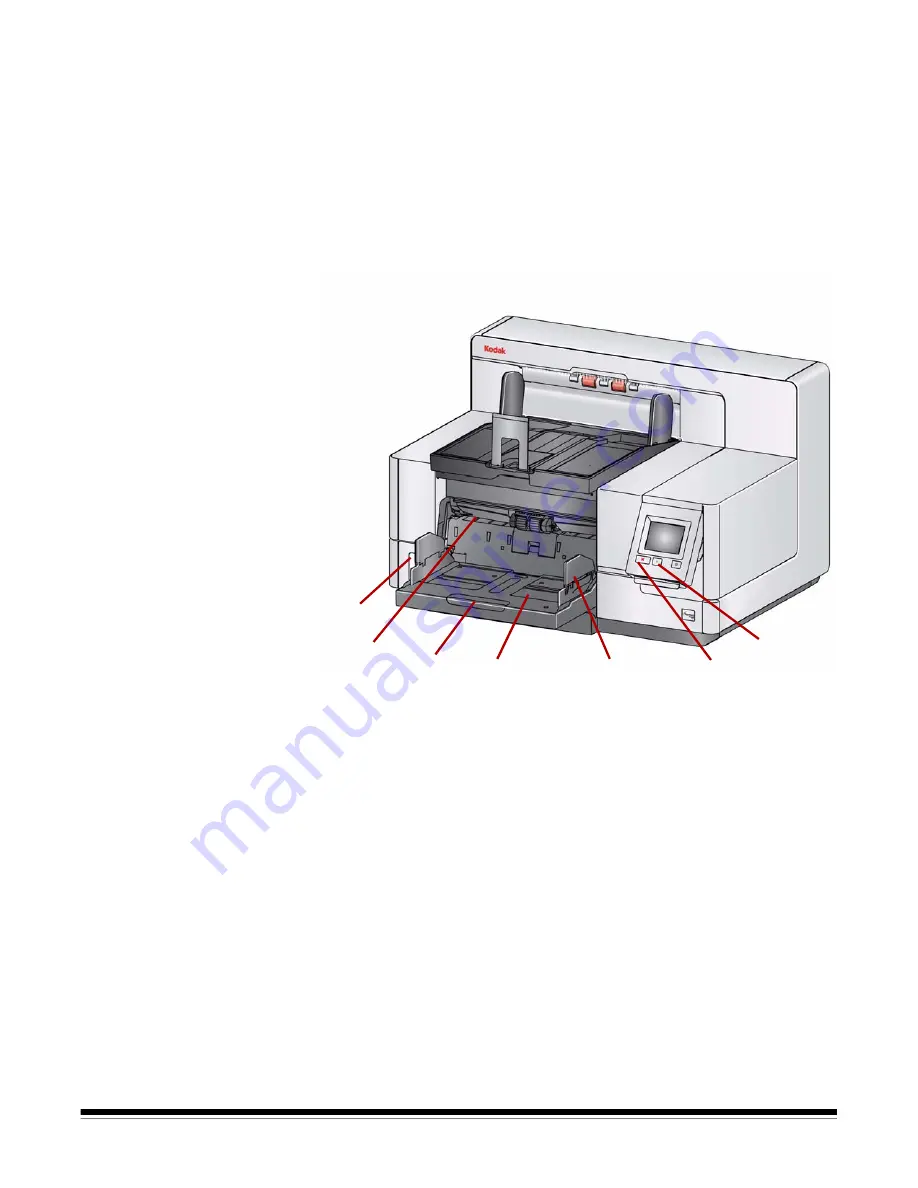
Start/Resume button
— press to start or resume scanning.
11
Stop/Pause button
— press once to temporarily pause scanning (the
Start/Resume button can then be used to resume scanning). Press twice
to stop scanning.
12
Input Elevator side guides
— slide the guides in or out to accommodate
the document size you want to scan. Side guides can be left-, center- and
right-adjusted to accommodate documents of various widths. The side
guides can also be locked into position.
Fold the side guides down when you want to close the input elevator
when the scanner is not in use.
13
Input Elevator
— holds up to 750 documents (20 lb./80 g/m
2
) in place.
The input elevator can be set to accommodate stacks of 25, 100, 250,
500 or 750 documents. The input elevator can be folded up when it is not
in use.
14
Input Elevator
extender
— pull this extender out to accommodate
documents longer than 35.6 cm (14 inches).
15
Front print location indicators
— if you are using the Enhanced Printer
Accessory, use the detents at the edge of the input elevator as a visual
guide to see where the printing position will be on the document.
16
Gap release toggle switch
(i5200/i5600/i5200V/i5600V Scanners) —
push the “
+
“ button to increase the space between the feed module and
separation roller for documents that require special handling.
NOTE: The gap release toggle switch is located in a different position on
the i5800/i5850 Scanners. See the next section, “Front view:
i5800/i5850 Scanners” for more information.
16
10
11
12
13
14
15


