background image

30

www.kodak.com/go/support

Reviewing and editing

Viewing pictures/videos in different ways

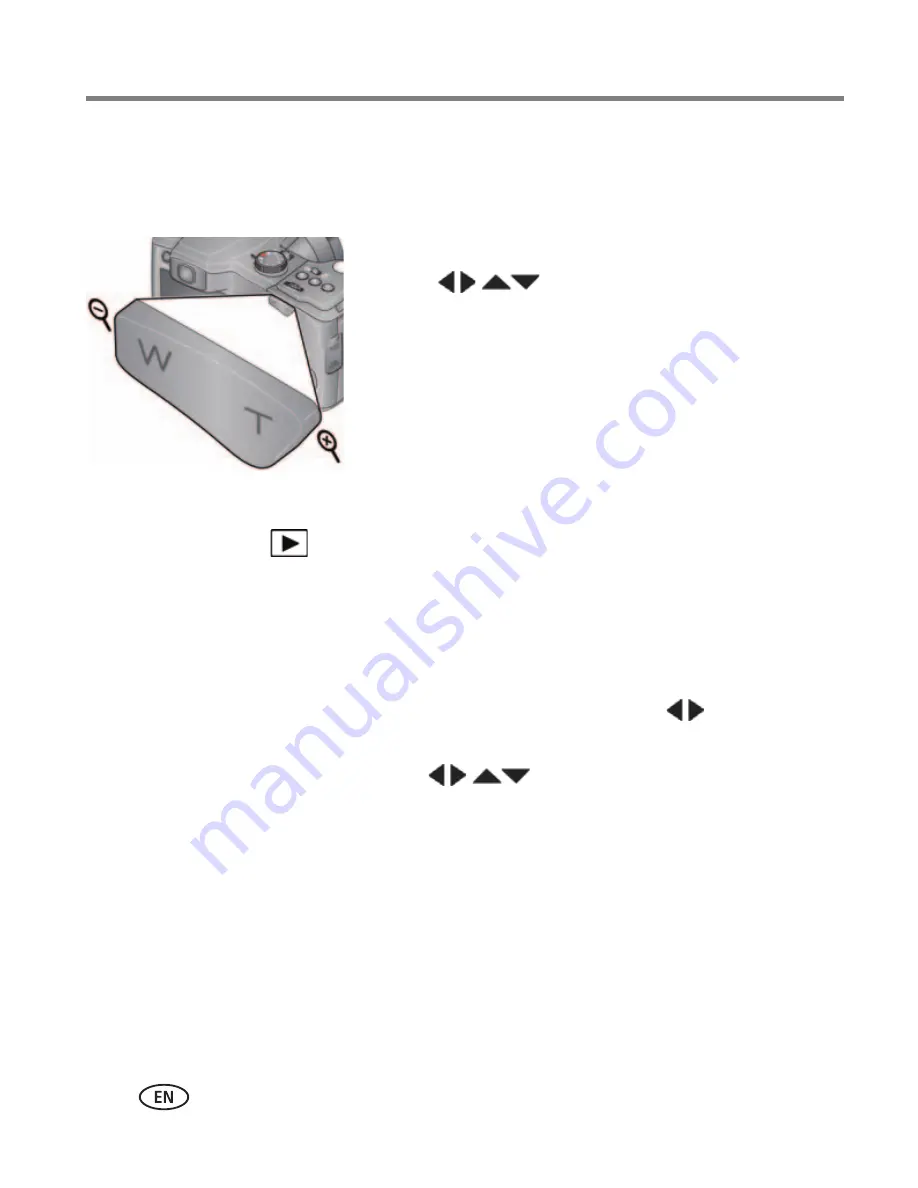
Magnifying a picture

1

Press Telephoto (T) to magnify 1X–8X.

2

Press 


 to view other parts of a picture.

Press OK to return to 1X.

Viewing as thumbnails (multi-up)

1

Press the Review 

button.

The camera shows the last picture that was taken.

2

Press the Wide Angle (W) button to view pictures/videos as thumbnails. (Press it 
again to see more, smaller thumbnails.) 

To view all pictures/videos, choose the All tab. 
To sort by favorites, date, people, or tagged pictures/videos, press 

 and choose the 

appropriate tab.

3

To see a single picture/video, press 


 to choose it. Then press the 

Telephoto (T) button.

To select multiple pictures/videos, see 

page 35

.

Press the Review button to exit Review.

Summary of Contents for 1020304

Page 1: ...KODAK EASYSHARE Z981 Digital Camera Extended user guide www kodak com For interactive tutorials www kodak com go howto For help with your camera www kodak com go z981support...

Page 2: ...Eastman Kodak Company Rochester New York 14650 Eastman Kodak Company 2009 All screen images are simulated Kodak EasyShare Perfect Touch and Pulse are trademarks of Eastman Kodak Company 4H6892_en...

Page 3: ...r on off Shutter button Flash Focus Mode Drive Jog dial Zoom Telephoto Wide Angle Share 5V DC In A V Out USB Vertical Shutter button OK Delete Menu Info Review LCD Power Power light EVF LCD Tripod soc...

Page 4: ...ii www kodak com go support Product features Front view Lens Speaker Microphone Flash AF Assist Self timer Video light...

Page 5: ...videos 8 Taking pictures in Smart Capture mode 8 Taking a video 9 Adjusting LCD brightness 10 Capture modes 11 Using the zoom 13 Using the flash 14 Using the Drive button 15 Using the Focus button 17...

Page 6: ...36 Copying pictures videos 36 Using KODAK PERFECT TOUCH Technology 37 Using the RAW Develop feature 38 Editing videos 39 5 Doing more with your camera 40 Using the menu button to change settings 40 6...

Page 7: ...end battery life See page 61 Purchase accessories www kodak com go z981accessories Lights are on while the charger is plugged in See the charger documentation for instructions and charging times For l...

Page 8: ...2 www kodak com go support Setting up your camera Loading the batteries See other power options See page 7 Extend battery life See page 61 Purchase accessories www kodak com go z981accessories 1 2...

Page 9: ...ng on the camera Setting the language date time NOTE To change language or date time in the future use the Setup menu see page 43 to change current field for previous next field OK to accept At the pr...

Page 10: ...4 www kodak com go support Setting up your camera Attaching the strap...

Page 11: ...rientation The vertical grip makes it easier to take pictures in the vertical portrait orientation 1 Attach and tighten the grip Turn on the camera 2 Slide the Vertical Shutter switch 3 Take pictures...

Page 12: ...ase an SD or SDHC Card to store more pictures and videos Maximum supported card size is 32 GB CAUTION A card can only be inserted one way forcing it may cause damage Inserting or removing a card when...

Page 13: ...www kodak com go support 7 Using other accessory power options Use the KODAK 5 Volt AC Adapter to save battery power NOTE The AC adapter does not charge the batteries Purchase accessories www kodak c...

Page 14: ...her modes see page 11 Framing marks do not appear in some SCN scene and Video modes Press the Shutter button halfway to lock the focus When the framing marks turn green press the Shutter button comple...

Page 15: ...ired subject release the Shutter button and recompose the scene 2 Press the Shutter button completely down to take the picture NOTE Multiple framing marks may appear when faces are detected To access...

Page 16: ...r EVF displays a quickview for several seconds To dismiss the quickview sooner press the Shutter button halfway The picture video is saved unless you press the Delete button To review pictures videos...

Page 17: ...ratio for your needs just press the Menu button and choose Picture Size Portrait Full frame portraits of people Sport Subjects that are in motion Shutter speed is fast Panorama Stitching 2 or 3 pictur...

Page 18: ...nt scenery at night Flash does not fire Place the camera on a flat steady surface or use a tripod Flower Close ups of flowers or other small subjects in bright light Focus is Macro Sunset Capturing th...

Page 19: ...ess Wide Angle W to zoom out 3 Take the picture or video NOTE To get a focused picture every time remember Use the framing marks page 9 As you zoom in you may need to move away from your subject See F...

Page 20: ...r is backlit when the light is behind the subject In low light hold the camera steady or use a tripod NOTE Not available in Smart Capture mode Red eye Reduction To choose Preflash or Digital Correctio...

Page 21: ...e time to get into the scene 2 seconds A picture is taken after a 2 second delay for a steady shutter release on a tripod 2 shot The first picture is taken after a 10 second delay A second picture is...

Page 22: ...ies To delete selectively do so in Review see page 29 Burst is unavailable in Portrait Night Portrait Night Landscape Backlight Fireworks and Panorama modes and when taking pictures in the RAW format...

Page 23: ...n Normal picture taking Infinity AF Distant scenery or for taking pictures through a window Macro AF Subjects that are 3 9 39 4 in 10 100 cm from the lens Super Macro AF Subjects that are 0 4 11 8 in...

Page 24: ...et to Off You can use the self timer 2 and 10 second delays while taking panoramic pictures See page 15 1 Turn the Mode dial to Panorama 2 Press to choose Panorama Left Right or Panorama Right Left de...

Page 25: ...ra automatically sets the shutter speed and aperture f stop based on the scene lighting Exposure compensation how much light enters the camera flash compensation and ISO speed Aperture Priority mode c...

Page 26: ...in a picture ISO 3200 and 6400 are available only in 3 MP and lower picture sizes In Smart Capture mode ISO 1600 is the maximum Flash Compensation adjust flash brightness Exposure Compensation adjust...

Page 27: ...press it to edit the setting Turn the Jog dial to change the setting then press it to save it An exposure compensation level is shown on the LCD or EVF and the image gets darker or lighter 2 Take the...

Page 28: ...en to choose Histogram In Review press Menu button then to choose Properties Understanding the picture taking icons Know when your batteries need charging The battery level icon works like the gas gau...

Page 29: ...Help screen appears 3 Press to choose a social networking site then press OK A check mark appears Repeat this step to choose more sites Press OK again to remove a check mark 4 Press to choose Done the...

Page 30: ...Manage email addresses and KODAK PULSE Digital Frames You can add edit or delete email addresses and KODAK PULSE Digital Frames on your camera 1 In Review press the Share button Press to choose Manag...

Page 31: ...gs then press OK 4 Press to choose an existing name or New Name to add a new one see Using the keyboard page 27 then press OK If more than one face is detected a name or question mark is assigned to e...

Page 32: ...to modify then press OK 5 Edit the name choose OK then press OK To return to picture taking mode press the Shutter button halfway down Tip You can have up to 20 active names Tagging with keywords 1 Pr...

Page 33: ...gs then press OK Marking pictures videos for emailing It s simple to mark pictures so that they re ready to email when you transfer them to your computer First create a new email address See Using the...

Page 34: ...tton halfway down To view pictures videos as thumbnails press the Wide Angle W button For more information see page 30 Find your pictures like a pro See A smarter way to find your pictures page 31 Pla...

Page 35: ...e it This feature is only available immediately after you delete a picture Protecting pictures videos from deletion 1 Press the Review button 2 Press the Menu button 3 Press to choose Protect then pre...

Page 36: ...camera shows the last picture that was taken 2 Press the Wide Angle W button to view pictures videos as thumbnails Press it again to see more smaller thumbnails To view all pictures videos choose the...

Page 37: ...ss the Wide Angle W button to view pictures by thumbnail or choose View Thumbnails shortcut 3 Press to choose a tab and sort pictures by All Date People Favorite or Keyword 4 Press to choose a picture...

Page 38: ...Reviewing and editing Understanding the review icons Email Favorite Print number of prints Protected Picture Video number Upload Video duration Select picture video Battery level Text tag Add text tag...

Page 39: ...ge 35 If you choose no pictures all are shown in the slide show 2 Press the Menu button If the Review tab is not highlighted press 3 Press to choose Multimedia Slide Show then press OK 4 Press to choo...

Page 40: ...connect the camera directly to a television use an A V cable may be sold separately NOTE Ensure that the Video Out setting NTSC or PAL is correct see page 45 The slide show stops if you connect or di...

Page 41: ...ng multiple pictures videos Use the multi select feature when you have two or more pictures to print share delete protect unprotect tag with keyword etc Multi select is used most effectively when view...

Page 42: ...again on the camera Press the Shutter button halfway down to return to Capture mode To access your camera s Help system see page 51 Copying pictures videos You can copy pictures videos from a card to...

Page 43: ...pictures or pictures that are already enhanced 1 Press the Review button then to find a picture 2 Press the Menu button then to highlight the Edit tab 3 Press to choose Perfect Touch tech then press...

Page 44: ...harpness and white balance and save RAW files as Fine Standard or Basic The original RAW file is preserved You can edit RAW files in KODAK EASYSHARE Software 1 Press the Review button then to find a p...

Page 45: ...n then to choose the Edit tab Choose Make Picture then press OK 3 Follow the screen prompts A picture is created The original video is saved To access your camera s Help system see page 51 Trimming a...

Page 46: ...u change modes or turn off the camera 1 Press the Menu button 2 Press to choose a tab Capture Video for the most common picture and video taking settings Setup for other camera settings 3 Press to cho...

Page 47: ...in its original state to which white balance contrast etc have not been applied You can use the RAW Develop feature to create a JPG copy for printing see page 38 White Balance Choose your lighting con...

Page 48: ...or EVF AF Zone Select a large or concentrated area of focus Multi zone Evaluates 5 zones to give an even picture focus Ideal for general picture taking Center zone Evaluates the small area centered in...

Page 49: ...Setting More information AF Control Video Choose an auto focus setting Continuous AF Camera is always focusing Single AF Camera focuses once when the Shutter button is pressed Video Size See Camera Sp...

Page 50: ...s Red eye Reduction The Red eye flash fires automatically before a picture is taken Preflash The flash fires to reduce the chance of red eye Digital correction The camera digitally corrects red eye af...

Page 51: ...eos Auto The camera uses the card if one is in the camera If not the camera uses internal memory Internal Memory The camera always uses internal memory even if a card is installed Date Stamp Imprint t...

Page 52: ...otected Removing a card during formatting may damage the card Memory Card Deletes everything on the card formats the card Exit Exits without making a change Internal Memory Deletes everything in inter...

Page 53: ...ication feature See page 45 Turn on the camera 3 1 Turn off the camera After the software is installed follow the prompts to transfer pictures and videos to your computer 2 If the downloader does not...

Page 54: ...idge logo is displayed followed by the current picture and menu If no pictures are found a message is displayed If the menu turns off press any button to redisplay it 2 Choose a printing option then p...

Page 55: ...ce and add borders to your pictures Store pictures and share them with family and friends Have prints photo greeting cards frames and albums delivered to your door Printing from an optional SD or SDHC...

Page 56: ...to choose Print then press OK 4 Press to choose the number of copies then press OK Press the Shutter button halfway down to return to Capture mode When you transfer the marked pictures videos to your...

Page 57: ...nd how to take the best possible pictures and videos Great news Your camera offers a built in Help system It describes every setting for every menu choice If you learn nothing else about your camera l...

Page 58: ...ng see page 44 In Review a blue or black screen is displayed instead of a picture Transfer the picture to the computer see page 47 then format the card or internal memory Take another picture In Revie...

Page 59: ...the camera see page 29 switch image storage locations see page 45 or insert a card with available memory see page 6 Memory card not recognized or camera freezes with card Card may be corrupted Format...

Page 60: ...K Camera USB Cable U 8 is connected to the camera and the computer see page 47 Then turn on the camera See KODAK Software Help at www kodak com go camerasw Status Solution Picture is not clear To auto...

Page 61: ...mera to reduce the amount of available light Turn the flash off see page 14 Move so that the distance between you and the subject is within the effective flash range See Camera Specifications starting...

Page 62: ...menu to change the image storage location The Direct printing menu interface turns off Press any camera button to redisplay the menu Cannot print pictures Make sure there is a connection between the...

Page 63: ...oads See online demonstrations of your camera www kodak com go howto Register your camera www kodak com go register Chat email write or phone Kodak Chat not available in all languages www kodak com go...

Page 64: ...ge 1 MB equals one million bytes Lens 26 676 mm 35 mm equivalent f 2 8 5 lens 26X optical zoom Digital zoom 5X continuous Focus system TTL AF through the lens auto focus Multi Zone AF Center Zone AF F...

Page 65: ...ds 2 shot timer Burst mode Normal burst up to 3 pictures 0 9fps high speed burst up to 9 pictures 8 fps 3 MP Capture modes Smart Capture Portrait Sport Program Aperture Priority Shutter Priority Manua...

Page 66: ...F Care and maintenance If you suspect water has gotten inside the camera remove the batteries and card Allow all components to air dry for at least 24 hours before using the camera Blow gently on the...

Page 67: ...ment battery life KODAK Ni MH Pre Charged Rechargeable Batteries AA 2100 mAh 450 500 pictures Battery life per CIPA testing method using 128 MB SD Card Approximate number of pictures in Smart Capture...

Page 68: ...u have questions If using this product in an airplane observe all instructions of the airline When removing the batteries allow them to cool they may be hot Follow all warnings and instructions suppli...

Page 69: ...quired to ship Products at your expense to the authorized service facility for the country where the Products were purchased Kodak will repair or replace Products if they fail to function properly dur...

Page 70: ...e Liability for any special consequential or incidental damages including but not limited to loss of revenue or profit downtime costs loss of the use of the equipment cost of substitute equipment faci...

Page 71: ...television reception which can be determined by turning the equipment off and on the user is encouraged to try to correct the interference by one or more of the following measures 1 reorient or reloca...

Page 72: ...ODAK Product is in compliance with the essential requirements and other relevant provisions of Directive 1999 5 EC Russian GOST R In Europe For human environmental protection it is your responsibility...

Page 73: ...Appendix www kodak com go support 67 Australian C Tick VCCI Class B ITE Korean Class B ITE N137...

Page 74: ...68 www kodak com go support Appendix China RoHS...

Page 75: ...42 B backlight 12 battery expected life 61 loading 1 2 purchase 22 status 22 types 61 beach 12 brightness LCD 10 burst using 16 button burst 16 delete 10 flash 14 zoom 13 C cable audio video 34 camera...

Page 76: ...al video device viewing pictures videos 34 F faces tagging recognition 25 FCC compliance 65 find pictures 31 fireworks 12 firmware upgrading 61 flash settings 14 flower 12 focus zone 42 focus framing...

Page 77: ...19 shutter priority 19 modes capture high ISO 11 SCN scene 11 smart capture 11 video 11 multiple selections 35 multi up 30 N night landscape 12 night portrait 12 O online prints ordering 49 optical z...

Page 78: ...deos as you take them 10 running slide show 33 S safety 62 scene modes 12 backlight 12 beach 12 candle light 12 fireworks 12 flower 12 landscape 12 manner museum 12 night landscape 12 night portrait 1...

Page 79: ...continuous loop 33 running 33 smart capture 11 smart display 44 smart find 31 snow 12 software upgrading 61 software downloader 47 sounds 44 specifications camera 58 stage 13 strap 4 sunset 12 T taggi...

Page 80: ...ailing marked 27 out 45 playback 28 protecting 29 review icons 32 size 43 transfer to computer 47 viewing 28 video out 45 viewing by multi up 30 picture after taking 28 viewing picture video after tak...

Reviews: