15
OPERATING INSTRUCTIONS
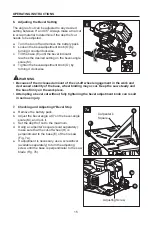
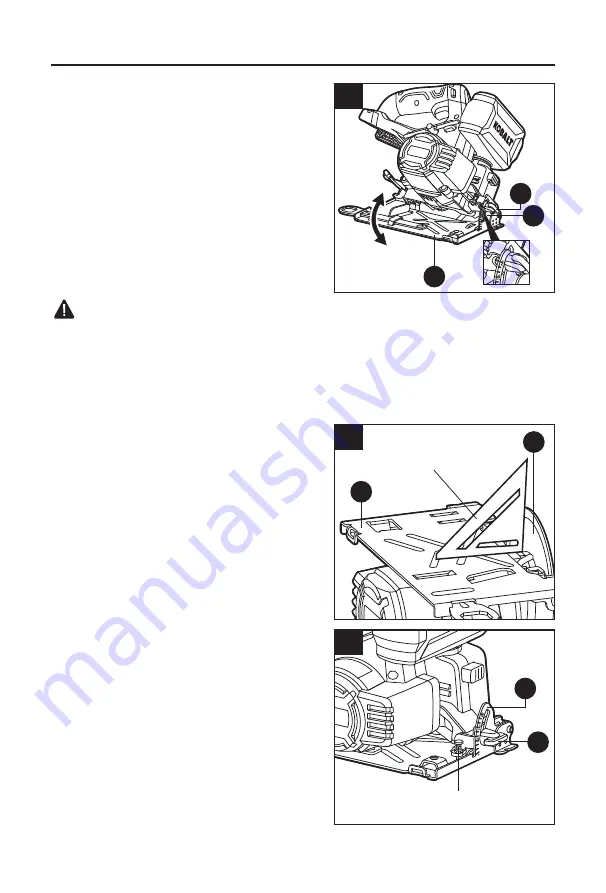
6. Adjusting the Bevel Setting
The angle of cut can be adjusted to any desired
setting between 0° and 45°. Always make a trial cut
in scrap material to determine if the depth of cut
needs to be adjusted.
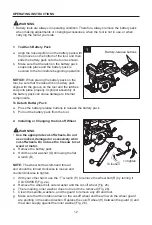
a. Turn the tool off and remove the battery pack.
b. Loosen the bevel-adjustment knob (O) by
turning it counterclockwise.
c. Tilt the base (E) until the bevel indicator
reaches the desired setting on the bevel-angle
scale (M).
d. Tighten the bevel-adjustment knob (O) by
turning it clockwise.
WARNING
• Because of the increased amount of the cut-off wheel engagement in the work and
decreased stability of the base, wheel binding may occur. Keep the saw steady and
the base firmly on the workpiece.
• Attempting a bevel cut without fully tightening the bevel adjustment knob can result
in serious injury.
7. Checking and Adjusting 0°Bevel Stop
a. Remove the battery pack.
b. Adjust the bevel angle at 0°on the bevel-angle
scale (M), and lock it.
c. Set the depth of cut to the maximum.
d. Using a carpenter’s square (sold separately),
make sure that the cut-off wheel (H) is
perpendicular to the base (E) of the tile saw
(Fig. 7a).
e. If adjustment is necessary, use a screwdriver
(available separately) to turn the adjusting
screw until the base is perpendicular to the saw
blade (Fig. 7b).
6
O
M
E
7a
E
H
Carpenter’s
Square
7b
Adjusting Screw
M
O
Summary of Contents for 4963560
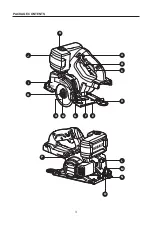
Page 3: ...3 PACKAGE CONTENTS E F G Q H K A B C D L M N O R J I P ...
Page 22: ......
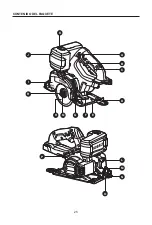
Page 25: ...25 CONTENIDO DEL PAQUETE E F G Q H K A B C D L M N O R J I P ...
Page 44: ......
Page 78: ...14 Printed in China ...
Page 92: ......


