


12
ASSEMBLY INSTRUCTIONS
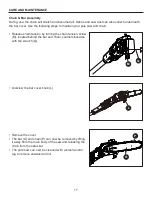
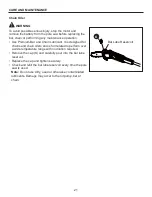
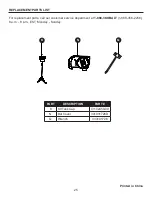
1. Connecting the poles
a. Insert the extension pole (C) into the handle pole (B) and
slide together.
b. Lower the collar (I) on the extension pole (C) to the
threaded base on the handle pole (B) and rotate
clockwise to secure.
c. Repeat this process to attach the extension pole (C) to
the power head pole (D).
WARNING
Periodically check the connections to ensure that they are
tightened securely.
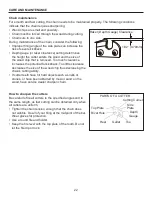
2. Adding bar and chain lubricant
Use a bar and chain lubricant (not included) with this
product. It is designed for chains and chain oilers,
and is formulated to perform over a wide temperature
range with no dilution required.
Note:
This pole saw comes from the factory with no bar
and chain oil added.
The level should also be checked after every 20 minutes
of use and refilled as needed.
• Flip up the tab and twist to remove the oil cap (K).
• Carefully pour the bar and chain oil into the tank.
• Wipe off excess oil and replace cap.
•
Check and fill the oil tank when quick view oil
indicator is below the MIN. line.
• Repeat as needed.
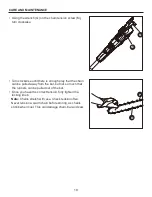
Note:
• Do not use dirty, used or otherwise contaminated oils. Damage may occur to the bar or chain.
• It is normal for oil to seep from the saw when not in use. To prevent seepage, empty the oil tank
after each use then run for one minute. When storing the unit for a long period of time (three
months or longer) be sure the chain is lightly lubricated; this will prevent rust on the chain and bar
sprocket.
WARNING
To preserve natural resources, please recycle or dispose of oil properly. Consult your local waste
authority for information regarding available recycling and/disposal options.
3. Battery
IMPORTANT:
The battery may not be fully charged when purchased. Before using the pole saw
for the first time, place the battery in the battery charger and charge. Make sure to read all safety
precautions, and follow the instructions in the battery and charger manuals.
1
B
C
D
I
2
K
Oil Indicator


