


In addition to the panel controls, a full-feature remote control is included which provides
additional functions to allow greater control over the media player.
1. Install the supplied batteries in the remote control following the correct polarity as
indicated inside the compartment.
2. In order for the remote to operate properly, ensure that it is pointed toward the front of
the speaker.
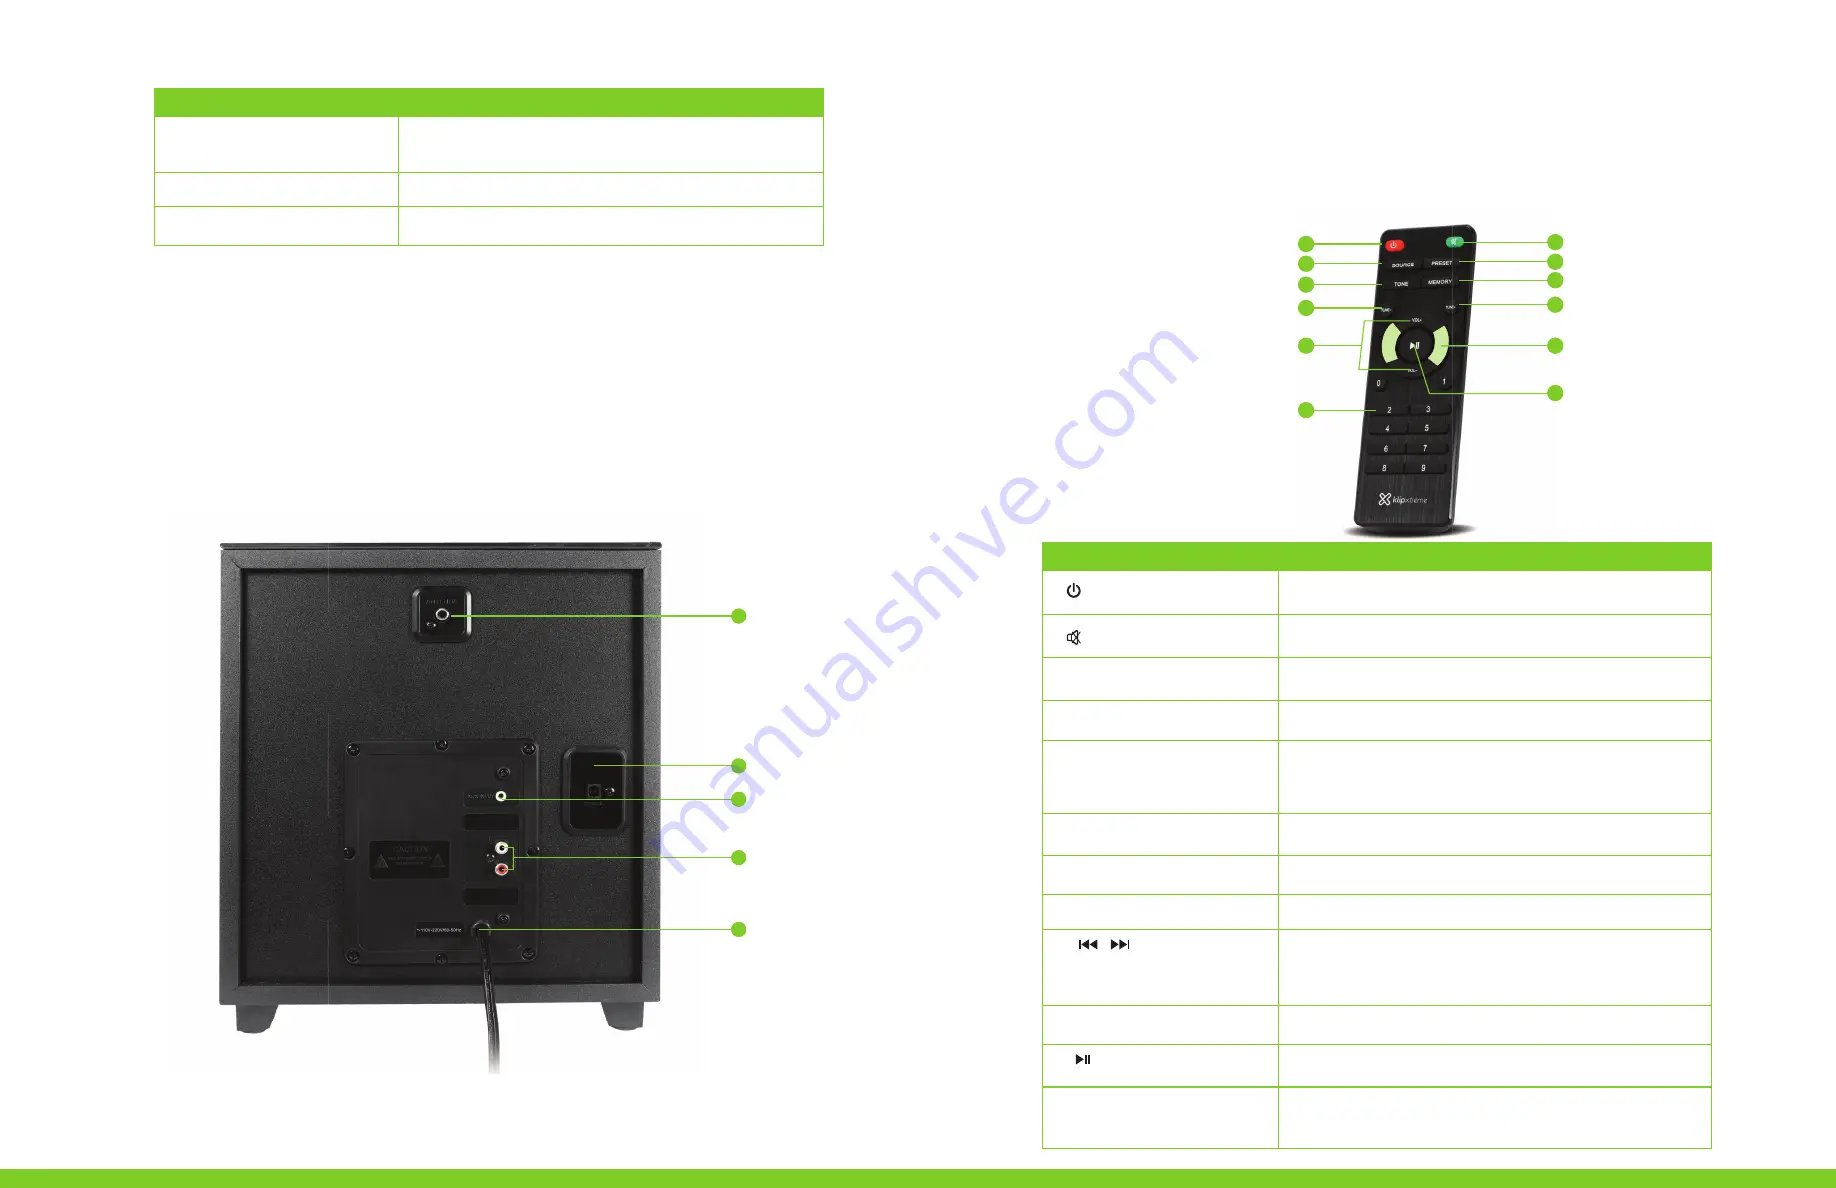
Back panel
Control
Description
The left and right satellites are connected here
Insert the AC plug into a wall outlet
Enables audio playback from devices fitted with a 3.5mm
connector, such as computers, TV sets, MP3, DVD
players, etc
11. AUX input
12. Audio outputs
13. Power cord
Buttons
Description
Press this button to alternate between the standby and
active modes on the device
Cancels the audio coming from the speaker. Press it
again to unmute the speaker
It replicates the function of the source button on
the main unit
Use it to call the preset channels
Press it to store your favorite channels for quick recall
Press it to scan in a downward direction
Press it to scan in an upward direction
Press these butons to increase or decrease the output
volume of the speaker
Press any key from 0 to 9 on the remote to choose
directly the tracks or channels you want to play.
It works in FM and USB modes
In playback mode, press to start and pause media in
Bluetooth
®
and USB modes
In USB or
Bluetooth
®
mode, press any of these buttons
to select the previous or next track on your play list
In tuner mode, it will scan downwards or upwards to
the next memorized channel
1.
Power
button
2.
Mute
button
4.
Preset
button
Press this button once and then use the volume up and
down buttons to adjust the treble level as desired
Press this button twice and then use the volume buttons
to adjust the bass as desired
5.
Tone
button
6.
7.
Tune -
button
3.
Source
button
10.
VOL
+ /
VOL
-
11.
8.
Tune +
button
12. Numbered keypad
Memory
button
9.
Remote control
2
4
6
8
9
11
9
10
11
12
13
•
1
3
5
7
10
12
/


