Features
1) Adjustable mounting legs
Featuring two adjustable additional legs with a mounting slot, this mount can accommodate larger
projectors.
Note: The assembly of the mounting legs will depend on the projector configuration. Take into
account that it may vary.
2) Ceiling plate
Can be easily installed either on a wood stud or concrete ceiling.
Installing the projector mount
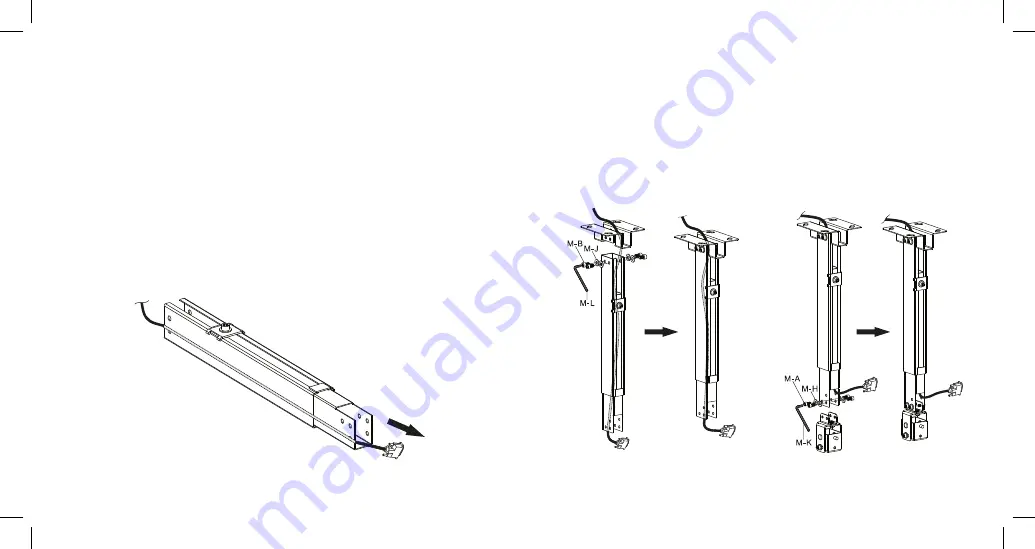
This projector mount provides a neat and efficient way of managing your cables. Simply slide your
projector cables through the extension pole to keep them organized and concealed from view.
Note: Take into account that a DVI cable may not fit through this opening.
Wood stud installation
Step 1
- First, attach the ceiling/wall plate to the extension pole using the corresponding bolts and washers.
- Slide the projector cables through the opening on the top, all the way to the end of the extension
pole, and take them out through the opening on the side. Use the supplied plastic cover to conceal
the opening on the side.
- Next, attach the tilt assembly to the extension pole using the corresponding bolts and washers.
On the ceiling


