KLIK Boks Quick Start Guide
Default Settings Password:
admin
Default Administration Password:
adminpwd
Default Wi-Fi Mode IP Address:
192.168.59.254
1)
Use either VGA or HDMI to connect the KLIK Boks to your display or projector.
2)
Connect Power Supply and press
Power button once to turn On.
NOTE:
Only one video
output will be active at a
time. Use either HDMI or
VGA but not both.
NOTE:
For more setup and operating information refer to the User Manual
NOTE:
Steps 1 - 4 are one-time setup. Step 5 is for Users.
NOTE:
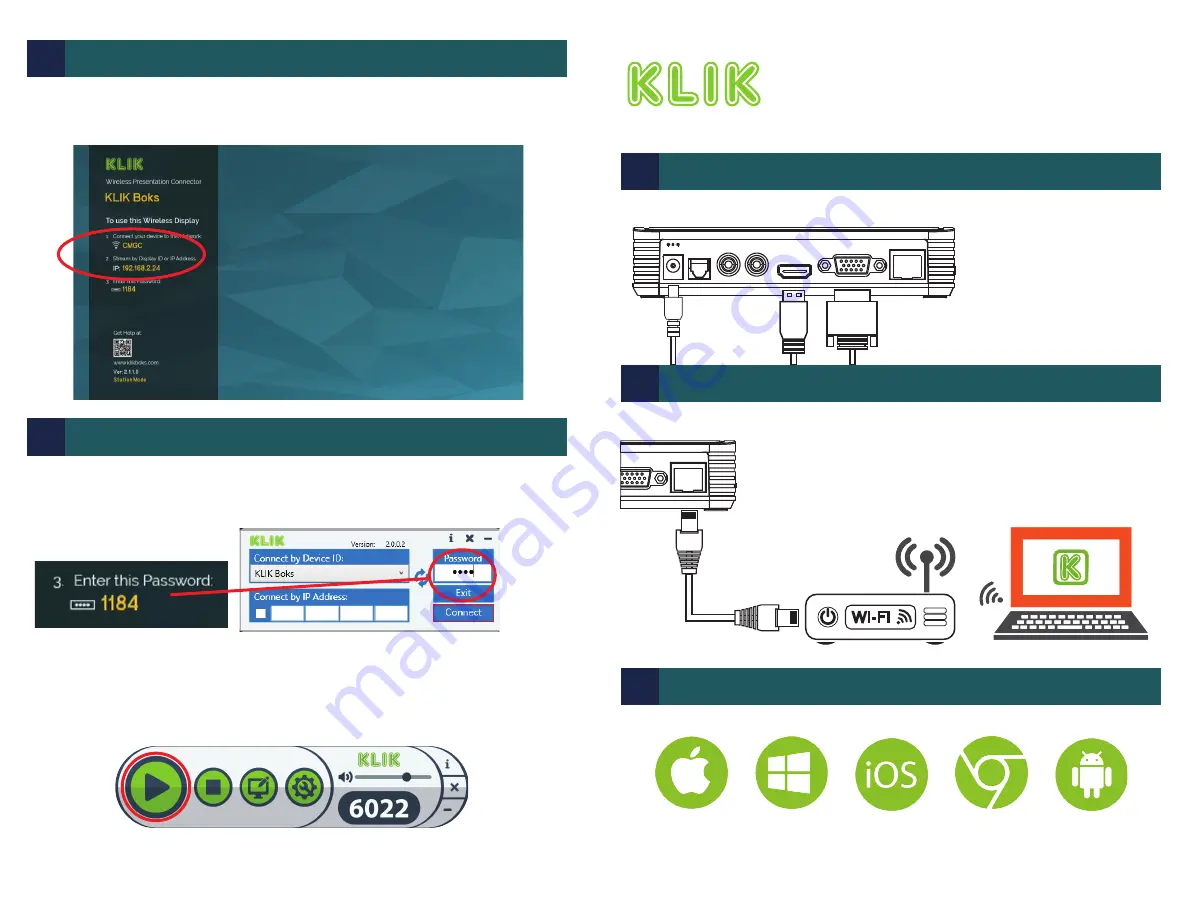
If the KLIK Boks name does not appear in the Connection Manager,
check that Network Discovery is enabled. Alternately, enter the IP Address
displayed on the KLIK Standby Screen to connect.
7
) The KLIK Boks will restart and display that it is in now connected to the Wi-Fi
network shown. Users are directed to connect to the same wireless network in
order to stream content to the KLIK.
1)
Locate the program icon and start the software.
2)
When the Connection Manager appears, select the KLIK Boks by name,
enter the displayed Password and press Connect.
3)
Once connected you will see the KLIK Player. To mirror your screen simply
press Play!
Page 4
Page 1
Copyright 2018 KLIK Communications Inc. - All Rights Reserved www.klikboks.com - Document QSG8.1.0
DC5V/1A
SPDIF
L
R
HDMI
VGA
LAN
1
Connect KLIK Boks to Display
Download & Install from www.klikboks.com or the App Store for your device.
NOTE:
KLIK may also be used without software installation. Windows, Mac, iOS and
Android users can connect using their native streaming utilities.
3
Install KLIK Software
NOTE:
To connect with Wi-Fi follow the instructions in
the Section 4, “Add KLIK to a Wireless Network”.
VGA
LAN
Use an Ethernet Cable to connect to your existing router
2
Add KLIK to a Wired Network
5
Launch KLIK Software and Start Streaming
4
Add KLIK to A Wireless Network


