background image

20

21

Klemsan

Klemsan

Cleaning Method

1 -

 Use soft materials such as gauze or cotton swab to clean stain or ribon residue around the heater elements area.

  Do not use re-use gauze, they may cause corrosion in the electrode area.

2 -

 Use a small amount of absolute ethanol or IPA(isopropyl alcohol) for cleaning. 


Never use cleaners such as acid/alkaline.

3 -

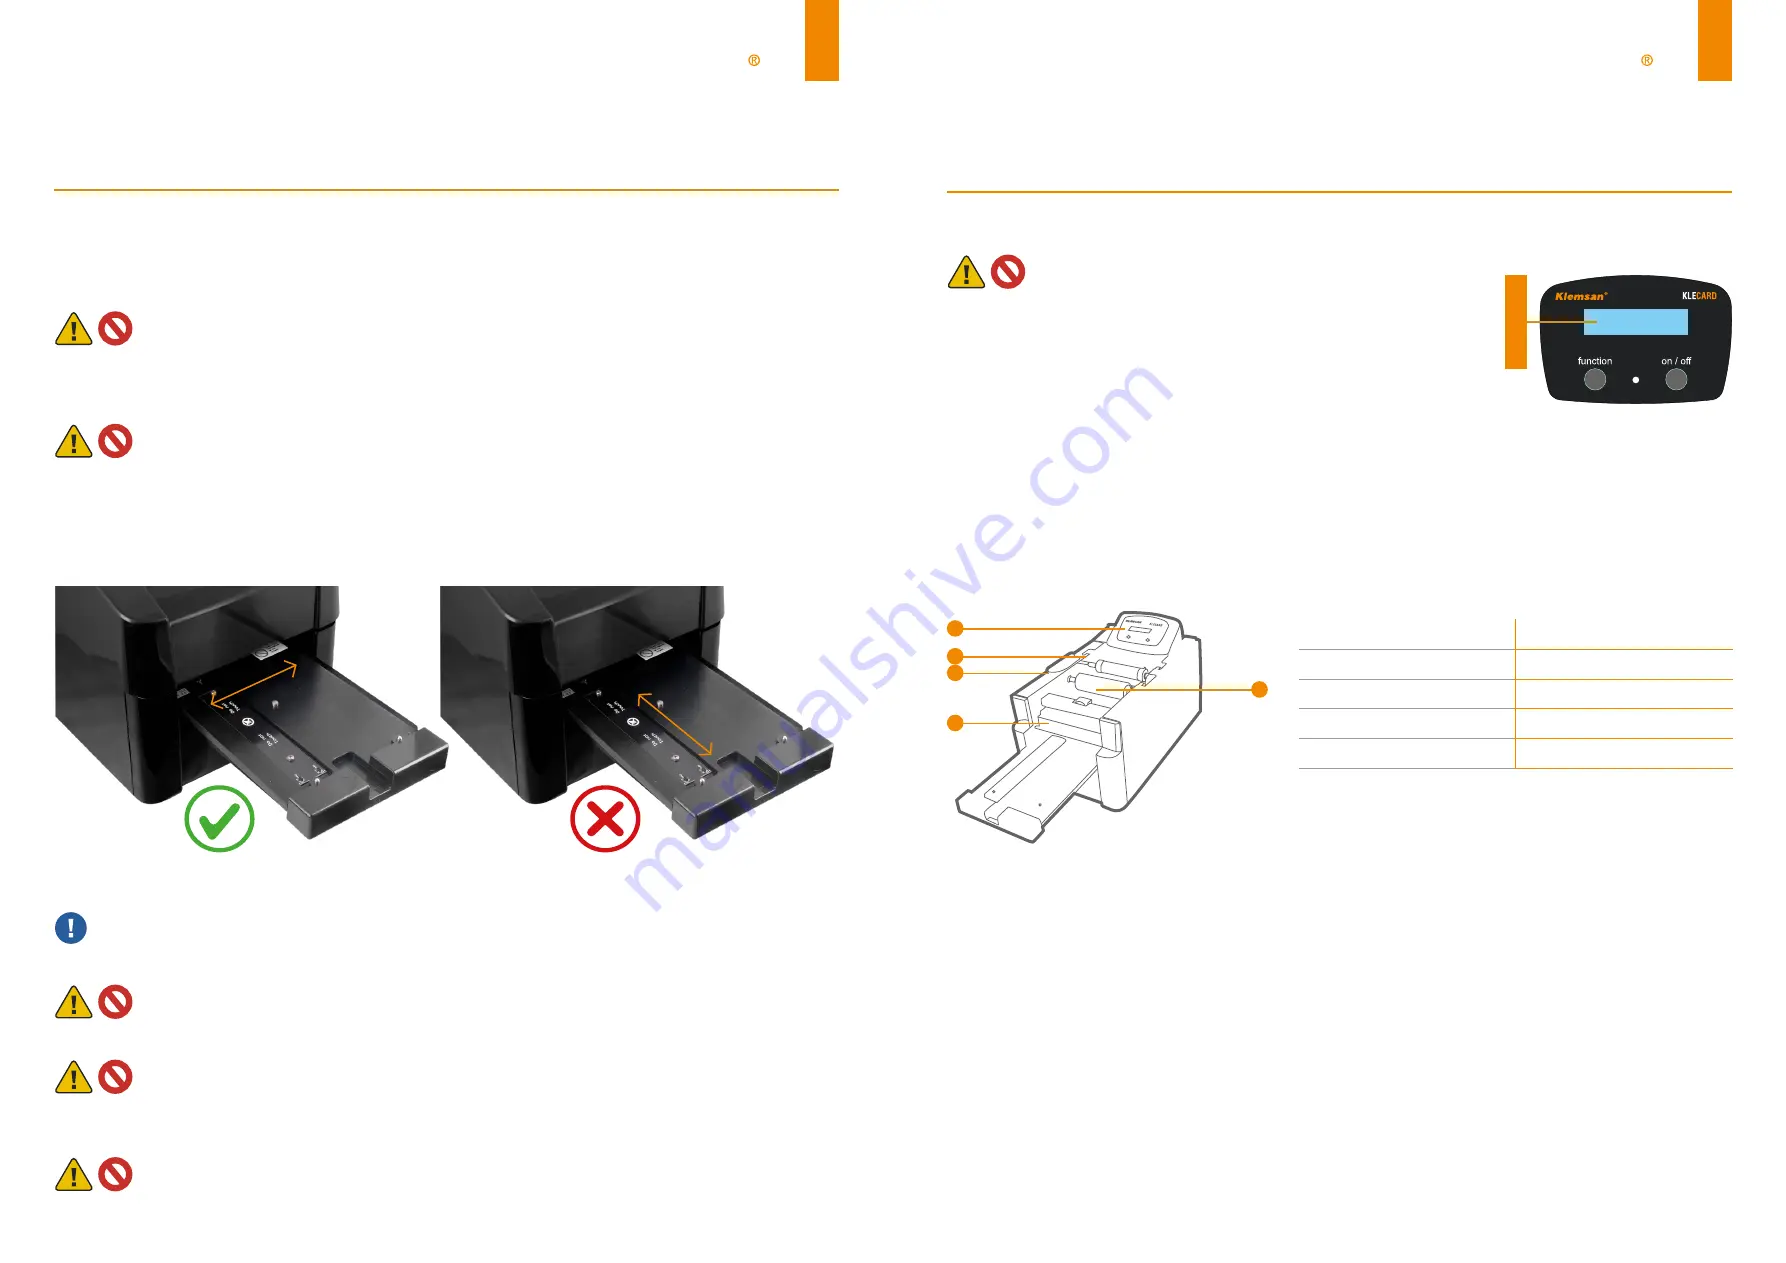
 Wipe gently in the direction of the heater element line shown as below.

General Recommendations


Always keep OFF when you are not using Klecard!

  Do not blow off dust on the TPH. Saliva may cause corrosion.

  Do not clean ribbon residue or stain on the heater element line using blades or tools. These actions may 

                   cause damage and separation of the protection film on the printhead.

  Do not touch the area around the heater elements with bare hands or dirty gloves.

Wiping direction

Wrong

Changing the Ribbon


Make this operation with power OFF.

The ribbon has a lenght of 

300

 meters. At the beginning and at the end of 

it there are two transparent parts (leader and trailer) which helps the user 

for changing and checking the ribbon.

When the ribbon is missing or finished, the Klecard appears as the picture 

on the right.

The sensor detects the transparent part and the display show the message: 

«Error #201 ribbon out» or «Missing Ribbon».

When the message is shown, the ribbon must be changed by the user. 

Please use the tape on the ribbon to stick the Rewind Roller in front of the printer.

Please follow below steps to replace the ribbon;

1 - 

Move  out  the  tray  (if  it  is  inside)  by  pressing  the 

Function Button.

2 - 

Turn off the printer by pressing the On/Off Button for 

two second.                      

3 - 

Remove the top plastic cover.

4 -

 Remove the marking plate from the tray.

5 - 

Remove the last transparent part of the ribbon from 

the supply roller.

6 -

 Slide the gear cover far from the frame.        

7 - 

Remove the two rollers (supply and take-up) from the 

printer by lifting them up.

8 - 

Remove the used ribbon from the rewind roller.

9 - 

Remove the empty cardboard core from the supply 

roller.

Error #201

Ribbon out

Message

4

1

2

3

5

1

Message

2

Supply Roller

3

Gear Cover

4

Missing Ribbon

5

Rewind Roller

Summary of Contents for Klecard

Page 1: ...1 Klemsan 1 USER GUIDE...

Page 2: ...wide variety of products are available in our range suitable to mark terminal blocks cables and any other component inside and outside the electric panels Operation is simple and fast once a job has b...

Page 3: ...rporate Headquarters Service Address K z l z m Cad No 15 Kemalpa a ZM R Tel 90 232 877 08 00 Fax 90 232 877 08 06 www klemsan com Trademark Acknowledgments Windows is a registered trademark of Microso...

Page 4: ...Warranty 29 Specifications Technology Thermal transfer Quality 300 x 600 dpi Speed Up to 1 inch per second Temperature 15 C 35 C Relative humidity 30 to 85 without condensation Printable width 105 mm...

Page 5: ...an print all kind of Klemsan labels Ribbons The Klecard printer requires original ribbon that specially produced for this printer with high temperature resistance and high resin density features The s...

Page 6: ...s working with the LED under firmware control the LED light is activated when the media sensor is detecting the label 1 2 3 4 Control Panel Function Button This button opens and closes the printer tra...

Page 7: ...se the Klecard printer works with variety of plates and consumables the plate sensor detects the presence of the plate on the tray This feature allows using many different types of tags and labels Aft...

Page 8: ...onnect the power cord into a suitable electrical outlet 1 To energize the printer press the on off button on the right side of the front panel Withthiscommand theprinternameandtheambienttemperature wh...

Page 9: ...ng into plate holes the flat medias place by attaching them to the two fixing pins on the tray by the help of label holes on top The plates of the Klecard have a unique shape which helps you to place...

Page 10: ...ol Panel Devices and Printers of your computer and change the Darkness Control option on the device settings to By Software P S After this feature is activated you can instantly determine the printing...

Page 11: ...the end of it there are two transparent parts leader and trailer which helps the user for changing and checking the ribbon When the ribbon is missing or finished the Klecard appears as the picture on...

Page 12: ...hrough the lower of the guides and wrap the new cardboard shell with the ribbon matte side should be face out Don t forget to tighten the screws Matte side should be face out Correct Ribbon Path Suppl...

Page 13: ...d Tray movement failure detected by sensor 208 PCL Corrupt PCL command data is incorrect 209 PCL Excessive PCL raster data exceeds printhead capacity 210 PCL LM Invalid PCL left margin LM value is inv...

Page 14: ...e space in front of the printer for opening the tray Do not touch the printer tray while is moving Do not place your finger into the front opening between the tray and the printing device Do not revom...

Page 15: ...ect without the written consent of Klemsan Equipment or parts that have been damaged due to shipping or accidents or damaged by lightning storms water or power surges Printer consumables including the...

Page 16: ...ru Ukraine 6 8A Yaroslava Ivashkevicha str Office 7 8 04074 Kiev UKRAINE Tel 380 637 217 185 Mail tatyanarozhko klemsan com tr Europe Gsm 48 51 666 51 41 Mail ayhankanal klemsan com tr GCC India Paki...

Reviews: