21
EN
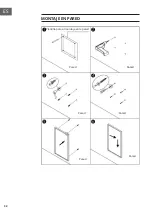
• Step 1: Use the template provided to mark the position of the holes on the
wall.
•
Step 2: Drill the holes in the wall with an 8 mm drill bit.
• Step 3: Insert the dowels into the holes.
• Step 4: Screw the supplied screws to the wall.
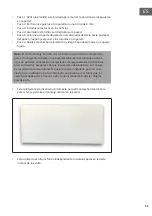
• Step 5: Attach the wall bracket to the heater from the back of the panel and
then fix the panel to the screws in the wall.
• Step 6. slide the panel to the right and then down until it is attached.
Note:
The mounting kit included in the scope of delivery is intended for
horizontal mounting on a stable wall. For mounting on other types of walls, you
need corresponding fixings (not included in the scope of delivery). Please make
sure that the wall is suitable for the installation. It is strongly recommended that
the panel be installed by a qualified electrician or an installer authorised by the
manufacturer. The heater must be at least 20 cm away from all objects, walls,
etc.
• This heater is designed for horizontal wall mounting only. Vertical wall
mounting is not permitted.
• For free-standing use of the heater, install the feet on the bottom of the
heater.
Summary of Contents for 10041869
Page 2: ......
Page 6: ...6 DE WANDMONTAGE Wand Schablone für die Wandmontage Wand Wand Wand Wand Wand ...
Page 20: ...20 EN WALL MOUNTING Wall Template for wall mounting Wall Wall Wall Wall Wall ...
Page 44: ...44 FR MONTAGE MURAL Mur Gabarit pour le montage mural Mur Mur Mur Mur Mur ...
Page 65: ......
Page 66: ......
Page 67: ......
Page 68: ......


