


Initial Setup
Pairing Camera and Receiver
1.
Press the Power Button on your receiver. The Power LED will glow red when
power is on.
1.2.
If using the Quad receiver connect the provided RCA cables from the video
output on the receiver to the input on a TV or monitor
2.
Connect the power supply to your camera.
3.
How to pair:
3.1.
Select a channel on the receiver by pressing the pair button. Press and hold the
pair button until the channel LED flashes blue.
3.2.
Press the pair button on your camera. (See pair button location on pg 5)
3.3.
If the pairing is successful the blue channel LED on the receiver will flash
rapidly and the camera image will be shown on the monitor or TV.
4.
To pair additional cameras press pair button and release quickly to change
receiver channel. Then repeat pairing process on new channel.
4
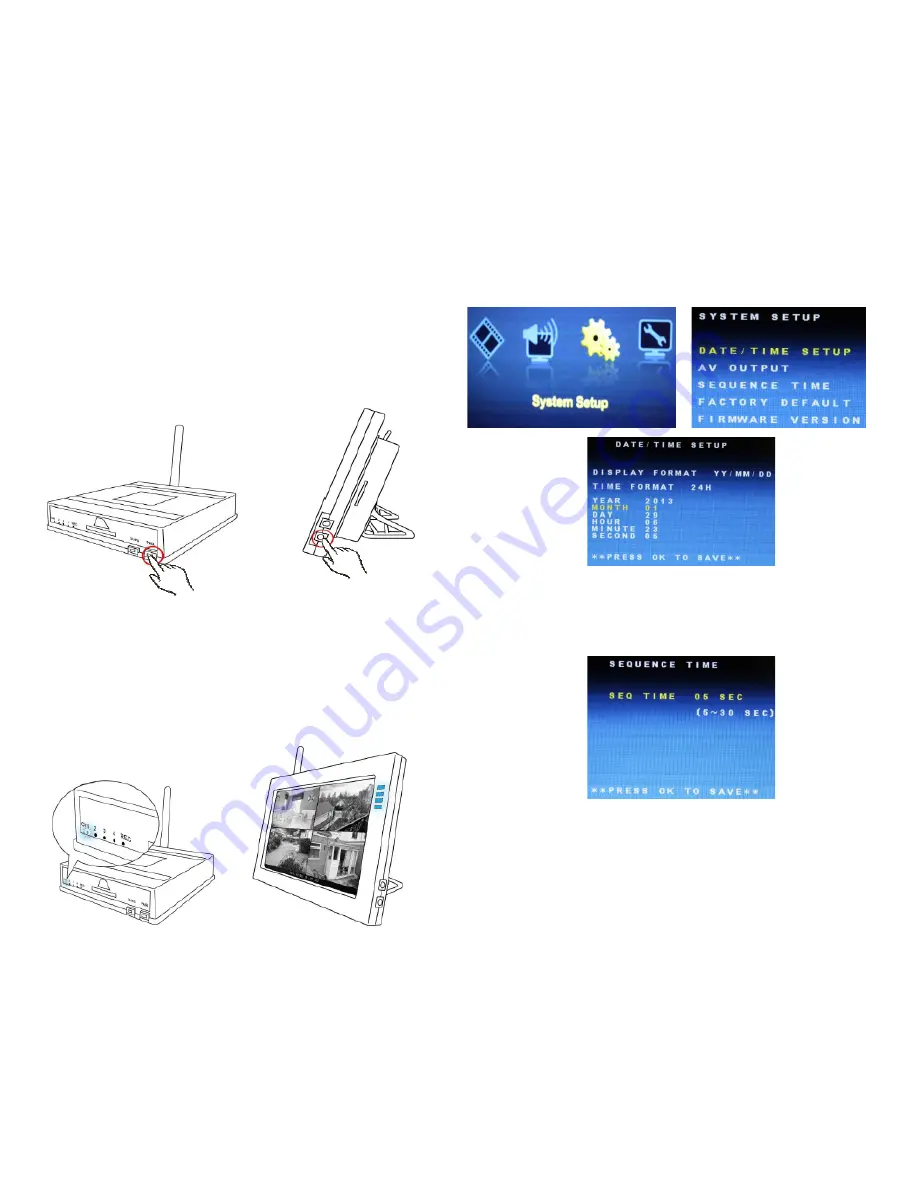
System Setup
Date / Time Setup
Date / Time Setup
- is to set the date and time stamp on the video recording.
Time Format
- is to change from a 12 hour to 24 hour format.
Set the current time and press OK to save.
Sequence Time
Sequence Time
- is to change the amount of time the channel will show on
the screen before switching to the next channel. To place the monitor in se-
quence mode press the SEQUENCE button on the remote.
17


