background image

15

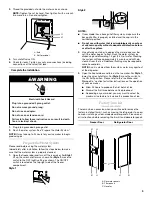
Style 1

To turn off the dispenser, press the LOCK button until the 
indicator appears. The ice and water dispensers will not work. To 
unlock the dispenser, press the UNLOCK button until the 
indicator appears. Then continue to dispense ice or water as 
usual.

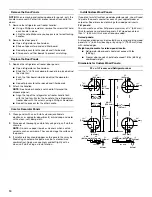
Style 2

To turn off the dispenser, press and hold the LOCK OUT button 
until the indicator appears. The ice and water dispensers will not 
work. To unlock the dispenser, press the LOCK OUT button until 
the indicator disappears. Then continue to dispense ice or water 
as usual.

Water Filter Status Light

(on some models)

The water filter status light will help you know when to change 
your water filter cartridge. The light will change from green to 
yellow. This tells you that it is almost time to change the water 
filter cartridge (90% of the filter life has been used). It is 
recommended that you replace the base grille water filter 
cartridge when the water filter indicator light changes to red OR 
water flow to your water dispenser or ice maker decreases 
noticeably. To change the base grille water filter cartridge, see 
“Changing the Water Filter Cartridge” later in this section.

After changing the water filter cartridge, reset the water filter 
status light.

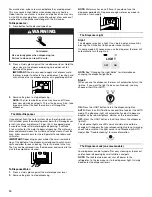
Style 1

Press the light switch 5 times within 10 seconds. The status light 
will change from red to green.

Style 2

Press and hold the water filter reset button until the status light 
turns green. Your reset button may be located on the water 
dispenser or on the control panel in the refrigerator compartment.

Water Filtration System

(on some models)

NOTE: Do not use with water that is microbiologically unsafe 
or of unknown quality without adequate disinfection before 
or after the system.

Changing the Water Filter Cartridge

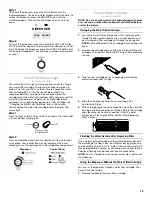
1. Locate the water filter cartridge cap in the front base grille. 

Rotate the cap counterclockwise to a vertical position and 
pull the cap and filter cartridge out through the base grille.

NOTE: There will be water in the cartridge. Some spilling may 
occur. 

2. Remove the cartridge cap by sliding it off the end of the old 

cartridge. The cap will slide to the left or right. Do not discard 
the cap.

3. Take the new cartridge out of its packaging and remove 

protective cover from O-rings.

4. Slide the cartridge cap onto the new cartridge. See 

illustration in Step 2.

5. With cartridge cap in the vertical position, push the new filter 

cartridge into the base grille until it stops. Rotate the cartridge 
cap clockwise to a horizontal position. Flush the water 
system (see “Flushing the Water System After Replacing 
Filter” section). 

Flushing the Water System After Replacing Filter

Use a sturdy container to depress the water dispenser bar until 
the water begins to flow. Flush the water system by dispensing 
and discarding 1.5 gal. (5.4 L) of water. Cleaning the system will 
take approximately 3 minutes and will help clear air from the line. 
Additional flushing may be required in some households.

NOTE: As air is cleared from the system, water may spurt out of 
the dispenser.

Using the Dispenser Without the Water Filter Cartridge

You can run the dispenser without a water filter cartridge. Your 
water will not be filtered.

1. Remove the base grille water filter cartridge. 

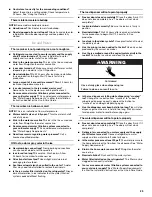
A. Status Light
B. Light Switch

Dispenser

Control Panel

DISPENSER

LOCK

UNLOCK

A

B

Summary of Contents for KitchenAid SIDE BY SIDE REFRIGERATOR

Page 1: ...l for assistance installation or service call 1 800 807 6777 or visit our website at www kitchenaid com or www KitchenAid ca RÉFRIGÉRATEUR CÔTE ÀCÔTE Guided utilisationetd entretien Au Canada pour assistance installation ou service composez le 1 800 807 6777 ou visitez notre site web à www KitchenAid ca Table of Contents Table des matières 2 2305802A ...

Page 2: ...INSTALLATION 29 Déballage du réfrigérateur 29 Exigences d emplacement 29 Spécifications électriques 30 Spécifications de l alimentation en eau 30 Grille de la base 30 Portes du réfrigérateur 31 Ajuster les portes 33 Raccordement de la canalisation d eau 33 Préparer le système d eau 34 Ensembles décoratifs de l usine 35 Sons normaux 36 UTILISATION DU RÉFRIGÉRATEUR 37 Pour s assurer d une circulatio...

Page 3: ...d and obey all safety messages This is the safety alert symbol This symbol alerts you to potential hazards that can kill or hurt you and others All safety messages will follow the safety alert symbol and either the word DANGER or WARNING These words mean follow instructions instructions DANGER WARNING IMPORTANT SAFETY INSTRUCTIONS WARNING To reduce the risk of fire electric shock or injury when us...

Page 4: ... is recommended that you do not install the refrigerator near an oven radiator or other heat source Do not install in a location where the temperature will fall below 55 F 13 C WARNING Excessive Weight Hazard Use two or more people to move and install refrigerator Failure to do so can result in back or other injury When Moving Your Refrigerator Your refrigerator is heavy When moving the refrigerat...

Page 5: ...is required to operate the water dispenser and ice maker If you have questions about your water pressure call a licensed qualified plumber Reverse Osmosis Water Supply IMPORTANT The pressure of the water supply coming out of a reverse osmosis system going to the water inlet valve of the refrigerator needs to be between 30 and 120 psi 207 827 kPa If a reverse osmosis water filtration system is conn...

Page 6: ...or or utility bins from doors WARNING Electrical Shock Hazard Disconnect power before removing doors Reconnect both ground wires before operating Failure to do so can result in death or electrical shock 2 1 4 Door Removal Water Dispenser Tubing Connection Base Grille 5 A Do Not Remove Screw A A Top Right Hinge Bottom Hinge 6 A Do Not Remove Screw A A Door Alignment 7 A Leveling Screw A 3 Top Left ...

Page 7: ...ubing through the bottom hinge while reinstalling the freezer door Feed the dispenser tubing through the bottom left hinge before replacing the door on the hinge NOTE Provide additional support for the doors while the top hinges are being replaced Do not depend on the door magnets to hold the doors in place while you are working 3 Reconnect water dispenser tubing by pushing tubing into fitting unt...

Page 8: ... the copper tubing as shown Insert the end of the tubing into the outlet end squarely as far as it will go Screw compression nut onto outlet end with adjustable wrench Do not overtighten 8 Place the free end of the tubing in a container or sink and turn ON the main water supply Flush the tubing until water is clear Turn OFF the shutoff valve on the water pipe Coil the copper tubing Connect to Refr...

Page 9: ...ispenser bar until the water begins to flow Flush the water system by dispensing and discarding 1 5 gal 5 4 L of water Cleaning the system will take approximately 3 minutes and will help clear air from the line Additional flushing may be required in some households NOTE As air is cleared from the system water may spurt out of the dispenser 3 Open the freezer door and turn on the ice maker For Styl...

Page 10: ...se panels thoroughly and blot dry using a dry soft cloth or chamois NOTE Do not use paper towels or cleaners which contain solvents such as ammonia They can damage the surface of the panels 3 If small scratches should appear on the panels they may be filled using an automotive paste wax not a cleaner wax combination Apply wax sparingly and buff lightly with a clean soft cloth using a circular moti...

Page 11: ...ondenser by the condenser fan You may hear water running into the drain pan during the defrost cycle REFRIGERATOR USE Ensuring Proper Air Circulation In order to ensure proper temperatures you need to permit air to flow between the two sections Cold air enters the bottom of the freezer section and moves up It then enters the refrigerator section through the top vent Air then returns to the freezer...

Page 12: ...e less cold Settings to the right of the mid setting make the temperature colder Adjusting Electronic Controls NOTE Wait at least 24 hours between adjustments Recheck the temperatures before other adjustments are made If you need to adjust temperatures Press the FREEZER or REFRIGERATOR arrow to move the indicator light to the right one setting at a time Continue moving the indicator light until it...

Page 13: ...The temperature display will not change After 24 hours the refrigerator returns to the previous temperature set points Accelerated Ice Production on some models This feature assists with temporary periods of heavy ice use by increasing ice production over a 24 hour period Press OPTIMICE touch pad to turn on the OptimIce feature The OptimIce setting will remain on for 24 hours unless manually turne...

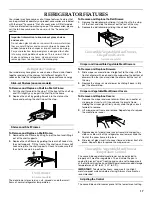
Page 14: ...tray can be removed from the dispenser and carried to the sink to be emptied or cleaned To Dispense Water 1 Press a sturdy glass against the water dispenser lever 2 Remove the glass to stop dispensing NOTE Water may have an off flavor if you do not use the dispenser periodically Dispense enough water every week to maintain a fresh supply The Dispenser Light Style 1 The dispenser area has a light I...

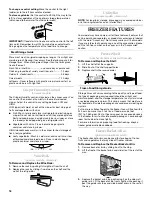
Page 15: ...nSystem onsomemodels NOTE Do not use with water that is microbiologically unsafe or of unknown quality without adequate disinfection before or after the system Changing the Water Filter Cartridge 1 Locate the water filter cartridge cap in the front base grille Rotate the cap counterclockwise to a vertical position and pull the cap and filter cartridge out through the base grille NOTE There will be...

Page 16: ...matically stop ice production but the control will remain in the ON left position 2 To manually turn the ice maker off slide the control to the OFF right position To Remove and Replace the Ice Storage Bin 1 Hold the base of the storage bin with both hands and press the release button to lift the storage bin up and out NOTE It is not necessary to turn the ice maker control to the OFF right position...

Page 17: ... Remove and Replace Drawers 1 Slide crisper or meat drawer straight out to the stop Lift the front of drawer with one hand while supporting the bottom of drawer with other hand and slide the drawer out the rest of the way 2 Replace the crisper or meat drawer by sliding it back in fully past the drawer stop Crisper or Vegetable Meat Drawer Covers To Remove and Replace Covers 1 Remove the crisper an...

Page 18: ...Remove the rack by pulling it straight out from the shelf 2 Replace the rack by sliding it in between the shelf and the wall of the refrigerator UtilityBin onsomemodels Accessory NOTE For long term storage place eggs in a covered container or in their original carton on an interior shelf FREEZER FEATURES Your model may have some or all of these features Features that can be purchased separately as...

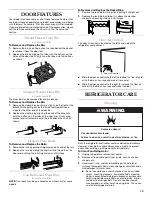
Page 19: ...omemodels NOTE Can racks may be purchased as an Accessory for some models To Remove and Replace the Racks Bins 1 Remove the rack bin by lifting it and pulling it straight out 2 Replace the rack bin by sliding it in above the desired support and pushing it down until it stops DoorAirControl The door air control is located on the left hand side of the refrigerator compartment Slide the door air cont...

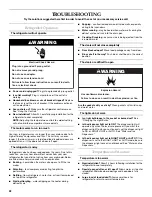
Page 20: ...y If you need to clean the condenser Remove the base grille See Base Grille graphic or Base Grille section Use a vacuum cleaner with a soft brush to clean the grille the open areas behind the grille and the front surface area of the condenser Replace the base grille when finished 6 Plug in refrigerator or reconnect power ChangingtheLightBulbs NOTE Not all appliance bulbs will fit your refrigerator...

Page 21: ...an automatic ice maker Raise wire shutoff arm to OFF up position or move the switch to the OFF right setting Shut off water supply to the ice maker 3 Empty the ice bin If You Choose to Turn the Refrigerator Off Before You Leave 1 Remove all food from the refrigerator 2 If your refrigerator has an automatic ice maker Turn off the water supply to the ice maker at least one day ahead of time When the...

Page 22: ...ng contraction expansion of inside walls especially during initial cool down Water running may be heard when water melts during the defrost cycle and runs into the drain pan Creaking Cracking occurs as ice is being ejected from the ice maker mold The doors will not close completely Door blocked open Move food packages away from door Bin or shelf in the way Push bin or shelf back in the correct pos...

Page 23: ...tight moisture proof packaging to store food Are there minerals such as sulfur in the water A water filter may need to be installed to remove the minerals Is there a water filter installed on the refrigerator Gray or dark discoloration in ice indicates that the water filtration system needs additional flushing The ice dispenser will not operate properly Freezer door closed completely Close the doo...

Page 24: ... Customer eXperience Center telephone number or your nearest designated service center IntheU S A Call the KitchenAid Customer eXperience Center toll free 1 800 422 1230 Our consultants provide assistance with Features and specifications on our full line of appliances Installation information Use and maintenance procedures Accessory and repair parts sales Specialized customer assistance Spanish sp...

Page 25: ...d dealer In Canada call 1 800 807 6777 Stainless Steel Cleaner Polish Order Part 8171420 Base grille water filter cartridges NOTE Do not use with water that is microbiologically unsafe or of unknown quality without adequate disinfection before or after the system Standard Cartridge Order Part 4396509 NL240V and L400V WATER FILTER CERTIFICATIONS ...

Page 26: ...L 100 000 mL 0 05 mg L 40 667 mL 97 4 88 0 97 4 95 1 Contaminant Reduction NSF Reduction Requirements Average Influent Influent Challenge Concentration Maximum Effluent Average Effluent Minimum Reduction Average Reduction Lead pH 6 5 Lead pH 8 5 0 01mg L 0 01mg L 0 15 mg L 0 148 mg L 0 15 mg L 10 0 15 mg L 10 0 001 mg L 0 003 mg L 0 001 mg L 0 001 mg L 99 3 97 9 99 3 99 0 Mercury pH 6 5 Mercury pH...

Page 27: ...chenAid or KitchenAid Canada will not pay for 1 Service calls to correct the installation of your refrigerator to instruct you how to use your refrigerator to replace house fuses or correct house wiring or plumbing to replace light bulbs or replacement water filters other than as noted above 2 Repairs when your refrigerator is used in other than normal single family household use 3 Pickup and deli...

Page 28: ...rité Ce symbole d alerte de sécurité vous signale les dangers potentiels de décès et de blessures graves à vous et à d autres Tous les messages de sécurité suivront le symbole d alerte de sécurité et le mot DANGER ou AVERTISSEMENT Ces mots signifient AVERTISSEMENT réfrigérateur prendre quelques précautions fondamentales y compris les suivantes Pour réduire les risques d incendie de choc électrique...

Page 29: ...our d un radiateur ou de toute autre source de chaleur Ne pas installer le réfrigérateur dans un endroit où la température baissera au dessous de 55 F 13 C AVERTISSEMENT Risque du poids excessif Utiliser deux ou plus de personnes pour déplacer et installer le réfrigérateur Le non respect de cette instruction peut causer une blessure au dos ou d autre blessure Déplacement de votre réfrigérateur Vot...

Page 30: ...ide avec une pression entre 30 et 120 lb po2 207 827 kPa est nécessaire pour faire fonctionner le distributeur d eau et la machine à glaçons Si vous avez des questions au sujet de la pression de votre eau appeler un plombier qualifié agréé Alimentation en eau par osmose inverse IMPORTANT La pression de l alimentation en eau entre le système d osmose inverse et la valve d arrivée d eau du réfrigéra...

Page 31: ...ISSEMENT Risque de choc électrique Déconnecter la source de courant électrique avant d enlever les portes Reconnecter les deux fils de liaison à la terre avant de faire la remise en marche Le non respect de cette instruction peut causer un décès ou un choc électrique 1 4 Enlèvement des portes Grille de la base 5 A Ne pas enlever la vis A Charnière supérieure droite 3 Charnière supérieure gauche A ...

Page 32: ... dessin 6 Ne pas enlever la vis A Replacer les portes et les charnières 1 Replacer les deux charnières inférieures si elles ont été enlevées Serrer les vis 2 Une aide peut être requise pour faire passer le conduit d eau au distributeur à travers la charnière inférieure pendant la réinstallation de la porte du congélateur Faire passer le conduit d eau du distributeur à travers la charnière inférieu...

Page 33: ...he à l arrière du réfrigérateur et le tuyau d arrivée d eau Ajouter une longueur de 7 pi 2 1 m pour permettre le déplacement du réfrigérateur pour le nettoyage Utiliser un tube en cuivre de 6 35 mm de diamètre extérieur Veiller à ce que le tube soit coupé d équerre aux deux extrémités 5 À l aide d une perceuse électrique reliée à la terre percer un trou de dans le tuyau de canalisation d eau froid...

Page 34: ...liée à la terre 2 Vider le système d eau Voir Préparer le système d eau REMARQUE Une période d attente allant jusqu à 24 heures est nécessaire avant que l appareil commence à produire des glaçons Préparerlesystèmed eau Veuillez lire avant d utiliser le système d eau Immédiatement après l installation suivre les étapes ci dessous pour vous assurer que le système d eau est bien nettoyé 1 Ouvrir la p...

Page 35: ...aux de remplissage pour éviter les égratignures Remplacement des panneaux de porte 1 Remplacer les panneaux de porte du réfrigérateur ou du congélateur Ouvrir la porte du réfrigérateur ou du congélateur Faire glisser le panneau décoratif de 3 18 mm en place derrière la garniture latérale Abaisser le panneau de remplissage en place en arrière du panneau décoratif Répéter le processus pour les autre...

Page 36: ...ne machine à glaçons vous entendrez un bruit de gargouillement lorsque la valve d eau s ouvre pour remplir la machine à glaçons pour chaque programme Porte du congélateur et réfrigérateur de 22 pi cu 185 32 46 1 cm VUE DE DESSUS VUE DE DESSUS 3 4 min 19 05 mm min 31 4 82 55 mm min 3 4 19 05 mm 127 16 31 6 cm 127 16 31 6 cm 285 64 71 3 cm 1 4 6 35 mm 1 4 6 35 mm 1 4 6 35 mm 1 4 6 35 mm 5 16 7 93 mm...

Page 37: ...urs formées dans une section seront transférées à l autre Vous devez nettoyer à fond les deux sections pour éliminer les odeurs Pour empêcher le transfert d odeurs bien envelopper ou recouvrir hermétiquement les aliments Utilisationdescommandes Votre modèle peut être muni de commandes à curseur de commandes électroniques ou de commandes numériques IMPORTANT Toutes les commandes La commande du réfr...

Page 38: ...ur le tableau de commande à la partie supérieure du compartiment de réfrigération Témoin lumineux et réinitialisation du filtre à eau Voir Témoin lumineux de l état du filtre à eau Production accélérée de glaçons La caractéristique de production accélérée de glaçons vient en aide lors de périodes temporaires d utilisation intense de glaçons en augmentant la production de glaçons sur une période de...

Page 39: ...t utile lors de périodes d utilisation intense de glaçons de l addition d un grand nombre d aliments ou de températures temporaires élevées de la pièce Appuyer sur MAX COOL pour activer la caractéristique de refroidissement maximal Le témoin lumineux Max Cool demeure allumé pendant 24 heures à moins d être éteint manuellement REMARQUE L affichage de la température ne change pas Au bout de 24 heure...

Page 40: ...une distribution plus rapide de glaçons ou des quantités plus grandes 3 Retirer le verre pour arrêter la distribution REMARQUE Les quelques premières quantités de glaçons peuvent avoir une saveur désagréable provenant d une plomberie ou de pièces neuves Jeter ces glaçons Prendre de grandes quantités de glaçons du bac à glaçons plutôt que par l entremise du distributeur Le distributeur d eau Si le ...

Page 41: ...es distributeurs de glaçons et d eau ne fonctionneront pas Pour déverrouiller le distributeur appuyer sur le bouton LOCK OUT jusqu à ce que l indicateur disparaisse Puis poursuivre la distribution d eau ou de glaçons comme d habitude Letémoinlumineuxdel étatdufiltreàeau surcertainsmodèles Le témoin lumineux de l état du filtre à eau vous aidera à savoir quand changer la cartouche de filtre à eau L...

Page 42: ... être au même niveau que la grille de la base Machineàglaçonsetbacd entreposage surcertainsmodèles accessoire Style 1 Mise en marche arrêt de la machine à glaçons Le commutateur marche arrêt pour la machine à glaçons est un bras de commande en broche situé sur le côté de la machine à glaçons 1 Pour mettre la machine à glaçons en marche il suffit d abaisser le bras de commande en broche REMARQUE Vo...

Page 43: ...sur le dessus de la machine à glaçons ou dans le bac à glaçons CARACTÉRISTIQUES DU RÉFRIGÉRATEUR Le modèle que vous avez peut avoir certaines ou toutes ces caractéristiques Les caractéristiques qui peuvent être achetées séparément telles que les accessoires comportent le mot accessoire Tous les accessoires ne conviendront pas à tous les modèles Si l achat d accessoires vous intéresse veuillez comp...

Page 44: ...cadre du couvercle et abaisser le devant en place Répéter les étapes pour replacer le couvercle du bac à légumes Réglagedelatempératuredutiroirà légumes viandeconvertible Le tiroir à légumes viande convertible peut être ajusté pour refroidir correctement les viandes ou légumes L air à l intérieur du contenant est refroidi pour empêcher les petits espaces de congélation et peut être réglé pour gard...

Page 45: ...accessoire Tous les accessoires ne conviennent pas à tous les modèles Si vous désirez acheter l un des accessoires veuillez composer notre numéro d appel sans frais sur la couverture ou dans la section Accessoires Tablettedecongélateur lenombredetablettesvarieselonlemodèle Pour enlever et réinstaller la tablette 1 Soulever la tablette hors de ses appuis 2 Glisser la tablette hors des orifices d ap...

Page 46: ...mpartiment 2 Replacer le compartiment en alignant les extrémités du support avec les boutons sur les côtés de la doublure de la porte Enclencher fermement le support et son rebord dans les butées sur l étagère tel qu indiqué Tringlesdéposéesdanslaporte Pour retirer et réinstaller les tringles 1 Retirer les tringles en les soulevant tout droit à chaque extrémité de la tringle 2 Réinstaller les trin...

Page 47: ...teur en acier inoxydable conserve son aspect neuf et pour enlever les petites égratignures ou marques il est suggéré d utiliser le nettoyant et poli pour acier inoxydable approuvé par le fabricant Pour commander le nettoyant voir la section Accessoires IMPORTANT Ce nettoyant doit être utilisé sur les pièces en acier inoxydable uniquement Veiller à ce que le nettoyant et poli pour acier inoxydable ...

Page 48: ...le du bac Replacer le protecteur de l ampoule en insérant les languettes à une extrémité dans les fentes sur la paroi interne du réfrigérateur ou du congélateur Ensuite plier le protecteur au centre pour insérer les languettes à l autre extrémité Style 2 Enlever le protecteur d ampoule en saisissant les côtés et en pressant vers le centre tout en tirant le protecteur vers l avant tel qu indiqué Re...

Page 49: ... une machine à glaçons automatique Fermer l approvisionnement d eau de la machine à glaçons au moins une journée à l avance Lorsque la dernière quantité de glaçons est déposée soulever le bras de commande en broche à la position OFF élevée ou déplacer le commutateur à la position OFF à droite 3 Tourner la commande de température ou la commande du réfrigérateur selon le modèle à OFF arrêt Voir Util...

Page 50: ... liquide réfrigérant mouvement des conduites d eau ou d objets posés sur le dessus du réfrigérateur Grésillement gargouillement de l eau tombe sur l élément de chauffage durant le programme de dégivrage Bruit d éclatement contraction expansion des parois internes particulièrement lors du refroidissement initial Bruit d écoulement d eau peut être entendu lorsque la glace fond lors du programme de d...

Page 51: ...tre canalisation d eau froide Ceci peut diminuer la pression de l eau Voir Spécifications de l alimentation en eau soit dans les instructions d installation soit dans le Guide d utilisation et d entretien Les glaçons sont creux ou petits REMARQUE Cela indique une faible pression de l eau La valve de la canalisation d eau n est elle pas complètement ouverte Ouvrir la valve d eau complètement La can...

Page 52: ...éfrigérateur Le filtre peut être obstrué ou installé incorrectement Un système de filtration de l eau à osmose inverse est il connecté à votre canalisation d eau froide Voir Spécifications de l alimentation en eau soit dans les instructions d installation soit dans le Guide d utilisation et d entretien De l eau suinte du distributeur REMARQUE Il est normal de constater une ou deux gouttes d eau ap...

Page 53: ...sistance pour Caractéristiques et spécifications de notre gamme complète d appareils électroménagers Procédés d utilisation et d entretien Vente d accessoires et de pièces de rechange Les références aux concessionnaires compagnies de service de réparation et distributeurs de pièces de rechange locaux Les techniciens de service désignés par KitchenAid Canada sont formés pour remplir la garantie des...

Page 54: ...4 mg L 833 333 mL 2 0 mg L 10 Au moins 10 000 particules mL 0 05 mg L 100 000 mL 0 05 mg L 40 667 mL 97 4 88 0 97 4 95 1 Réduction de contaminant Critères de réduction NFS Affluent moyen Concentration dans l eau à traiter Effluent maximal Effluent moyen de réd minimale de réd moyenne Plomb à pH 6 5 Plomb à pH 8 5 0 01mg L 0 01mg L 0 15 mg L 0 148 mg L 0 15 mg L 10 0 15 mg L 10 0 001 mg L 0 003 mg ...

Page 55: ...itchenAid ou KitchenAid Canada ne paiera pas pour 1 Les visites de service pour rectifier l installation du réfrigérateur montrer à l utilisateur comment utiliser le réfrigérateur ou remplacer des fusibles rectifier le câblage électrique ou la plomberie du domicile remplacer des ampoules électriques ou les filtres à eau de rechange sauf ce qui est indiqué ci dessus 2 Les réparations lorsque le réf...

Page 56: ...s réservés Registered Trademark TM Trademark of KitchenAid U S A KitchenAid Canada licensee in Canada Marque déposée TM Marque de commerce de KitchenAid U S A Emploi licencié par KitchenAid Canada au Canada 12 05 Printed in U S A Imprimé aux É U ...

Reviews: