


10
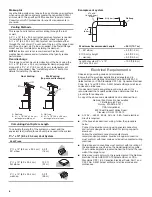
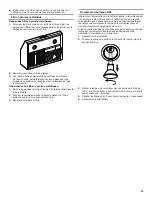
Install Vent Covers (Optional)
If you are installing an optional full width duct cover, follow the
instructions included with that product.
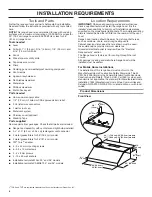
Complete Installation
1.
Install metal grease
fi
lters. See the “Range Hood
Care”
section.
2.
Check the operation of the range hood blower and light. See
the “Range Hood Use” section.
NOTE:
To get the most ef
fi
cient use from your new range
hood, read the “Range Hood Use” section.
RANGE HOOD USE
The range hood is designed to remove smoke, cooking vapors,
and odors from the cooktop area. For best results, start the
hood before cooking and allow it to operate several minutes
after the cooking is complete to clear all smoke and odors from
the kitchen.
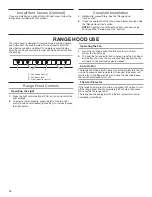
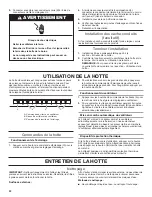
Range Hood Controls
Operating the Light
1.
Press the light control buttons (C) to turn on and control the
light settings.
2.
To select a lower intensity, press the left of the two light
control buttons until desired light setting. To increase, press
the right button.
Operating the Fan
1.
Press the fan speed control buttons (A) to turn on and
control the fan settings.
2.
To boost the fan speed for
fi
ve minutes, press the Fan Boost
level button (B). Once the
fi
ve minutes have passed, the fan
will return to the previously selected speed.
Auto On Fan
The range hood has a built in sensor to automatically turn the fan
on when excessive heat is detected. If needed, the sensor will
turn the fan to the Boost setting, and once the heat decreases,
the fan will automatically turn off.
Thermal Protector
If the range hood shuts off while in use, press OFF button to turn
off the range hood. Wait approximately 60 minutes, then press
ON to restart the range hood.
The range hood is equipped with a thermal protector to avoid
overheating conditions.
A. Fan speed control
B. Fan boost level
C. Light intensity control
A
A
C
B
Summary of Contents for KitchenAid KVUC600KSS0
Page 38: ...38 Notas ...
Page 39: ...39 Notas ...