background image

15

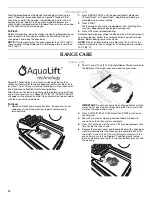
7. If any soils remain, remove them with a non-scratch scrubbing 

sponge or plastic scraper. Additional Clean cycles may be run 
to help remove the stubborn soils.
IMPORTANT: Do not use oven cleaners. The use of chemicals, 
including commercial oven cleaners or metal scouring pads, 
may cause permanent damage to the porcelain surface of the 
oven interior.

NOTES:

The range should be level to ensure that the entire surface of 
the bottom of the oven cavity is covered by water at the 
beginning of the Clean cycle.

For best results, use distilled or filtered water. Tap water may 
leave mineral deposits on the oven bottom. 

Before removing the residual water and loosened soils at the 
end of the Clean cycle, insert a cloth or paper towel between 
the lower edge of the oven door and the front frame to keep 
water from spilling onto the front of the range and the floor.

Soil baked on through several cooking cycles will be more 
difficult to remove with the Clean cycle. 

Nonabrasive scrub sponges or eraser style cleaning pads 
(without cleaners) can be effective for cleaning the oven cavity 
walls, oven door and oven bottom for difficult soils. For best 
results, moisten the pads and sponges before use.

Run an additional Clean cycle for stubborn soils.

affresh™ Kitchen and Appliance Cleaner and affresh™ 
Cooktop Cleaner may be used to clean the oven bottom, walls 
and door when the oven has finished the cycle and returned to 
room temperature. If affresh™ Cooktop Cleaner is used, it is 
recommended to wipe out the cavity with distilled water as 
well. Refer to the “Accessories” section for information on 
ordering.

Additional AquaLift™ Technology Cleaning Kits may be 
obtained by ordering Part Number W10423113RP. See the 
“Accessories” section for more information.

For assistance with AquaLift™ Technology, call 
1-877-258-0808, or visit our website at http://whr.pl/aqualift.

General Cleaning

IMPORTANT: Before cleaning, make sure all controls are off and 
the oven and cooktop are cool. Always follow label instructions on 
cleaning products. For additional information, you can visit the 
Frequently Asked Questions section of our website at 
www.kitchenaid.com. In Canada, reference the Customer Service 
section at www.kitchenaid.ca.
Soap, water and a soft cloth or sponge are suggested first unless 
otherwise noted.

EXTERIOR PORCELAIN ENAMEL SURFACES (on some 
models)

Food spills containing acids, such as vinegar and tomato, should 
be cleaned as soon as the entire range is cool. These spills may 
affect the finish.
Cleaning Method:

Glass cleaner, mild liquid cleaner or nonabrasive scrubbing 
pad: 
Gently clean around the model and serial number plate 
because scrubbing may remove numbers.

affresh™ Kitchen and Appliance Cleaner Part Number 
W10355010 (not included):
See “Accessories” section for more information.

STAINLESS STEEL (on some models)

NOTE: To avoid damage to stainless steel surfaces, do not use 
soap-filled scouring pads, abrasive cleaners, Cooktop Cleaner, 
steel-wool pads, gritty washcloths or abrasive paper towels. 
Damage may occur to stainless steel surfaces, even with one-time 
or limited use.
Cleaning Method:

Rub in direction of grain to avoid damaging.

affresh™ Stainless Steel Cleaner Part Number W10355016 (not 
included): 
See “Accessories” section for more information.

Liquid detergent or all-purpose cleaner: 
Rinse with clean water and dry with soft, lint-free cloth.

METALLIC PAINT (on some models)

Do not use abrasive cleaners, cleaners with bleach, rust removers, 
ammonia or sodium hydroxide (lye) because paint surface may 
stain. 

PORCELAIN-COATED GRATES AND CAPS

Food spills containing acids, such as vinegar and tomato, should 
be cleaned as soon as the cooktop, grates and caps are cool. 
These spills may affect the finish.

To avoid chipping, do not bang grates and caps against each other 
or hard surfaces such as cast iron cookware.
Do not reassemble caps on burners while wet.
Cleaning Method:

Nonabrasive plastic scrubbing pad and mildly abrasive 
cleanser:

Clean as soon as cooktop, grates and caps are cool.

Dishwasher (grates only, not caps):

Use the most aggressive cycle. Cooked-on soils should be 
soaked or scrubbed before going into a dishwasher.

Gas Grate and Drip Pan Cleaner Part Number 31617A:
See “Accessories” section for more information.

SURFACE BURNERS

See “Sealed Surface Burners” section.

COOKTOP CONTROLS

To avoid damage to the cooktop controls, do not use steel wool, 
abrasive cleansers or oven cleaner.
To avoid damage, do not soak knobs. When replacing knobs, make 
sure knobs are in the OFF position.
On some models, do not remove seals under knobs.
Cleaning Method:

Soap and water: 
Pull knobs straight away from control panel to remove.

GRIDDLE

To avoid damaging the nonstick surface, do not clean the griddle in 
the dishwasher, or use steel wool and abrasive cleaners.
Cleaning method:

Mild detergent

CONTROL PANEL AND OVEN DOOR EXTERIOR

To avoid damage to the control panel, do not use abrasive 
cleaners, steel-wool pads, gritty washcloths or abrasive paper 
towels.
Cleaning Method:

Glass cleaner and soft cloth or sponge: 
Apply glass cleaner to soft cloth or sponge, not directly on 
panel.

affresh™ Kitchen and Appliance Cleaner Part Number 
W10355010 (not included):
See “Accessories” section for more information.
Summary of Contents for GAS RANGE

Page 1: ...l acerca de su producto visite www kitchenaid com Deberá tener a mano el número de modelo y de serie que están ubicados en el marco del horno detrás del lado derecho superior de la puerta del horno GAS RANGE USER INSTRUCTIONS Table of Contents RANGE SAFETY 2 The Anti Tip Bracket 3 FEATURE GUIDE 4 COOKTOP USE 6 Grates 6 Griddle 6 Sealed Surface Burners 7 Burner Size 7 Cookware 8 Home Canning 8 OVEN...

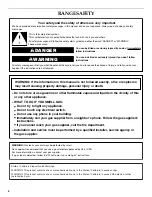
Page 2: ...y damage personal injury or death Do not store or use gasoline or other flammable vapors and liquids in the vicinity of this or any other appliance WHAT TO DO IF YOU SMELL GAS Do not try to light any appliance Do not touch any electrical switch Do not use any phone in your building Immediately call your gas supplier from a neighbor s phone Follow the gas supplier s instructions If you cannot reach...

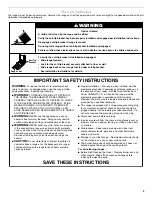
Page 3: ...rheating of the oven WARNING NEVER cover any slots holes or passages in the oven bottom or cover an entire rack with materials such as aluminum foil Doing so blocks air flow through the oven and may cause carbon monoxide poisoning Aluminum foil linings may also trap heat causing a fire hazard CAUTION Do not store items of interest to children in cabinets above a range or on the backguard of a rang...

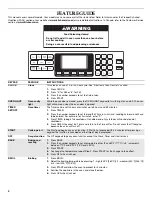
Page 4: ...ountdown If enabled end of cycle tones will sound at end of countdown 4 Press TIMER to cancel the Timer and return to the Time of Day Do not press the Off keypad because the oven will turn off START Cooking start The Start pad begins any oven function If Start is not pressed within 2 minutes after pressing a keypad the function is canceled and the time of day is displayed OFF Range function The Of...

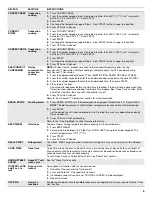
Page 5: ...ection At the end of the stop time the oven will automatically turn off 5 Press OFF when finished Refer to EasyConvect Conversion section for more information BREAD PROOF Proofing bread 1 Press BREAD PROOF until the desired proof is displayed Stndrd Proof or Rapid Proof NOTE Rapid operates at a slightly higher temperature for second rise of formed dough 2 Press START Let the dough rise until nearl...

Page 6: ...ing illustration On some models the two grates are identical and can be used on either the left or right side of the cooktop Grates that are designed for use on only one side of the cooktop will have either LEFT or RIGHT embossed on the bottom side of the grate Griddle To Use the Griddle 1 Locate the griddle on the right side grate as shown The locating feet on the bottom of the griddle will engag...

Page 7: ...RTANT Before cleaning make sure all controls are off and the oven and cooktop are cool Do not use oven cleaners bleach or rust removers 1 Remove the burner cap from the burner base and clean according to General Cleaning section 2 Clean the gas tube opening with a damp cloth 3 Clean clogged burner ports with a straight pin as shown Do not enlarge or distort the port Do not use a wooden toothpick I...

Page 8: ...facture home canning products can also offer assistance OVEN USE The normal operation of the range will include several noises that may be heard each time the Bake or Broil burners ignite during the cooking cycle gas valves may make a popping sound when opening or closing igniters will click several times until a flame is sensed a poof sound is heard when a Bake or Broil burner ignites Odors and s...

Page 9: ... of cycle tone and key press tones Reminder tones are still active when all tones are disabled 1 Press OPTIONS until ALL SOUNDS is displayed 2 Press START to display the current setting 3 Press the 3 keypad to adjust the setting 4 Press START to save the setting 5 Press OFF to exit Tone Pitch Volume Sets the pitch of the tone to either high or low 1 Press OPTIONS until TONE PITCH is displayed 2 Pr...

Page 10: ...f immediately To Enable Sabbath Mode Capability one time only 1 Open oven door 2 Press 7 8 9 6 SABBATH ON or SABBATH OFF will appear in the display If SABBATH ON is displayed Sabbath Mode is enabled Continue with Step 4 If SABBATH OFF is displayed continue with Step 3 3 Press START to change the displayed status 4 Close oven door and press OFF Sabbath Mode can be activated for baking NOTE To disab...

Page 11: ...such as a turkey and casseroles Do not place more than 25 lbs 11 3 kg on the split rack The insert can also be used on the counter as a cooling rack If you would like to purchase a split oven rack one may be ordered See Accessories section to order To Use Racks 1 Place a full rack in the lower section of the oven and position the split rack above it 2 Place large items on the right side of the ful...

Page 12: ...ped pieces of meat fish and poultry may cook better at lower broil settings Use racks 6 or 7 for broiling Use rack position 6 if using the roll out rack Refer to the Positioning Racks and Bakeware section for more information For best results use a broiler pan and grid It is designed to drain juices and help avoid spatter and smoke If you would like to purchase a broiler pan one may be ordered Ple...

Page 13: ...down the time When the time ends the oven will shut off automatically The temperature and or time setting can be changed at any time by repeating steps 2 3 6 Press OFF to clear the display NOTE The time setting for any timed cooking function including EasyConvect Conversion can be adjusted by following the previous steps 3 5 To Set a Delayed Timed Cook 1 Press BAKE CONVECT BAKE or CONVECT ROAST 2 ...

Page 14: ...NGE CARE CleanCycle AquaLift Technology is an innovative cleaning solution that utilizes heat and water to release baked on spills from the oven in less than 1 hour This new cleaning technology is a low heat odor free alternative to traditional self cleaning options Allow the oven to cool to room temperature before using the Clean cycle If your oven cavity is above 200 F 93 C OVEN COOLING will app...

Page 15: ...eaning Method Glass cleaner mild liquid cleaner or nonabrasive scrubbing pad Gently clean around the model and serial number plate because scrubbing may remove numbers affresh Kitchen and Appliance Cleaner Part Number W10355010 not included See Accessories section for more information STAINLESS STEEL on some models NOTE To avoid damage to stainless steel surfaces do not use soap filled scouring pa...

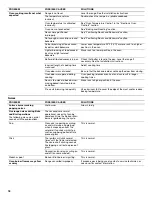
Page 16: ...irst try the solutions suggested here or visit our website and reference FAQs Frequently Asked Questions to possibly avoid the cost of a service call www kitchenaid com In Canada reference the Customer Service section at www kitchenaid ca PROBLEM POSSIBLE CAUSES SOLUTIONS Nothing will operate Power supply cord is unplugged Plug into a grounded 3 prong outlet Household fuse is blown or a circuit br...

Page 17: ...will start running approximately 5 minutes into the cycle Oven door is open If the oven door is opened during convention cooking the fan will turn off immediately It will come back on when the oven door is closed Oven burner flames are yellow or noisy Range converted improperly If propane gas is being used contact a service technician or see cover for contact information Oven temperature too high ...

Page 18: ...eeking releases oven heat and can result in longer cooking times Rack is too close to bake burner making baked items too brown on bottom Move rack to higher position in the oven Pie crusts browning too quickly Use aluminum foil to cover the edge of the crust and or reduce baking temperature PROBLEM POSSIBLE CAUSES SOLUTIONS Surface burner making popping noises Wet burner Allow it to dry Gas range ...

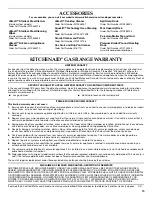
Page 19: ...our major appliance for repairs This major appliance is designed to be repaired in the home and only in home service is covered by this warranty 7 Repairs to parts or systems resulting from unauthorized modifications made to the appliance 8 Expenses for travel and transportation for product service if your major appliance is located in a remote area where service by an authorized KitchenAid servic...

Page 20: ...ehind the top right side of the oven door For assistance or service in the U S A call 1 800 422 1230 In Canada call 1 800 807 6777 If you need further assistance you can write to Whirlpool with any questions or concerns at the address below In the U S A KitchenAid Brand Home Appliances Customer eXperience Center 553 Benson Road Benton Harbor MI 49022 2692 In Canada Customer eXperience Centre Kitch...

Page 21: ...LISATION DE LA TABLE DE CUISSON 27 Grilles 27 Plaque à frire 28 Brûleurs de surface scellés 28 Taille du brûleur 29 Ustensiles de cuisson 29 Mise en conserve à la maison 30 UTILISATION DU FOUR 30 Commandes électroniques du four 30 Mode Sabbat 32 Papier d aluminium 32 Positionnement des grilles et des ustensiles de cuisson au four 32 Grille de four en deux pièces sur certains modèles 33 Évent du fo...

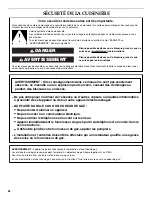
Page 22: ...VERTISSEMENT Si les renseignements dans ce manuel ne sont pas exactement observés un incendie ou une explosion peut survenir causant des dommages au produit des blessures ou un décès Ne pas entreposer ni utiliser de l essence ou d autres vapeurs ou liquides inflammables à proximité de cet appareil ou de tout autre appareil électroménager QUE FAIRE DANS LE CAS D UNE ODEUR DE GAZ Ne pas tenter d all...

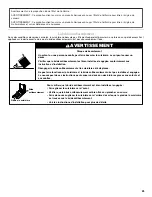
Page 23: ...aire basculer la cuisinière ce qui peut causer un décès Vérifier que la bride antibasculement est bien installée et engagée conformément aux instructions d installation Réengager la bride antibasculement si la cuisinière a été déplacée Ne pas faire fonctionner la cuisinière si la bride antibasculement n est pas installée et engagée Le non respect de ces instructions peut causer un décès ou des brû...

Page 24: ...bjets que des enfants pourraient vouloir atteindre Les enfants pourraient se blesser gravement en grimpant sur la cuisinière Installation appropriée La cuisinière lorsqu elle est correctement installée doit être reliée à la terre conformément aux codes électriques locaux ou en l absence de codes locaux selon le Code électrique national US ANSI NFPA 70 ou le Code canadien de l électricité S assurer...

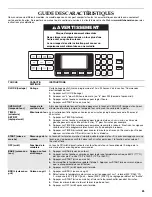
Page 25: ...inuterie pour annuler la minuterie et revenir à l heure du jour Ne pas appuyer sur la touche Off arrêt sinon le four s éteindra START mise en marche Démarrage de la cuisson La touche Start met en marche n importe quelle fonction du four Si après avoir appuyé sur une touche on n appuie pas sur Start dans les 2 minutes qui suivent la fonction est annulée et l heure s affiche OFF arrêt Fonction de la...

Page 26: ...ques pour entrer une durée de cuisson standard puis appuyer sur START mise en marche 4 Placer les aliments dans le four Contrôler le degré de cuisson des aliments avant que l heure de fin ne soit atteinte Si les aliments ne sont pas cuits une fois la durée de cuisson écoulée prolonger la cuisson avant que la cuisson ne soit terminée Voir la section Durée de cuisson Une fois la durée écoulée le fou...

Page 27: ...e couvrent toute la table de cuisson en largeur Il est possible d imbriquer les deux grilles à l aide du crochet situé à une extrémité de chacune d entre elles sur certains modèles L extrémité plate d une des grilles s emboîte sur le crochet de l autre grille tel qu indiqué dans l illustration suivante Sur certains modèles les deux grilles sont identiques et peuvent être utilisées du côté gauche o...

Page 28: ...tube d arrivée de gaz Pour que le brûleur s allume convenablement il faut que le gaz puisse passer librement à travers l ouverture du tube d arrivée de gaz Garder cette zone exempte de souillures et veiller à ce que les renversements aliments agents de nettoyage ou autre matériau ne puissent pénétrer dans l ouverture du tube d arrivée de gaz Protéger le tube d arrivée de gaz contre les renversemen...

Page 29: ...à l horizontale au fond sur la grille La flamme doit être réglée de sorte qu elle ne s étende pas sur les côtés du plat Taille du brûleur Utilisation recommandée Petite taille Cuisson à basse température Faire fondre le chocolat ou le beurre Taille moyenne Brûleur multifonction Grande taille Pour les ustensiles de cuisson de grande taille Très grande taille Le brûleur le plus puissant Pour les ust...

Page 30: ...iques du module de commande du four peuvent être ajustées pour répondre à vos besoins On effectue ces changements à l aide de la touche OPTIONS Utiliser la touche OPTIONS pour faire défiler les caractéristiques qui peuvent être modifiées L affichage passe au réglage suivant à chaque pression supplémentaire sur OPTIONS Après avoir sélectionné la caractéristique à modifier le tableau de commande dem...

Page 31: ...mande sans pour autant activer les éléments de chauffage Si cette caractéristique est activée le four ne fonctionnera pas 1 Appuyer sur OPTIONS jusqu à ce que DEMO MODE mode de démonstration s affiche 2 Appuyer sur START mise en marche pour afficher le réglage actuel 3 Appuyer sur la touche 3 pour modifier le réglage 4 Appuyer sur START mise en marche pour enregistrer le réglage 5 Appuyer sur OFF ...

Page 32: ... était affiché avant que l on appuie sur la touche 2 Appuyer sur START mise en marche Désactivation du mode Sabbat Appuyer sur OPTIONS puis sur 7 pour revenir à la cuisson au four traditionnelle ou appuyer sur OFF pour éteindre la cuisinière Papierd aluminium IMPORTANT Pour éviter des dommages permanents au fini du fond du four ne pas recouvrir le fond du four avec du papier d aluminium ou un revê...

Page 33: ... gros aliments tels qu une dinde ou des mets en sauce Ne pas placer plus de 25 lb 11 3 kg sur la grille en deux pièces La section amovible peut aussi servir de grille de refroidissement sur un comptoir Il est possible de commander une grille en deux pièces Voir la section Accessoires pour placer une commande Utilisation des grilles 1 Placer une grille pleine largeur dans la section inférieure du f...

Page 34: ...ril Si l on utilise la grille déployante utiliser la position de grille 6 Consulter la section Positionnement des grilles et ustensiles de cuisson au four pour plus d informations Pour de meilleurs résultats utiliser une lèchefrite et une grille La lèchefrite est conçue pour laisser s écouler les jus et aider à éviter les éclaboussures et la fumée Il est possible de commander une lèchefrite Consul...

Page 35: ...RT 2 Appuyer sur les touches numériques pour entrer la température de cuisson standard puis appuyer sur START 3 Appuyer sur les touches numériques pour entrer la température de cuisson standard puis appuyer sur START 4 Placer les aliments dans le four Contrôler le degré de cuisson des aliments avant que l heure de fin de cuisson ne soit atteinte Si les aliments ne sont pas cuits une fois la durée ...

Page 36: ... sur Start mise en marche à mi chemin entre les étapes 4 et 5 pour pouvoir continuer à effectuer des changements Lorsque la durée de cuisson réglée s achève le four s éteint automatiquement 8 Appuyer sur OFF arrêt pour effacer l affichage Levéedupain La levée du pain prépare la pâte pour la cuisson en activant la levure Suivre les instructions de la recette comme guide La levée standard doit être ...

Page 37: ...euvent être lancés pour aider à se débarrasser des saletés tenaces IMPORTANT Ne pas utiliser de nettoyants à four L utilisation de produits chimiques y compris les nettoyants à four qu on trouve sur le marché ou des spatules métalliques pourrait causer des dommages permanents à la surface en porcelaine qui se trouve à l intérieur du four REMARQUES La cuisinière doit être d aplomb de façon à s assu...

Page 38: ...e de nettoyage Ustensile de récurage en plastique non abrasif et nettoyant légèrement abrasif Nettoyer dès que la table de cuisson les grilles et les chapeaux ont refroidi Lave vaisselle les grilles seulement et non les chapeaux Utiliser le programme le plus intensif Les saletés cuites doivent être trempées ou frottées avant d être placées au lave vaisselle Nettoyant pour grille et plateau d égout...

Page 39: ...rrêt ou de réglage du gaz est à la position fermée Voir les instructions d installation La cuisinière est mal raccordée à la canalisation de gaz Contacter un technicien de réparation qualifié ou voir les Instructions d installation Les brûleurs de surface ne fonctionnent pas Le bouton de commande n est pas réglé correctement Enfoncer le bouton avant de le tourner à un réglage Il y a de l air dans ...

Page 40: ...me à nouveau lorsque la porte du four est fermée Les flammes du brûleur du four sont jaunes ou bruyantes Conversion inappropriée de la cuisinière Si l on utilise du gaz propane contacter un technicien de service ou consulter la page de couverture pour des renseignements de contact La température du four est trop élevée ou trop basse La température du four est mal calibrée Voir Commande de températ...

Page 41: ...périeur dans le four Brunissage plus clair des aliments entraîné par un ustensile de cuisson brillant ou clair Déplacer la grille à un niveau inférieur dans le four Le mélange est distribué de façon inégale dans la casserole Vérifier que la pâte est répartie uniformément dans le plat Régler l aplomb de la cuisinière au besoin Voir les Instructions d installation Une durée de cuisson incorrecte a é...

Page 42: ...èles Ceci est normal Crissement ou pouf Le brûleur de cuisson au four ou au gril est en train de s allumer Ceci est normal Les flammes du brûleur du four sont jaunes ou bruyantes Conversion inappropriée de la cuisinière Si l on utilise du gaz propane contacter un technicien de service ou consulter la page de couverture pour des renseignements de contact Nettoyant pour acier inoxydable affresh modè...

Page 43: ...pprouvés par KitchenAid 5 Les défauts apparents notamment les éraflures les bosses fissures ou tout autre dommage au fini du gros appareil ménager à moins que ces dommages soient dus à des vices de matériaux ou de fabrication et soient signalés à KitchenAid dans les 30 jours suivant la date d achat 6 Les coûts associés au transport du gros appareil ménager du domicile pour réparation Ce gros appar...

Page 44: ...ssistance ou service au Canada composez le 1 800 807 6777 Si vous avez besoin de plus d assistance vous pouvez écrire à KitchenAid en soumettant toute question ou problème à l adresse suivante Centre pour l eXpérience de la clientèle KitchenAid Canada 200 6750 Century Ave Mississauga Ontario L5N 0B7 Dans votre correspondance veuillez indiquer un numéro de téléphone où l on peut vous joindre dans l...

Reviews: