background image

14

REFRIGERATOR USE

Ensuring Proper Air Circulation

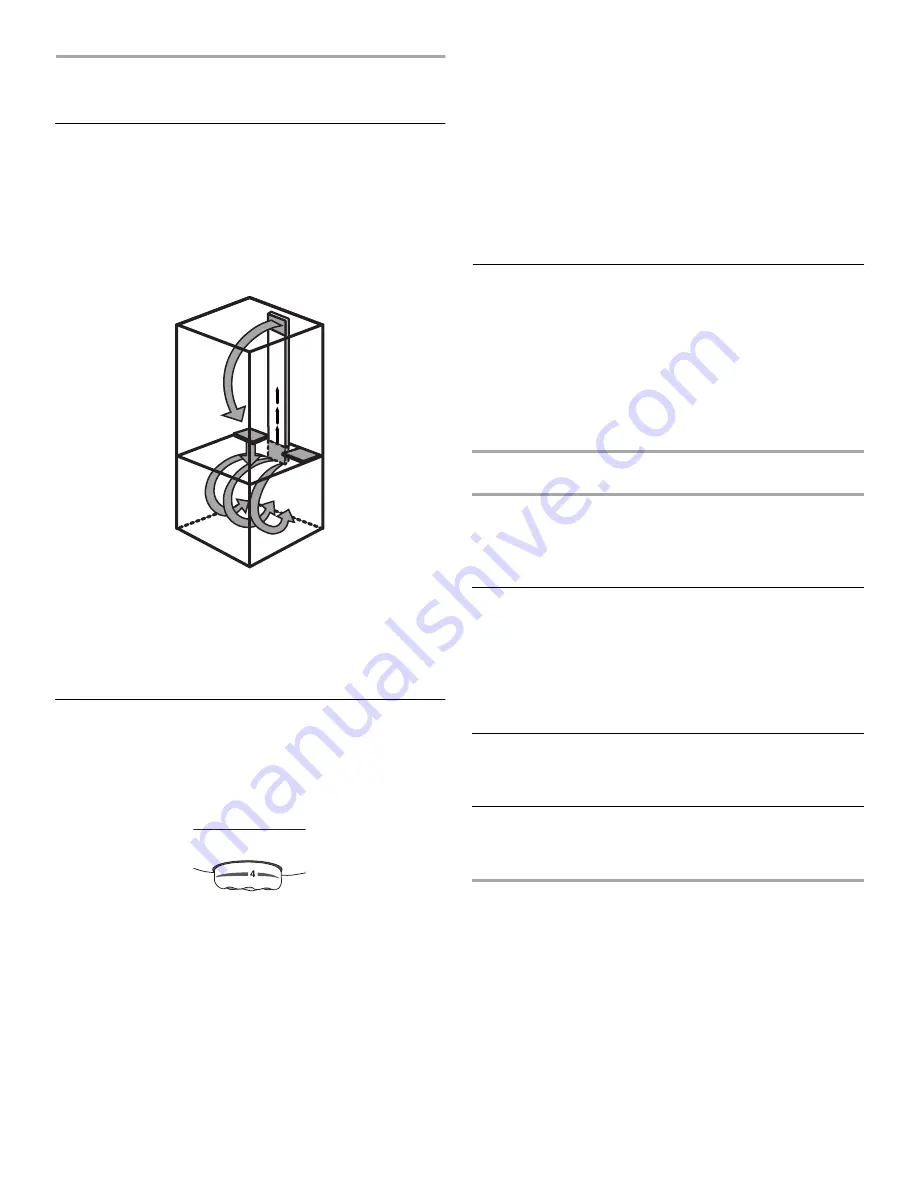
In order to ensure proper temperatures, you need to permit 
airflow between the refrigerator and freezer sections. As shown in 
the illustration, cool air enters the freezer section through vents in 
the rear and top. The air flows forward through the freezer section 
and recirculates under the freezer floor. Cool air enters the 
refrigerator section through the top, flows down and across 
shelves to the doors and recirculates to return air vents at the 
bottom. 

Do not block any of these vents with food packages. If the vents 
are blocked, airflow will be prevented and temperature and 
moisture problems may occur.

IMPORTANT:

 Because air circulates between both sections, any 

odors formed in one section will transfer to the other. You must 
thoroughly clean both sections to eliminate odors. To prevent 
odor transfer and drying out of food, wrap or cover foods tightly.

Using the Controls

For your convenience, your refrigerator and freezer controls are 
preset at the factory. When you first install your refrigerator, make 
sure that the controls in the refrigerator and freezer 
compartments are still preset to the mid-settings as shown.

Mid-setting “4”

IMPORTANT:

To turn your refrigerator off, turn the freezer control to the 
word OFF or until the word OFF appears. Neither 
compartment will cool when the freezer control is set to OFF.

The refrigerator control adjusts the refrigerator compartment 
temperature. The freezer control adjusts the freezer 
compartment temperature. Settings to the left of the mid-
setting make the temperature less cold. Settings to the right 
of the mid-setting make the temperature colder.

Wait 24 hours before you put food into the refrigerator. If you 
add food before the refrigerator has cooled completely, your 
food may spoil.

NOTE:

 Adjusting the Refrigerator and Freezer Controls to a 

higher (colder) than recommended setting will not cool the 
compartments any faster.

The preset settings should be correct for normal household 
use. The controls are set correctly when milk or juice is as 
cold as you like and when ice cream is firm.

If the temperature is too warm or too cold in the refrigerator or 
freezer, first check the air vents to be sure they are not 
blocked before adjusting the controls.

Adjusting Control Settings

Give the refrigerator time to cool down completely before adding 
food. It is best to wait 24 hours before you put food into the 
refrigerator. The settings indicated in the previous section should 
be correct for normal household refrigerator usage. The controls 
are set correctly when milk or juice is as cold as you like and 
when ice cream is firm. 

If you need to adjust temperatures in the refrigerator or freezer, 
use the settings listed in the chart below as a guide. Always 
remember to wait at least 24 hours between adjustments.

CONDITION/REASON:

RECOMMENDED 
ADJUSTMENT:

REFRIGERATOR too warm

Door opened often

Large amount of food added

Room temperature very warm

Turn REFRIGERATOR 
Control to next higher 
number, wait 24 
hours, then recheck 

FREEZER too warm/ice not made 
fast enough

Door opened often

Large amount of food added

Very cold room temperature 
(can’t cycle often enough)

Heavy ice usage

Turn FREEZER 
Control to next higher 
number, wait 24 
hours, then recheck 

REFRIGERATOR too cold

Control not set correctly for your 
conditions

Turn REFRIGERATOR 
Control to next lower 
number, wait 24 
hours, then recheck 

FREEZER too cold

Control not set correctly for your 
conditions

Turn FREEZER 
Control to next lower 
number, wait 24 
hours, then recheck 

Summary of Contents for Bottom-Freezer Refrigerator

Page 1: ...81 for installation and service call 1 800 807 6777 or visit our website at www kitchenaid com or www KitchenAid ca RÉFRIGÉRATEURSUPERPOSÉ Guided utilisationetd entretien Au Canada pour assistance composez le 1 800 461 5681 pour installation ou service composez le 1 800 807 6777 ou visitez notre site web à www KitchenAid ca Table of Contents Table des matières 2 12642709SP 2225031A ...

Page 2: ...RATEUR 27 Mise au rebut de votre vieux réfrigérateur 27 INSTALLATION DU RÉFRIGÉRATEUR 28 Déballage 28 Emplacement d installation 28 Spécifications électriques 29 Raccordement de la canalisation d eau 29 Grille de la base 30 Portes du réfrigérateur 31 Fermeture et alignement des portes 35 Préparation du système d eau 35 Ensemble décoratif de l usine 36 Sons normaux 37 UTILISATION DU RÉFRIGÉRATEUR 3...

Page 3: ...many important safety messages in this manual and on your appliance Always read and obey all safety messages This is the safety alert symbol This symbol alerts you to potential hazards that can kill or hurt you and others All safety messages will follow the safety alert symbol and either the word DANGER or WARNING These words mean IMPORTANT SAFETY INSTRUCTIONS WARNING To reduce the risk of fire el...

Page 4: ...not require clearance on the top back or sides but many factors such as subflooring or floor covering may affect your installation opening Measure carefully If you are installing your refrigerator next to a fixed wall leave 2 in 5 4 cm minimum on each side depending on your model to allow for the door to swing open If your refrigerator has an ice maker make sure you leave some extra space at the b...

Page 5: ...e up to 24 hours for your ice maker to begin producing ice Tools required NOTE Your refrigerator dealer has a kit available with a in 6 35 mm saddle type shutoff valve a union and copper tubing Before purchasing make sure a saddle type valve complies with your local plumbing codes Do not use a piercing type or in 4 76 mm saddle valve which reduces water flow and clogs more easily Cold Water Supply...

Page 6: ...nd of the tubing into a bucket or sink Turn ON main water supply and flush out tubing until water is clear Turn OFF shutoff valve on the water pipe Check for leaks Coil copper tubing Connecting to Refrigerator 1 Remove plastic cap from water valve inlet port Attach the copper tube to the valve inlet using a compression nut and sleeve as shown Tighten the compression nut Do not overtighten Confirm ...

Page 7: ...rom rail assembly 6 Lift front handle of freezer drawer to disengage drawer rail hooks from interior rail assembly Lift drawer out Freezer Drawer Replacement IMPORTANT Two individuals may be required to complete this procedure 1 Extend both interior rail assemblies to full length on each side of cabinet 2 Locate notches in both interior rail extensions see Graphic 6 2 3 Align tabs on outside edge ...

Page 8: ...ment see Graphic 4 4 Using a Phillips screwdriver remove top door cap 5 Remove in hex head screws from top door extension Reverse top door extension so notched corner turns in toward interior of door see Graphic 2 6 Remove side door trim and handle trim by tapping bottom edges upward with a soft rubber mallet Trim will slide up and release from door see Graphic 3 7 Replace bottom door cap and inst...

Page 9: ...r Stop 3 Side View Front View 1 2 1 1 1 1 1 Hinge Screws 5 Door Handle Seal Screw Front 2 1 3 32 Set Screw 1 3 32 Set Screw 4 6 1 6 2 6 3 1 1 Drawer Removal Replacement Top Hinge 1 Shim 3 Hinge Screws 2 Center Hinge 1 Hinge Cover Screw 2 Top Hinge Cover 3 5 16 Hex Head Hinge Screws 4 Top Hinge 2 1 3 4 Bottom Hinge 1 2 3 Some Models ...

Page 10: ...ement Top Hinge 1 Shim 3 Hinge Screws 2 Center Hinge 1 5 16 Hex Head Hinge Screws 2 Top Hinge 1 2 Bottom Hinge 1 2 3 1 Cabinet Hinge Hole Plugs 1 2 1 1 1 1 1 Hinge Screws 1 2 4 1 Bottom Door Cap 2 Door Stop 2 1 2 1 1 4 Hex Head Screws 2 Top Door Extension 3 1 Handle Trim 2 Side Door Trim 1 2 Some Models ...

Page 11: ...st be lowered by turning clockwise 7 Replace the base grille WaterSystemPreparation onsomemodels Please read before using the water system Immediately after installation follow the steps below to make sure that the water system is properly cleaned 1 Turn off the ice maker by opening the freezer door and lifting up the wire shutoff arm as shown 2 Install the interior water filter cartridge The inte...

Page 12: ...ecorator panel 1 Pull freezer drawer out to access handle screws 2 Using a Phillips screwdriver remove handle screws and lift off handle 3 Slide decorator panel and filler board up through handle opening 4 Replace decorator panels by reversing directions Care of Decorator Panels 1 Clean panels with stainless steel cleaner and polish or mild soap and water with a clean soft damp cloth 2 Rinse panel...

Page 13: ...frigerator to run longer than your old one You may also hear a pulsating or high pitched sound from the compressor or fans adjusting to optimize performance You may hear the evaporator fan motor circulating air through the refrigerator and freezer compartments The fan speed may increase as you open the doors or add warm food Rattling noises may come from the flow of refrigerant the water line or i...

Page 14: ...s before you put food into the refrigerator If you add food before the refrigerator has cooled completely your food may spoil NOTE Adjusting the Refrigerator and Freezer Controls to a higher colder than recommended setting will not cool the compartments any faster The preset settings should be correct for normal household use The controls are set correctly when milk or juice is as cold as you like...

Page 15: ...f water Cleaning the system will take approximately 6 to 7 minutes and will help clear air from the line Additional flushing may be required in some households NOTE As air is cleared from the system water may spurt out of the dispenser 5 Inspect the filter system for water leaks If you see water leaks see the Troubleshooting section IceMaker Turning the Ice Maker On Off NOTE Do not force the wire ...

Page 16: ... and check to make sure that the shelf is securely in position MeatDrawerandCover onsomemodels To remove and replace the meat drawer 1 Remove the meat drawer by sliding it out to the stop Lift the front of meat drawer with one hand while supporting the bottom of drawer with other hand Slide drawer out the rest of the way 2 Replace the meat drawer by guiding it into the meat cover supports and push...

Page 17: ...astic container and store in crisper HIGH closed keeps moist air in the crisper for best storage of fresh leafy vegetables Leafy vegetables Wash in cold water drain and trim or tear off bruised and discolored areas Place in plastic bag or plastic container and store in crisper UtilityorEggBin onsomemodels Accessory Depending on your model you may have a one two or three piece bin Eggs may be store...

Page 18: ...dels If you are interested in purchasing one of the accessories please call the toll free number on the cover or in the Assistance or Service section DoorRetainer To remove and replace the door retainer 1 Remove the retainer by lifting it up and pulling it straight out 2 Replace the retainer by sliding it in above the support and pushing it down until it stops DoorBins To remove and replace the bi...

Page 19: ...rgent in warm water Dry thoroughly with a soft cloth To order the cleaner see the Accessories section 5 There is no need for routine condenser cleaning in normal home operating environments If the environment is particularly greasy or dusty or there is significant pet traffic in the home the condenser should be cleaned every two to three months to ensure maximum efficiency If you need to clean the...

Page 20: ...the OFF right setting 2 Remove all food from the refrigerator and pack all frozen food in dry ice 3 Empty the ice bin 4 Depending on your model turn the Thermostat Control or Refrigerator Control to OFF See the Using the Control s section 5 Unplug the refrigerator 6 Empty water from the defrost pan 7 Clean wipe and dry thoroughly 8 Take out all removable parts wrap them well and tape them together...

Page 21: ...tor Features section Do the freezer and ice bin need to be cleaned See the Cleaning section Does the water contain minerals such as sulfur A filter may need to be installed to remove the minerals Is there a water filter installed on the refrigerator Gray or dark discoloration in ice indicates that the water filtration system needs additional flushing Run additional water through the water dispense...

Page 22: ...es section for more information Are the gaskets sticking Clean gaskets and the surface that they touch Rub a thin coat of paraffin wax on the gaskets following cleaning Does the refrigerator wobble or seem unstable Level the refrigerator See the Door Closing and Alignment section Were the doors removed during product installation and not properly replaced Remove and replace the doors according to ...

Page 23: ...urther assistance you can write to KitchenAid Canada with any questions or concerns at Customer Interaction Center KitchenAid Canada 1901 Minnesota Court Mississauga Ontario L5N 3A7 Please include a daytime phone number in your correspondence Accessories To order accessories call 1 800 442 9991 and ask for the appropriate part number listed below or contact your authorized KitchenAid dealer In Can...

Page 24: ...e address and telephone number Refer to the Warranty section for the Manufacturer s limited warranty Note that while the testing was performed under standard laboratory conditions actual performance may vary Systems must be installed and operated in accordance with manufacturer s recommended procedures and guidelines Tested and Certified by NSF International against ANSI NSF Standards 42 53 for th...

Page 25: ...ht bulbs or replacement water filters other than as noted above 2 Repairs when your refrigerator is used in other than normal single family household use 3 Pickup and delivery Your refrigerator is designed to be repaired in the home 4 Damage resulting from accident alteration misuse abuse fire flood improper installation acts of God or use of products not approved by KitchenAid or KitchenAid Canad...

Page 26: ...26 Notes ...

Page 27: ...sécurité et le mot DANGER ou AVERTISSEMENT Ces mots signifient DANGER AVERTISSEMENT Assurez vous de toujours lire tous les messages de sécurité et de vous y conformer à vous et à d autres Voici le symbole d alerte de sécurité vous ne suivez pas immédiatement les instructions blessure et ce IMPORTANTES INSTRUCTIONS DE SÉCURITÉ AVERTISSEMENT l utilisation du réfrigérateur prendre quelques précaution...

Page 28: ... installation Votre réfrigérateur n exige pas de l espace au sommet à l arrière et aux côtés mais de nombreux facteurs tels que le sous plancher ou le revêtement de plancher peuvent affecter l ouverture de votre installation Mesurez bien l ouverture Si vous installez votre réfrigérateur près d un mur fixe laisser un minimum de 2 po 5 4 cm du côté des charnières selon le modèle pour permettre à la ...

Page 29: ...ts où la température se maintient au dessus du point de congélation Une période d attente allant jusqu à 24 heures est nécessaire avant que l appareil commence à produire des glaçons Outils requis REMARQUE Votre marchand de réfrigérateurs présente une trousse disponible avec un robinet de genre à selle de po 6 35 mm un raccord et un tube en cuivre Avant l achat s assurer que le robinet de genre à ...

Page 30: ... serrer excessivement 8 Placer le bout libre du tube dans l évier ou un seau et OUVRIR le robinet principal d arrivée d eau et laisser l eau s écouler par le tube jusqu à ce que l eau soit limpide FERMER le robinet principal d arrivée d eau Vérifier s il y a des fuites Enrouler le tube en cuivre en spirale Raccordement au réfrigérateur 1 Enlever le capuchon de plastique du robinet d arrivée d eau ...

Page 31: ...ever les vis à tête hexagonale de l ensemble de rails 6 Soulever la poignée avant du tiroir du congélateur pour défaire les crochets du rail du tiroir de l intérieur de l ensemble du rail Soulever le tiroir pour le retirer Réinstallation du tiroir du congélateur IMPORTANT Deux personnes peuvent être nécessaires pour effectuer cette procédure 1 Tirer complètement les deux ensembles intérieurs de ra...

Page 32: ...de la porte 5 Enlever les vis de charnières à tête hexagonale de po du prolongement de la porte supérieure Inverser le prolongement de la porte supérieure de sorte que le coin avec encoche tourne vers l intérieur de la porte voir l illustration 2 6 Enlever la garniture de la porte latérale et la garniture de la poignée en frappant le bord inférieur vers le haut avec un maillet en caoutchouc mou La...

Page 33: ...1 1 1 1 Vis de charnière 5 Vis frontale de scellement de la poignée de la porte 2 1 Vis de retenue de 3 32 Démontage et réinstallation du tiroir Charnière supérieure 1 Cale 3 Vis de charnière 2 Charnière centrale 1 Vis de plaque de charnière 2 Plaque de charnière supérieure 3 Vis de charnière à tête hexagonale de 5 16 4 Charnière supérieure 2 1 3 4 Charnière inférieure 1 2 3 6 1 6 2 6 3 1 1 1 Vis ...

Page 34: ...harnière 2 Charnière centrale 1 Vis de charnière à tête hexagonale de 5 16 2 Charnière supérieure 1 2 Charnière inférieure 1 2 3 Certains modèles 1 2 1 1 1 1 1 2 4 1 Garniture de la porte inférieure 2 Butée de porte 2 1 2 1 Vis à tête hexagonale de 1 4 2 Prolongement du dessus de la porte 3 1 Garniture de poignée 2 Garniture de côté de porte 1 2 1 Bouchons obturateurs de charnière de caisse 1 Vis ...

Page 35: ...isse en le tournant dans le sens horaire 7 Réinstaller la grille de la base Préparationdusystèmed eau surcertainsmodèles Veuillez lire avant l utilisation du système d eau Immédiatement après l installation suivre les étapes ci dessous pour avoir la certitude que le système d eau est bien nettoyé 1 Arrêter la machine à glaçons en ouvrant la porte du congélateur et en soulevant le bras de commande ...

Page 36: ...emplacer le panneau décoratif 1 Retirer le tiroir du congélateur pour avoir accès aux vis de la poignée 2 À l aide d un tournevis Phillips enlever les vis de la poignée et soulever la poignée 3 Glisser le panneau décoratif et la planchette de remplissage à travers l ouverture de la poignée 4 Réinstaller les panneaux décoratifs en inversant les directions Entretien des panneaux décoratifs 1 Nettoye...

Page 37: ...longtemps que l ancien Vous pouvez aussi entendre des bruits saccadés ou aigus provenant du compresseur et des ventilateurs qui s ajustent pour optimiser la performance Vous pouvez entendre le moteur du ventilateur d évaporation qui fait circuler l air dans le réfrigérateur et le congélateur La vitesse du ventilateur peut augmenter si on ouvre les portes ou si on ajoute des aliments chauds Les vib...

Page 38: ...ale du réfrigérateur s assurer que les commandes des compartiments de réfrigération et de congélation sont encore préréglées aux réglages moyens tel qu illustré Réglage moyen 4 IMPORTANT Pour régler le réfrigérateur à OFF arrêt tourner la commande du congélateur au mot OFF ou jusqu à ce que le mot OFF arrêt apparaisse Aucun compartiment ne se refroidira lorsque la commande du congélateur est réglé...

Page 39: ...aintenir un approvisionnement frais Systèmedefiltrationd eauintérieur IMPORTANT On peut faire couler le distributeur d eau sans une cartouche de filtre d eau mais l eau ne sera pas filtrée Si vous choisissez cette option replacer le filtre avec le capuchon bleu de déviation La bride de montage du filtre d eau intérieur est située du côté droit supérieur du réfrigérateur La cartouche du filtre d ea...

Page 40: ...élateur au réglage le plus élevé en attendant 24 heures entre chaque augmentation À NOTER Accorder 24 heures pour produire la première quantité de glaçons Jeter les trois premières quantités de glaçons produites La qualité de vos glaçons sera seulement aussi bonne que la qualité de l eau fournie à votre machine à glaçons Éviter de brancher la machine à glaçons à un approvisionnement d eau adoucie ...

Page 41: ...nant le devant vers le haut et en le soulevant à l arrière Tirer le couvercle tout droit vers l extérieur 2 Réinstaller le couvercle en guidant les crochets arrière dans les supports de tablette Incliner le couvercle à l avant jusqu à ce que les crochets arrière tombent dans les crans 3 Abaisser le devant du couvercle en place et réinstaller le tiroir à viande Guide d entreposage des viandes La pl...

Page 42: ...èles Accessoire Selon le modèle que vous avez vous pouvez avoir un oeufrier à une deux ou trois pièces Les oeufs peuvent être gardés dans l oeufrier ou placés en vrac dans le casier REMARQUE Les oeufs devraient être rangés dans un contenant couvert pour remisage à long terme Si votre modèle ne comporte pas un d oeufrier ou de casier utilitaire ranger les oeufs dans le contenant original sur une ta...

Page 43: ...tre numéro d appel sans frais sur la couverture ou dans la section Assistance ou service Dispositifderetenuedelaporte Pour enlever et réinstaller le dispositif de retenue de la porte 1 Enlever le dispositif de retenue en le soulevant et en le tirant tout droit pour le sortir 2 Réinstaller le dispositif de retenue en le glissant en place au dessus du support et en le poussant vers le bas jusqu à ce...

Page 44: ...atignures ou marques il est suggéré d utiliser le nettoyant et poli pour acier inoxydable approuvé par le fabricant IMPORTANT Ce nettoyant est pour les pièces en acier inoxydable seulement Veiller à ce que le nettoyant et poli pour acier inoxydable n entre pas en contact avec les pièces de plastique telles que garnitures couvercles de distributeurs ou joints de porte En cas de contact nettoyer la ...

Page 45: ...aliments contiennent des cristaux de glace ils peuvent être remis à congeler même si la qualité et la saveur risquent d être affectées Si les aliments semblent de piètre qualité les jeter Entretienavantlesvacancesoulorsd un déménagement Vacances Si vous choisissez de laisser le réfrigérateur en fonctionnement pendant votre absence 1 Consommer tous les aliments périssables et congeler les autres ar...

Page 46: ...e d habitude Prévoir que l eau dans le plat de dégivrage prend plus de temps à s évaporer Ceci est normal quand il fait humide Le moteur semble fonctionner excessivement La température ambiante est elle plus chaude que d habitude Prévoir que le moteur fonctionnera plus longtemps dans des conditions de chaleur Pour des températures ambiantes normales prévoir que le moteur fonctionne environ 40 à 80...

Page 47: ...d un rinçage additionnel Faire couler de l eau supplémentaire dans le distributeur d eau pour mieux nettoyer le système de filtration de l eau au moins 2 à 3 gallons 8 à 12 L ou pendant 6 à 7 minutes initialement Jeter la glace décolorée Le distributeur d eau ne fonctionne pas bien Le système d eau s est il rempli Le système d eau a besoin d être rempli la première fois qu il est utilisé Utiliser ...

Page 48: ...res d aération La porte ou les portes sont elles ouvertes souvent Pour éviter l accumulation d humidité essayer de sortir tout ce dont vous avez besoin du réfrigérateur à la fois garder les aliments bien rangés et fermer la porte le plus tôt possible La pièce est elle humide Il est normal pour l humidité de s accumuler à l intérieur du réfrigérateur lorsque l air de l extérieur est humide Les alim...

Page 49: ...lundi au vendredi de 8 h 00 à 18 h 00 HNE Samedi de 8 h 30 à 16 h 30 HNE Nos consultants fournissent de l assistance pour Caractéristiques et spécifications de notre gamme complète d appareils électroménagers Les références aux concessionnaires locaux Pour service au Canada Composer le 1 800 807 6777 Les techniciens de service désignés par KitchenAid Canada sont formés pour remplir la garantie des...

Page 50: ...Service pour le nom l adresse et le numéro de téléphone du fabricant ou pour des renseignements au sujet des pièces et du service Veuillez vous référer à la section Garantie pour la garantie limitée du fabricant Remarquer que bien que le test ait été exécuté dans des conditions standard de laboratoire le rendement réel peut varier Les systèmes doivent être installés et doivent fonctionner conformé...

Page 51: ...omberie du domicile remplacer des ampoules électriques ou les filtres à eau de rechange sauf ce qui est indiqué ci dessus 2 Les réparations lorsque le réfrigérateur est utilisé à des fins autres qu un usage unifamilial normal 3 La prise en charge et la livraison du réfrigérateur Le réfrigérateur est conçu pour être réparé à domicile 4 Les dommages causés par accident modification mésusage abus inc...

Page 52: ... droits réservés Registered Trademark TM Trademark of KitchenAid U S A KitchenAid Canada licensee in Canada Marque déposée TM Marque de commerce de KitchenAid U S A Emploi licencié par KitchenAid Canada au Canada 1 03 Printed in U S A Imprimé aux É U ...

Reviews: