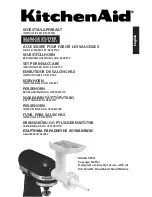
KitchenAid 5SSA Instructions And Recipes Manual Download Page 5

3

English

To Use food grinder Attachment 

1.  Cut food into small strips or pieces and 

feed them into hopper. Meat should be 

cut into long narrow strips.

2.  Turn mixer to Speed 4 and feed food 

into hopper using combination food 

pusher/wrench. 

NOTE:

 Liquid may appear in hopper when 

processing large amounts of high moisture 

foods such as tomatoes or grapes. To 

drain liquid, continue to operate mixer. 

To avoid damage to mixer, do not process 

additional food until liquid has drained 

from hopper.

Coarse Plate

 – Use for 

grinding raw or cooked meats, 

firm vegetables, dried fruits 

and cheese.

fine Plate 

– Use for grinding 

raw meat, cooked meats for 

spreads and breadcrumbs.

grinding Meat

 – For better mix and 

more tender results, grind beef twice. Best 

texture results from grinding very cold or 

partially frozen meat. Fatty meats should 

be ground only once.

grinding Bread 

– To grind bread for 

crumbs, be sure that bread is either oven 

dried thoroughly to remove all moisture, 

or not dried at all. Partially dried bread 

may jam the Food Grinder.

NOTE:

 Very hard, dense foods such as 

totally dried homemade bread should 

not be ground in the Food Grinder. 

Homemade bread should be ground fresh 

and then oven or air-dried.

To Loosen Ring 

– If ring is too tight to 

remove by hand, slip the combination 

food pusher/wrench over the grooves and 

turn counterclockwise.

NOTE:

 To avoid damage to the food 

grinder attachment, do not use 

combination food pusher/wrench to 

tighten ring to grinder body.

To Clean food grinder Attachment

First completely disassemble food grinder 

attachment. 
The following parts are dishwasher safe: 
• Grinder body 
• Grinder worm 
• Ring 
• Combination food pusher/wrench 
The following parts should be hand 

washed in warm, sudsy water and  

dried thoroughly: 
• Knife 
• Grinding plates 

food grinder* Attachment

* Food Grinder Attachment sold separately.

Summary of Contents for 5SSA

Page 1: ...RSTFÜLLHORN BEDIENUNGSANLEITUNG UND REZEPTE SET PER INSACCARE ISTRUZIONI PER L USO E RICETTE EMBUTIDOR DE SALCHICHAS INSTRUCCIONES Y RECETAS KORVHORN INSTRUKTIONER OCH RECEPT PØLSEHORN BRUKSANVISNING OG OPPSKRIFTIR MAKKARAN TÄYTTÖPUTKILO KÄYTTÖOHJEET JA RESEPTIT PØLSEHORN INSTRUKTIONER OG OPSKRIFTER FUNIL PARA SALSICHAS INSTRUÇÕES E RECEITAS KRANSAKÖKU OG PYLSUGERÐASTÚTAR LEIÐBEININGAR OG UPPSKRIF...

Page 2: ...er Attachment 2 To Use Food Grinder Attachment 3 To Clean Food Grinder Attachment 3 Sausage Stuffer Attachment 4 To Assemble Sausage Stuffer Attachment 4 To Use Sausage Stuffer Attachment 4 To Form Smaller Links 5 To Clean Sausage Stuffer Attachment 5 Mild Breakfast Sausage 5 KitchenAid Household Stand Mixer Attachment Warranty 6 Service Centers 6 Customer Service 6 Food Grinder Attachment sold se...

Page 3: ... 8 Do not use the mixer outdoors 9 Do not let the cord hang over the edge of table or counter 10 Never feed food by hand Always use combination food pusher wrench 11 Blades are sharp Handle carefully 12 This product is designed for household use only Save These Instructions Stand Mixer Attachment Safety Your safety and the safety of others are very important We have provided many important safety ...

Page 4: ...the notch on the hub rim 6 Tighten the attachment knob by turning it clockwise until the attachment is completely secured to mixer A C B To Attach Stand Mixer Attachment Food Grinder Attachment To Assemble Food Grinder Attachment 1 Insert the grind worm A into the grinder body B 2 Place the knife C over the square shank at the exposed end of the grind worm 3 Place grinding plate D over the knife m...

Page 5: ...ts should be ground only once Grinding Bread To grind bread for crumbs be sure that bread is either oven dried thoroughly to remove all moisture or not dried at all Partially dried bread may jam the Food Grinder NOTE Very hard dense foods such as totally dried homemade bread should not be ground in the Food Grinder Homemade bread should be ground fresh and then oven or air dried To Loosen Ring If ...

Page 6: ...ausage without casings 1 If using natural casings it s recommended to first soak them in cold water for 30 minutes to remove excess salt then rinse several times by running cold water through the entire length of casing 2 Grease stuffer tube with shortening and slide 3 to 4 feet 91 to 122 cm of casing onto stuffer tube 3 Tie the end of the casing with string to seal 4 Turn mixer to Speed 4 and slo...

Page 7: ...to Stir Speed and mix 1 minute Remove knife and coarse grinding plate from Food Grinder Assemble and attach Sausage Stuffer Grease Stuffer with shortening and slide casing on tightly Tie off end of casing Turn to Speed 4 and stuff pork mixture into casings Twist sausage into smaller links and refrigerate or freeze until ready to use Yield 3 pounds 1 5 kg sausage Mild Breakfast Sausage Sausage Stuf...

Page 8: ...ith local electrical codes KITCHENAID DOES NOT ASSUME ANY RESPONSIBILITY FOR INDIRECT DAMAGES KitchenAid Household Stand Mixer Attachment Warranty Service Centers All service should be handled locally by an Authorized KitchenAid Service Center Contact the dealer from whom the unit was purchased to obtain the name of the nearest Authorized KitchenAid Service Center In the U K Call 0845 6011 287 In ...

Page 9: ... Trademark of KitchenAid U S A TM Trademark of KitchenAid U S A The shape of the stand mixer is a trademark of KitchenAid U S A 2007 All rights reserved Specifications subject to change without notice 9709872A 5181dZw407 ...

Reviews: