


Use the Sensor Dry Automatic cycle for
heavyweight and
mediumweight cotton
items, such as towels,
linens, bedspreads,
work clothes, blue
jeans, and corduroys.
Set your dryer to a heat
setting that matches the
care label directions.
10
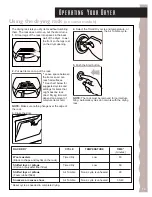
Delicates
3 camisoles
1 quilted robe
4 slips
4 panties
2 bras
2 nighties
1 baby’s dress
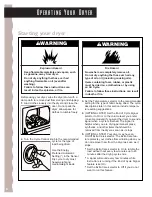
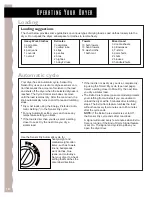
Automatic cycle
Your dryer has an Automatic cycle, Sensor Dry.
Sensor Dry uses an electronic dryness sensor con-
trol that senses the amount of moisture in the load
and shuts off the dryer when the selected dryness is
reached. The Cycle Control knob does not move
until the load is almost dry. After the cool-down, the
knob automatically turns to an Off area and tumbling
stops.
•
Dry most loads using the Energy Preferred Auto-
matic Setting (*) in the Sensor Dry cycle.
•
For any Automatic setting, you can choose any
temperature setting you want.
•
If the load is drier than you like, select a setting
closer to Less Dry the next time you dry a
similar load.
•
If the load is not as dry as you like, complete dry-
ing using the Timed Dry cycle (see next page).
Select a setting closer to More Dry the next time
you dry a similar load.
•
The Extra Care feature (on some models) protects
your clothing from wrinkles if you are unable to
unload the dryer within 5 minutes after tumbling
stops. The Extra Care feature tumbles the load
without heat every few minutes up to 45 minutes
after the cycle ends.
NOTE: If the Extra Care selector is set to Off,
the Sensor Dry cycle ends after cool-down.
A signal will sound every few minutes when Extra
Care is running if the End of Cycle Signal feature
is set On. The signal and cycle stop when you
open the dryer door.
More
Dry
Less
Dry
Cool
Down
Extra
Care
Heavy
OFF
(Option)
Loading suggestions
The chart below provides some guidelines on various types of drying loads. Load clothes loosely into the
dryer. Do not pack the dryer; allow space for clothes to tumble freely.
Heavy Work Clothes
3 pair pants
3 shirts
4 pair jeans
1 coverall
1 overall
Towels
10 bath towels
10 hand towels
14 wash cloths
1 bath mat
Mixed Load
3 double sheets
4 pillowcases
8 T-shirts
6 pair shorts
2 shirts
2 blouses
8 handkerchiefs
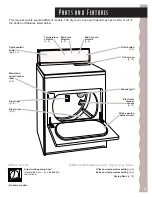
Loading
O p e r a t i n g Y o u r D r y e r